Creator (previously called MAGES) is going through a transition.
Many videos, text, and UIs may still refer to it as MAGES while this rebranding is underway.
In order to add your personalized JARIA in a VR simulation you need to first create
a custom agent with the appropriate knowledge (data).
This process can be done in the OramaVR Portal.
If your agent needs to use more than a few paragraphs of knowledge, create a personalized Library
for the agent to reference. If your data can be summarized in a few paragraphs, you can skip this
section and add the information directly to the agent prompt in Create and Configure a Personalized Agent.
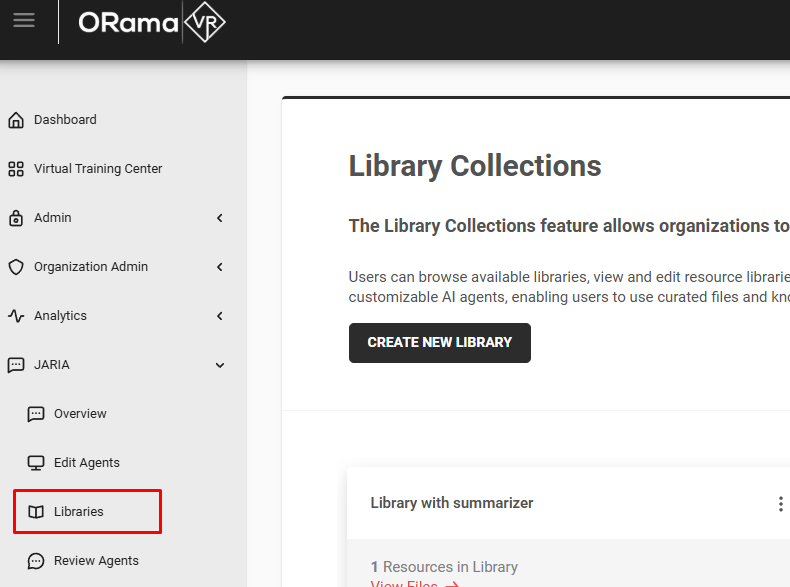
Step 1: Libraries Page
In the left navigation bar, expand JARIA, select Libraries, and click Create New Library.
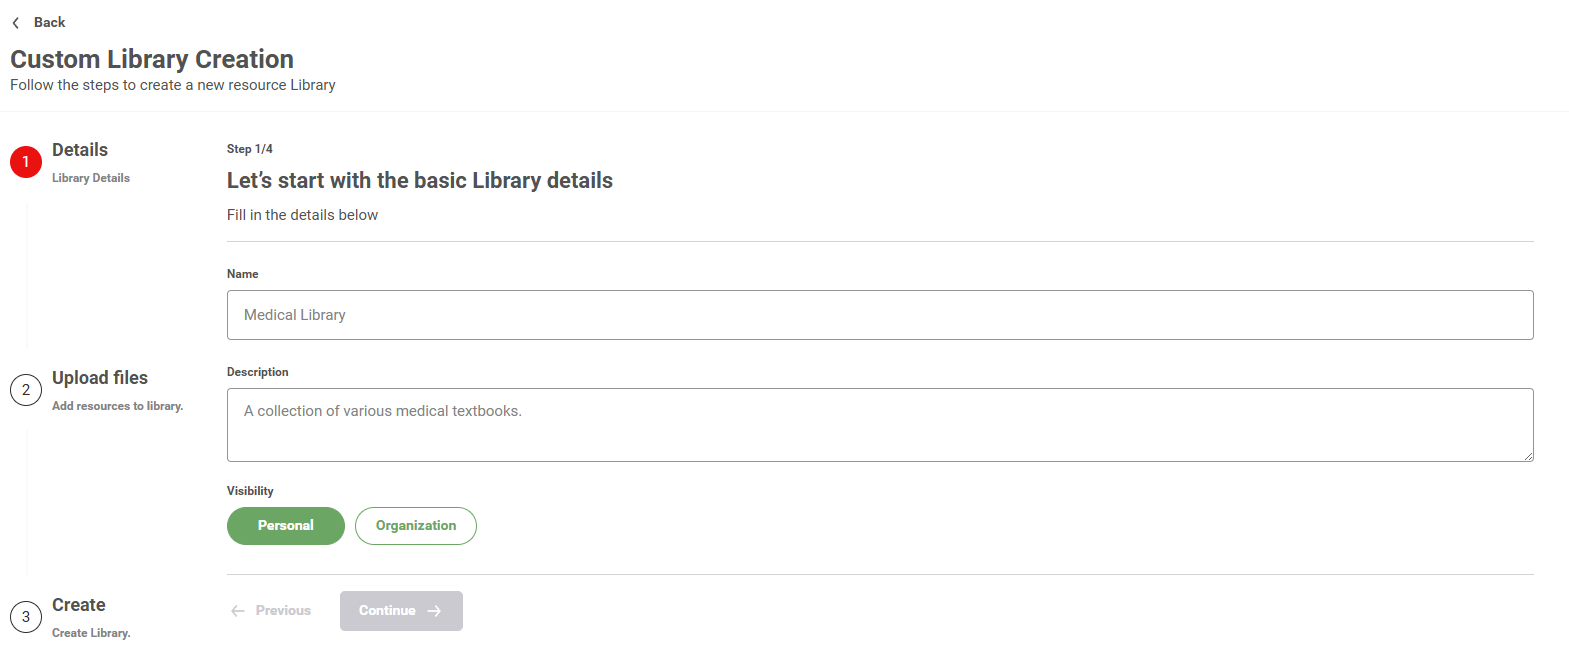
Step 2: Library Resources.
Fill in the library details.
Here you can select if the library will be visible and editable by only the author, or the whole organization (Pro Feature).
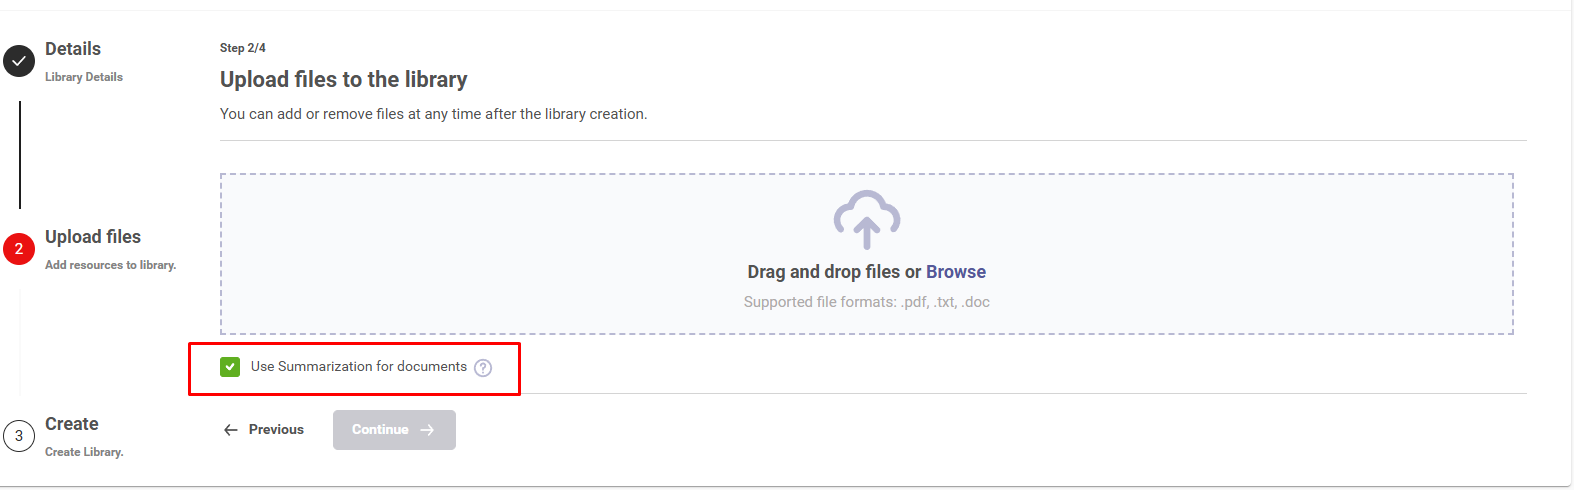
Step 3: Library Files.
Attach the files that will form the library. Supported files are: pdf and txt.
Creator Pro accounts can opt to summarize their libraries, which can help agents navigate large amounts of data.
Step 4: Library Creation.
After creation, the library will be available to select in the creation process of future agents.
Now that a library has been created, the next step is to create an agent.
After preparing any optional libraries, create the JARIA agent and configure its prompt, knowledge
sources, and behavior settings.
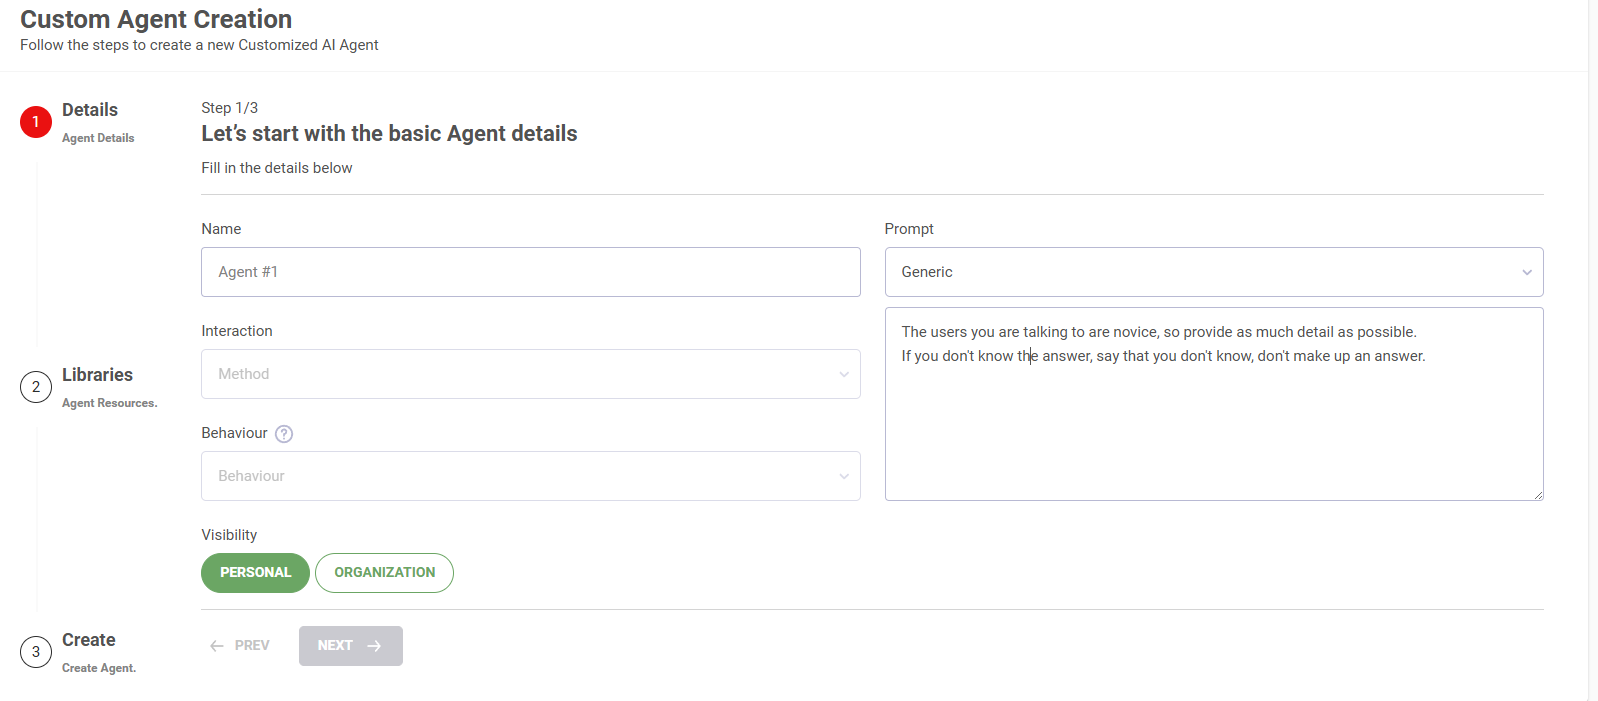
Step 1: Agent Details.
Fill in the agent details.
In the prompt section describe how you want your agent to behave.
If your data are not very long you can simply add them here instead of creating a library.
Step 2: Agent Libraries.
Choose among your libraries or the libraries of your organization.
The libraries selected are the ones which the agent will be based on.
After selecting your libraries, click on create agent.
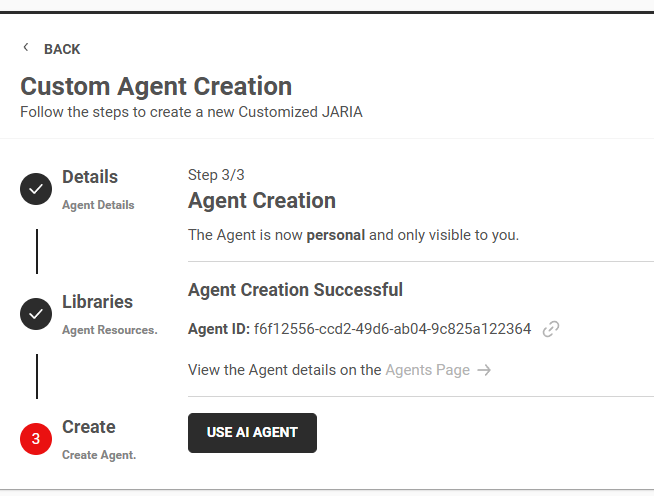
Step 3: Finalize Creation.
After creation, you will be presented with the following information.
Agent ID; is needed in order to link the agent with a character inside unity.
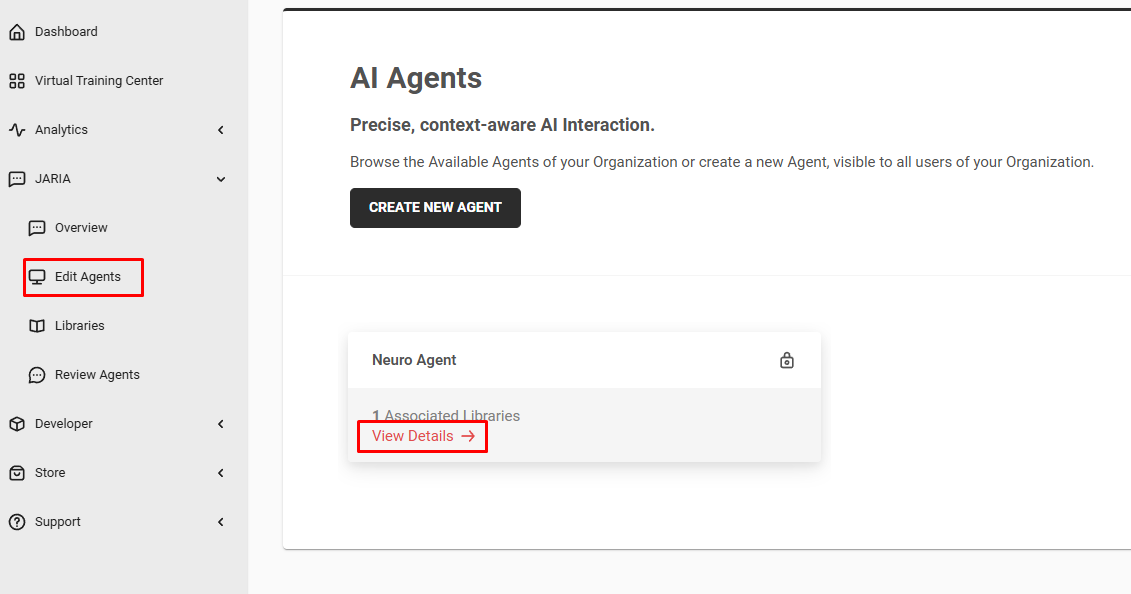
A link to view the details of your agents. You can follow the generated link or open JARIA > Edit Agents
and click on the view details button of that agent.
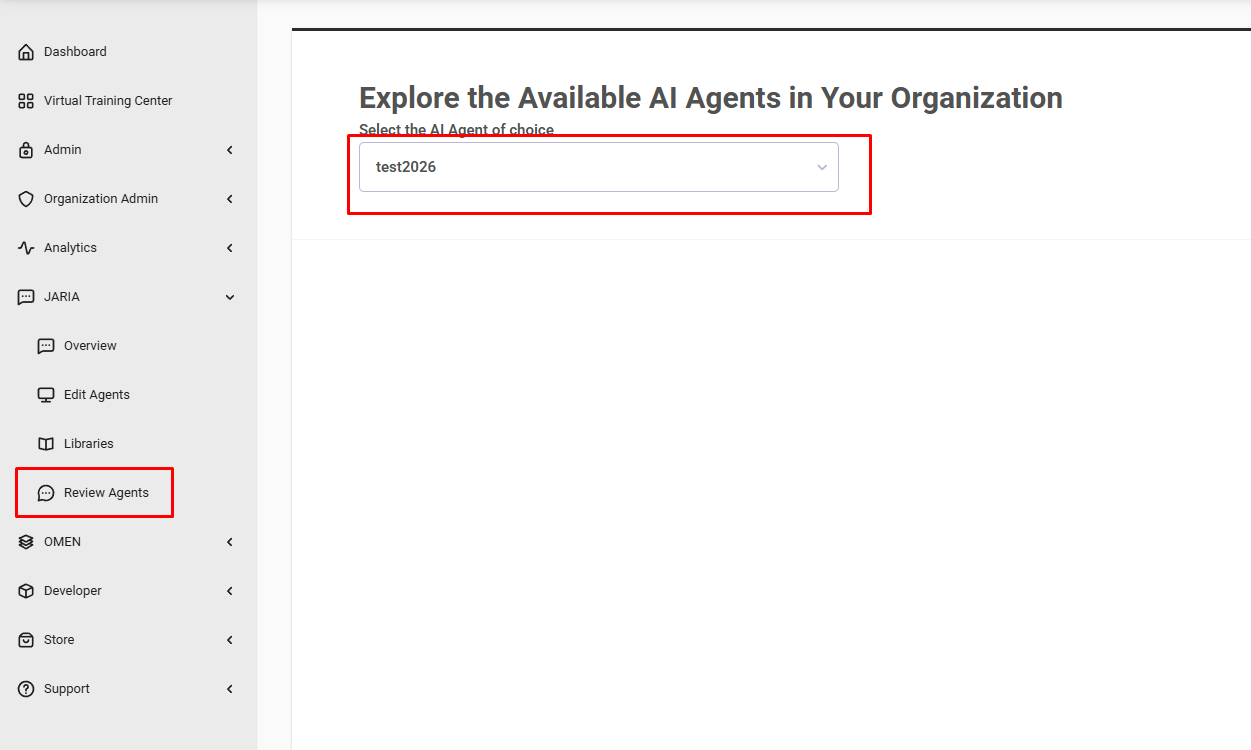
Step 4: Interact with the agent.
There are two ways to interact with the agent:
Portal Interaction: In JARIA > Review Agents, choose the agent from the dropdown and begin to chat with it.
Unity Interaction: You can set up a JARIA agent inside Unity with the ID of the agent provided,
continue with Create the JARIA Module.
Inside Unity the agent can be interacted via voice, not text.