Edit a Sample
After playing an existing operation once (for example the Neuromonitoring Sample), you might realise that you need to make some adjustments to the project to suit your needs. In this tutorial we will take a look on how to edit a Creator project by creating extra Actions and Analytics.
Create Parallel Actions
Parallel Actions are Actions that branch out from a single Action Node. We will create some Actions that run parallel to the others after the Subplastimal Incision Action (4th from the start).
First lets create a new Use Action using the Action Wizard:
Navigate to
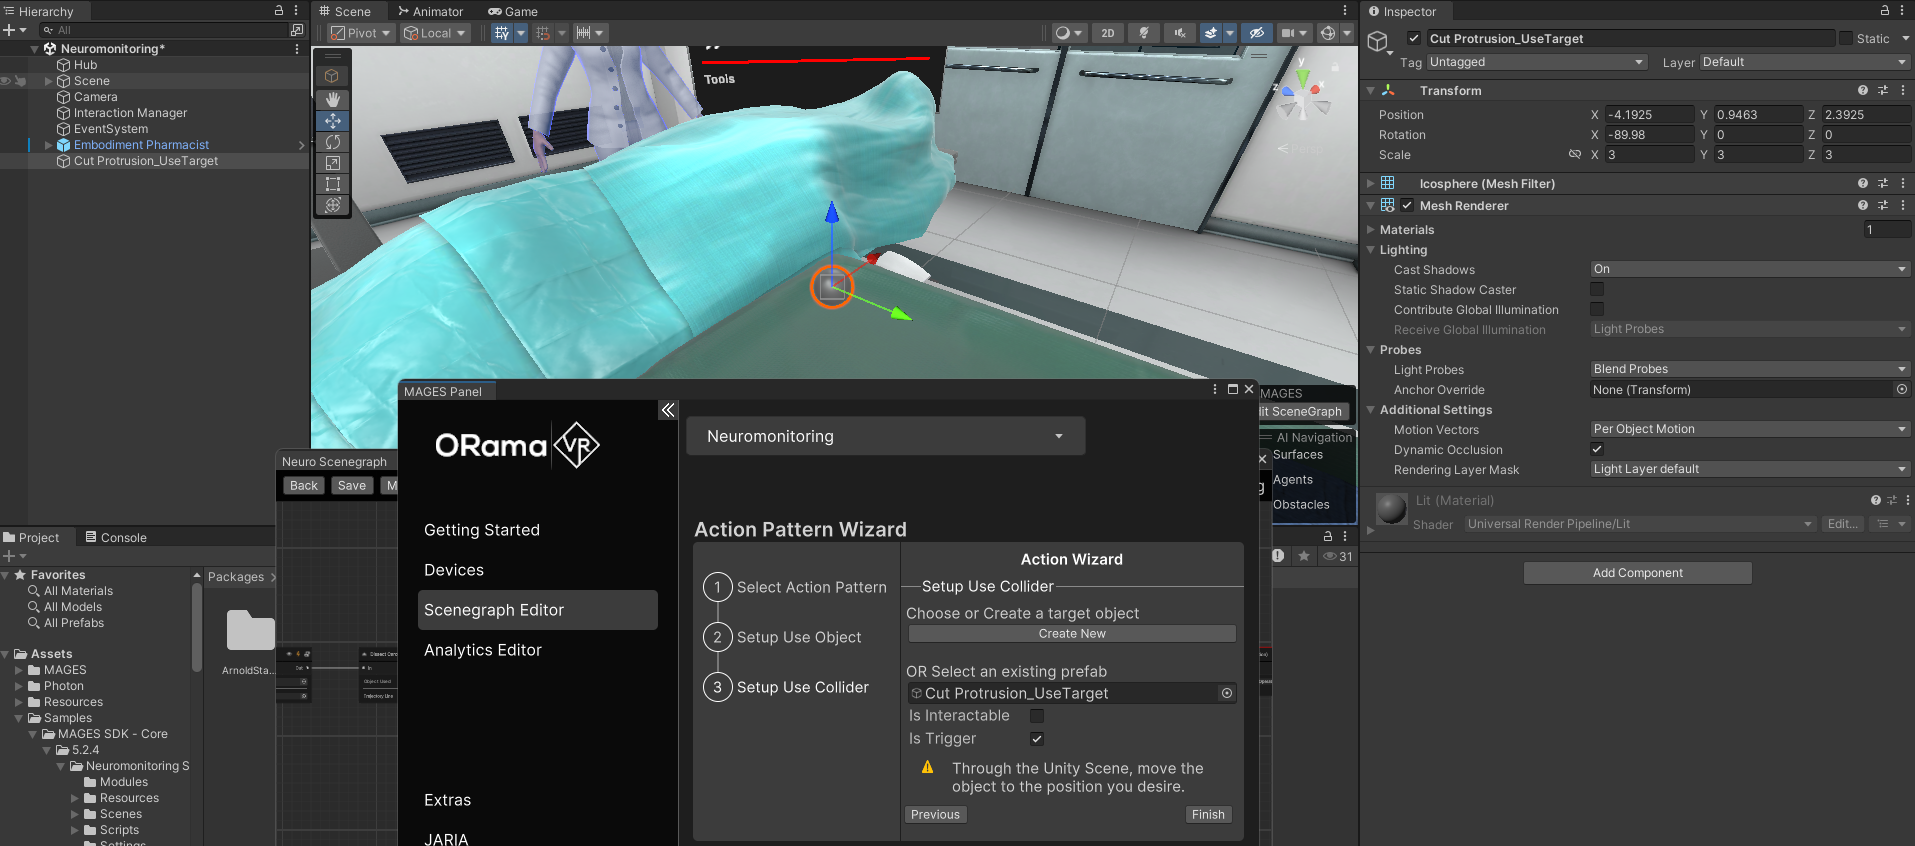
MAGES > Creator Panelto open the Creator Panel, then select the Scenegraph Editor tab.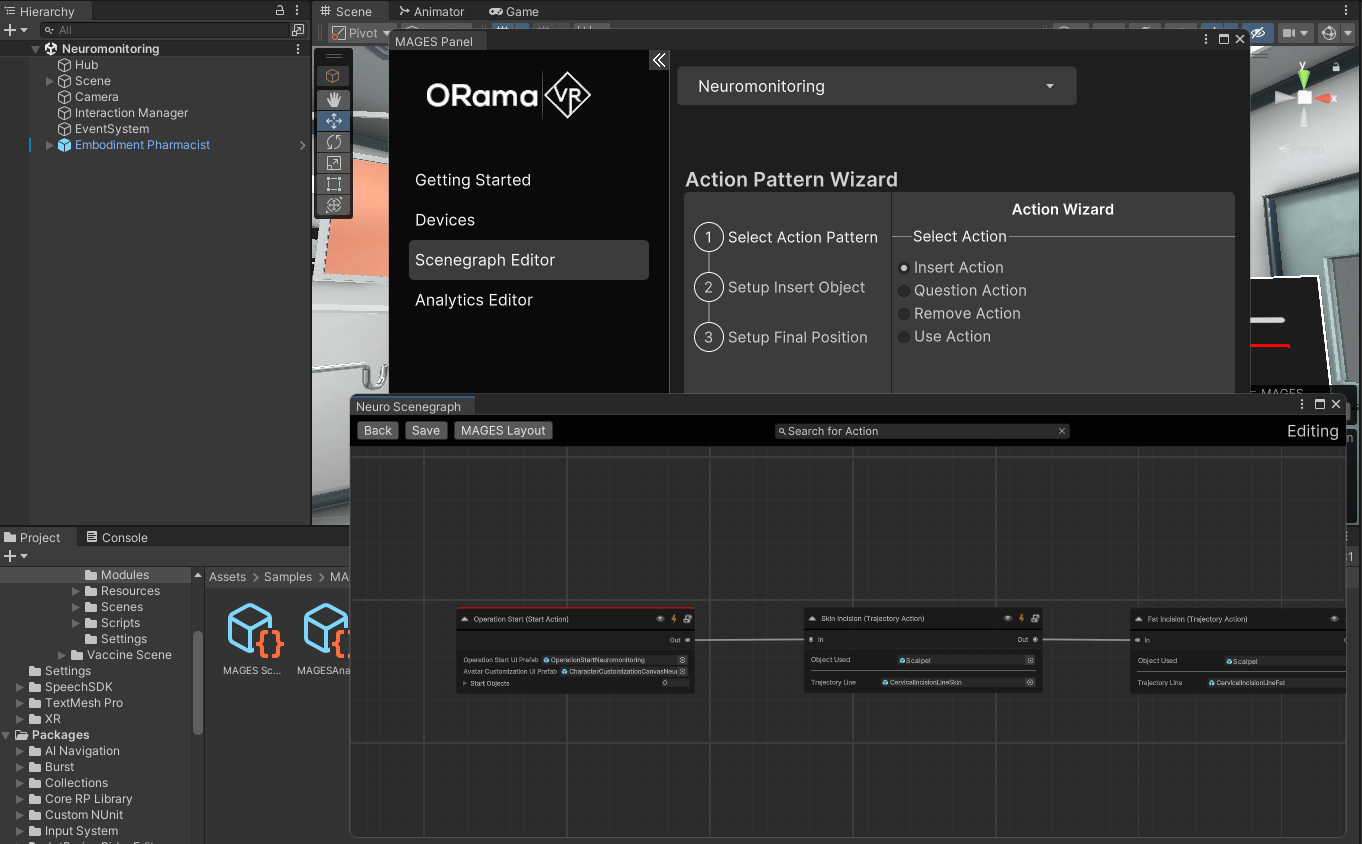
The Action Pattern Wizard will show up on the Creator Panel and the operation’s Scenegraph will open.
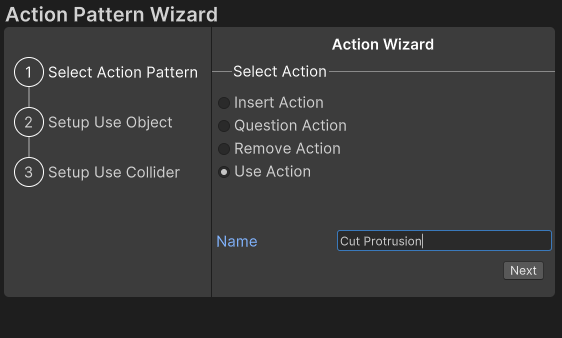
From the Action Wizard select the Use Action option, name the Action “Cut Protrusion” and then click on the Next button.
The Action Wizard will give you the option to either create a new Interactable object to use for that Action or select an existing one. In our case we will use the Scalpel prefab provided with the Sample.
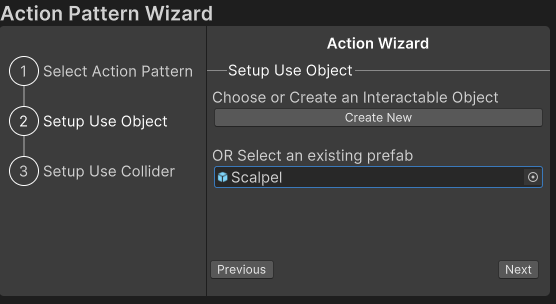
After selecting the Scalpel as the Use Object, click on Next.
Now the Action Wizard will provide similar options for the Use Collider object of the Action as well. This time we will create a new Sphere to act as the Use Collider by simply clicking on the Create New button and selecting the DebugProbe prefab.
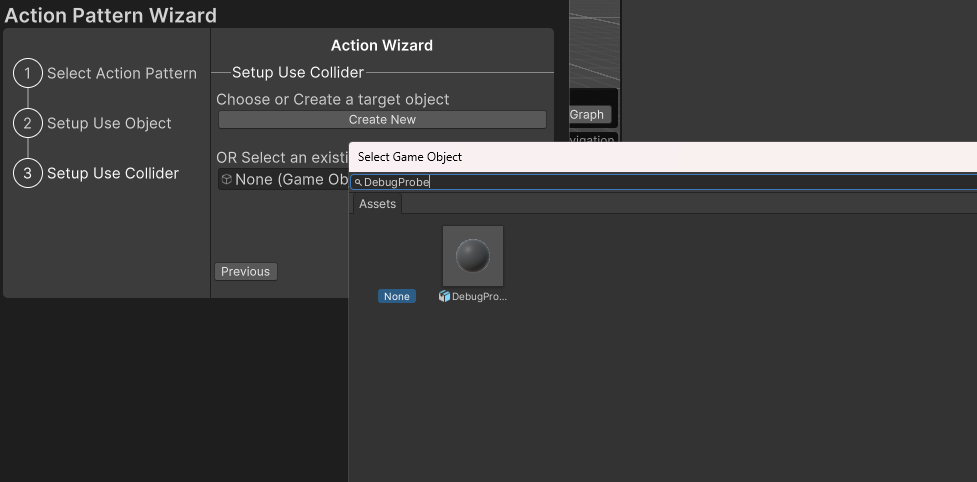
An instance of that prefab will spawn on the Scene. As the DebugProbe is huge, adjust its scale to 3 on each axis from the Inspector and change its position so that it rests on top of the table.
Let’s add a custom material on the Use Collider object. Navigate to your desired folder in Assets, right click and select
Create > Materialto create a new Material. After giving it a proper name (for example “Protrusion Material”), go to the Inspector of the new material and assign Fat_Albedo as its base map. You can also darken its color a little bit.After creating the new material, add it to the new Use Collider by dragging the material on it.
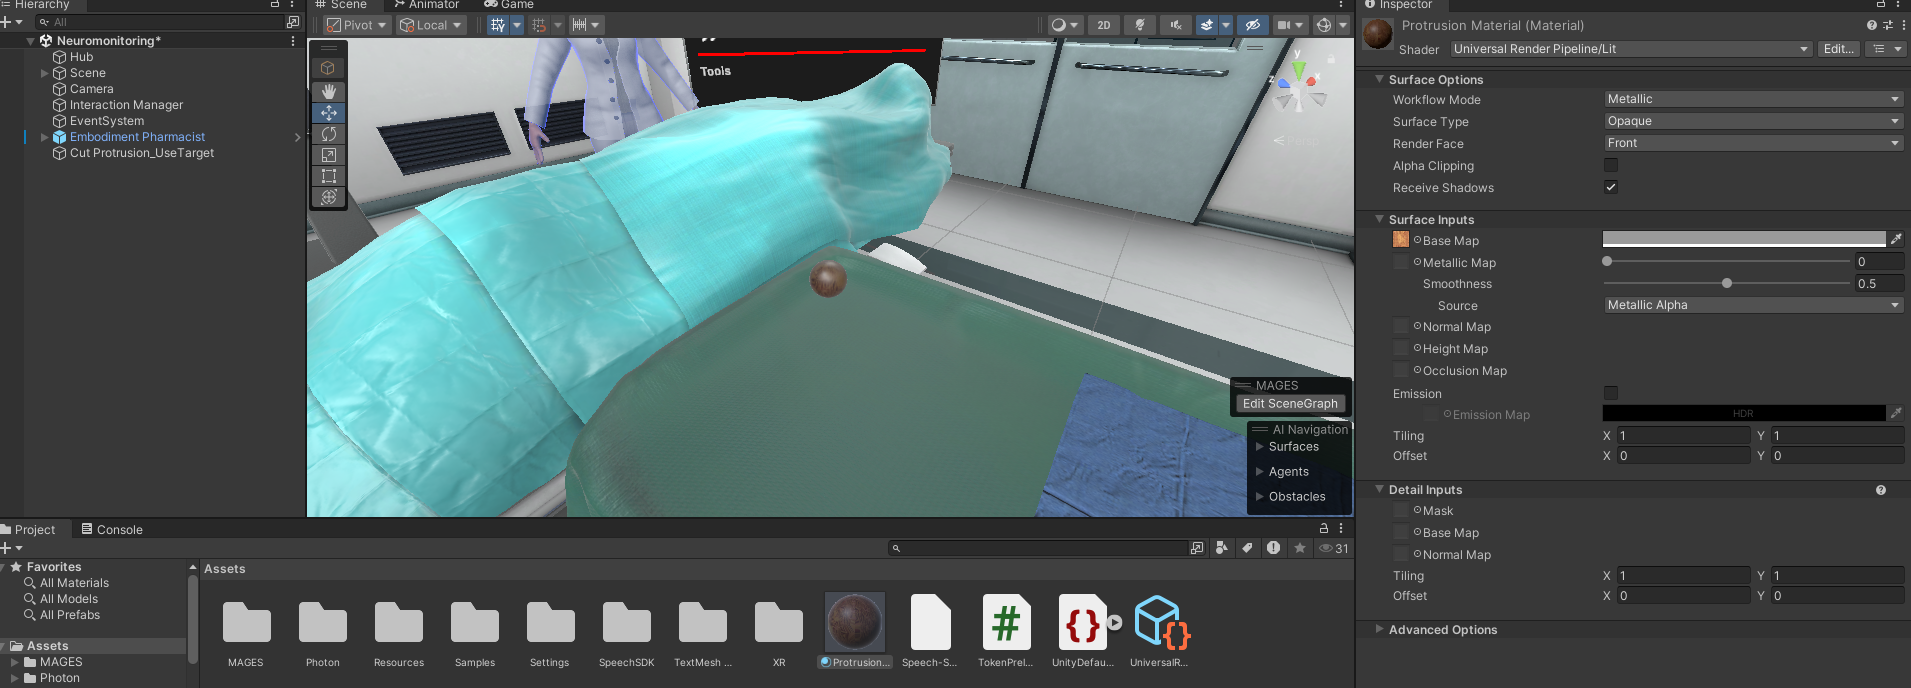
Afterward, add a Sphere Collider on the Use Collider object and through the Action Wizard click on the Finish button to finalize the creation of the new Use Action. Now the new Use Action Node will appear at the end of the Scenegraph. Delete the new node’s connections, move it bellow the “Subplastimal Incision” Action Node and link it to the “Fat Incision” Node.
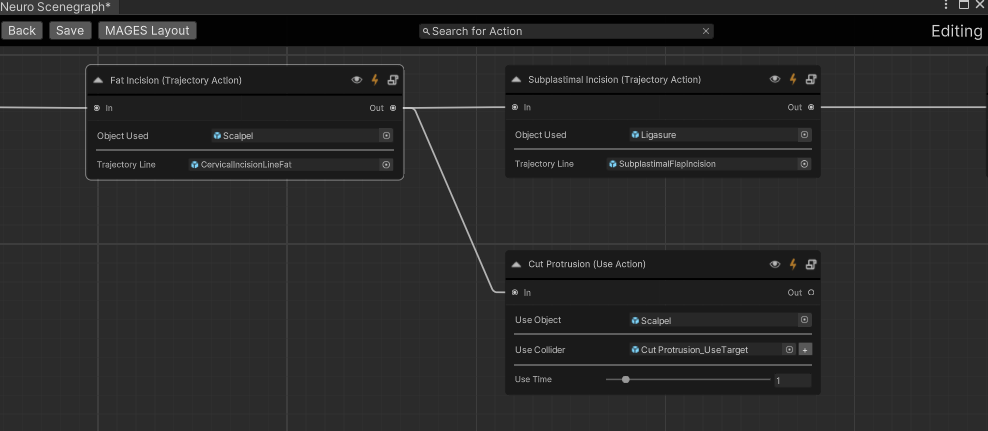
That’s it! You have added a new Use Action inside the Samples Scenegraph which is initialized after the “Fat Incision” action.
Now let’s create a Remove Action after the “Cut Protrusion” Action we just created.
Open the Scenegraph of the current project either via the Creator Panel or through the Edit Scenegraph button on the Scene view. Right click on the empty space next to the “Cut Protrusion” Action, then select
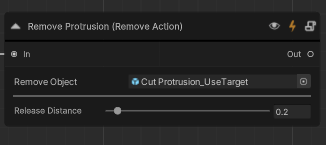
New Action > Remove Action. Name the new Action “Remove Protrusion” and connect it to the “Cut Protrusion” Action.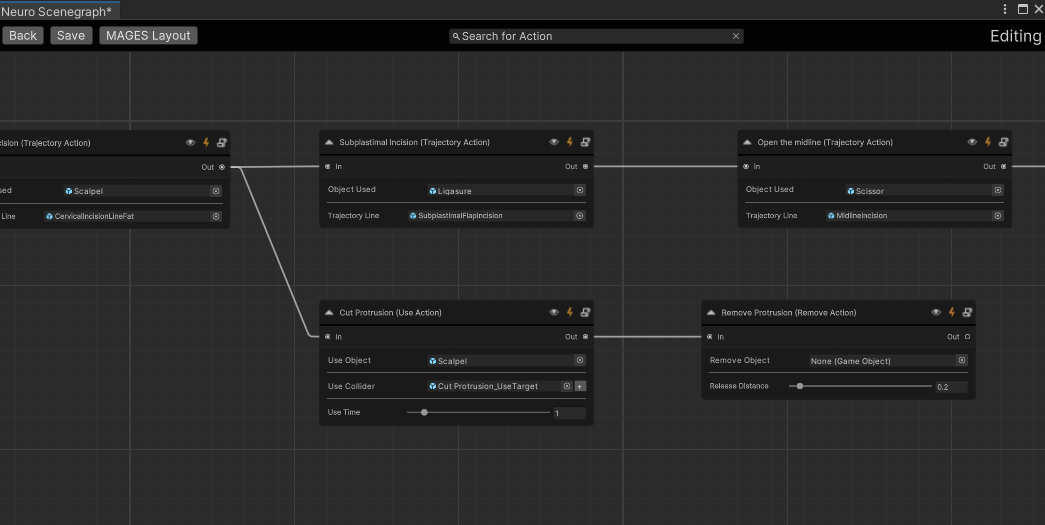
Assign the object we previously used as the Use Collider to the Remove Object field.
And simply as that you have added another new Action to the existing Project’s Scenegraph. Now you can press play and test the results.
Add a new Objective
We can also modify the Analytics of the existing project. In our case we will add a new Objective to the operation that will be completed in case we do not collide the Protrusion with the bottom tray during the new Remove Action.
Navigate to
MAGES > Creator Panelto open the Creator Panel, then select the Analytics Editor tab.
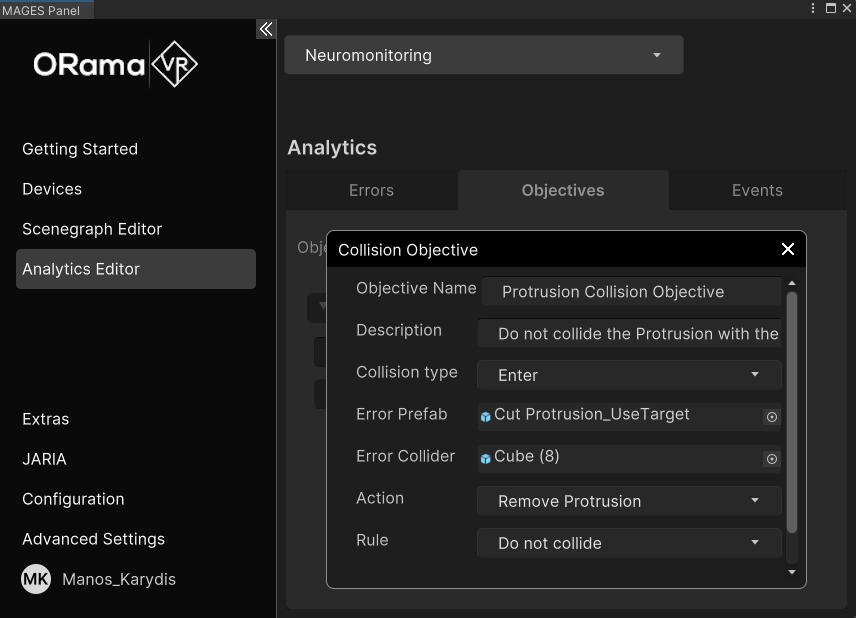
Inside the Analytics Editor navigate to the Objectives tab, then select Collision as the Objective type.
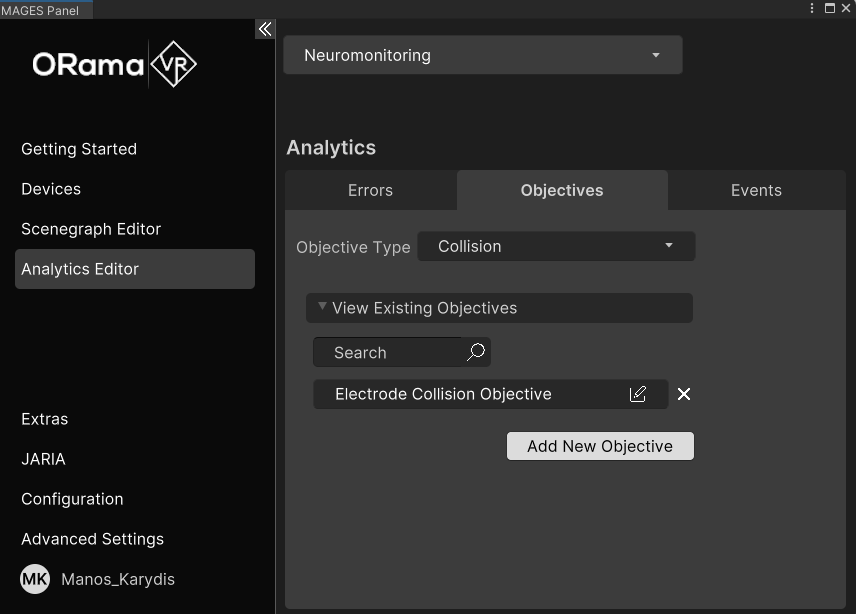
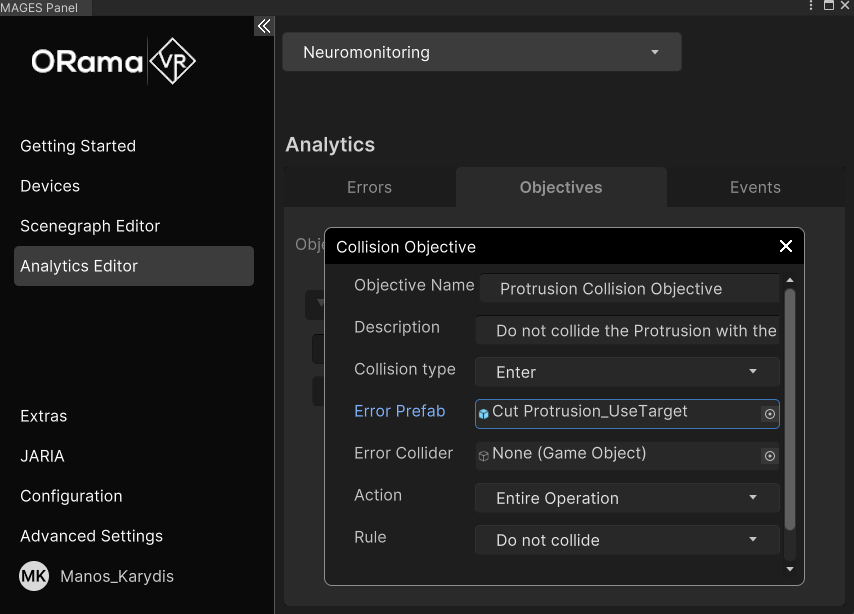
Click on the Add New Objective button. After providing it with a proper name and description, set its Collision Type to Enter and assign the Protrusion prefab as the Error Prefab.
We also need to create a new Collider prefab for the Collision Objective. Without closing the Creator Panel, create a new Box Collider surrounding the bottom tray (or simply find the collider gameobject corresponding to the bottom tray) and drag it to the preferred Assets folder to create a new prefab based on that gameObject.
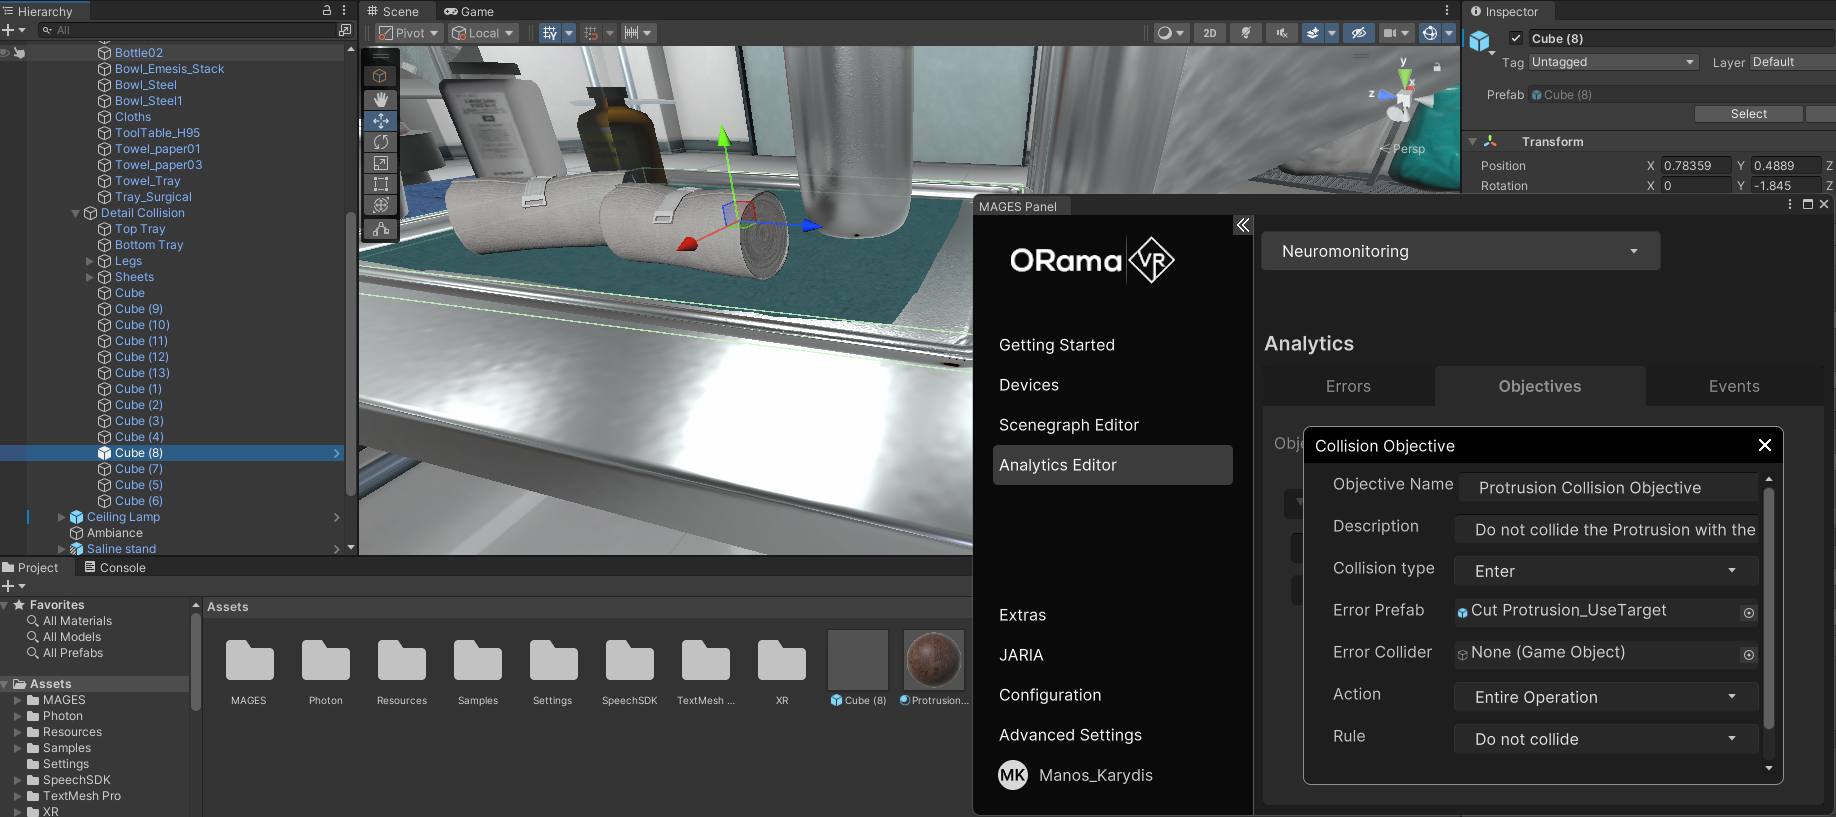
Assign the newly created prefab on the Error Collider field, set the Action field to “Remove Protrusion” and as rule set it to Do not collide. Lastly click on the Add button to add the new Objective.
Now your operation has a new Collision Objective. You can check whether you achieved it during your playthrough at the end of the operation.