Choice Action
With Choice Action you can select which path you want to follow from a list of available options. This Action type is versatile since you can modify it the way you like to guide users to the desired path.
How to Setup a Choice Action
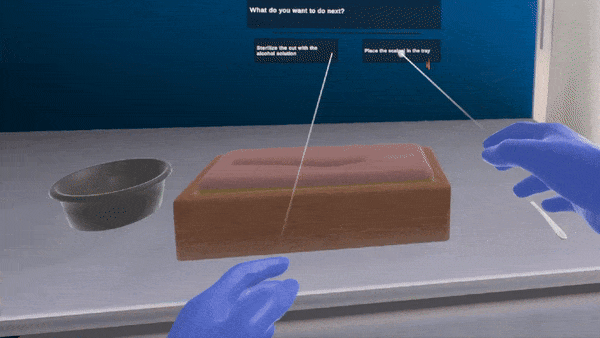
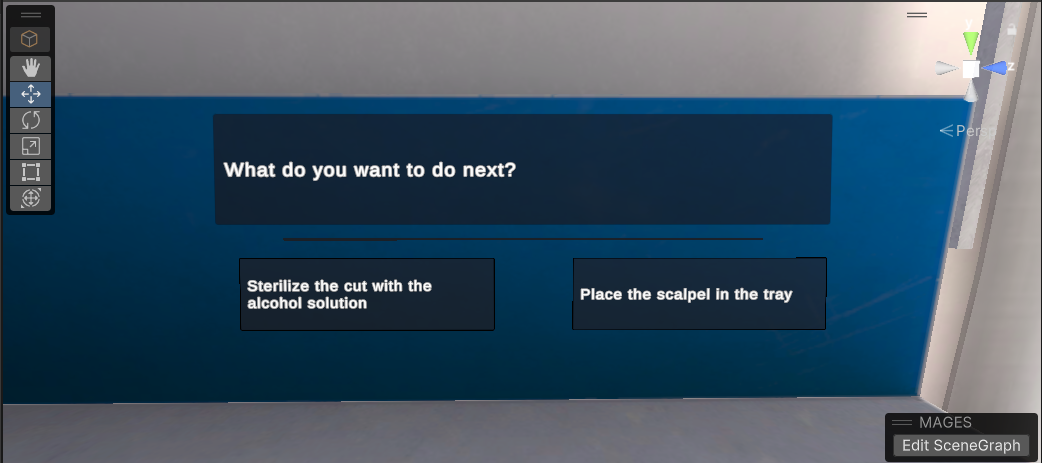
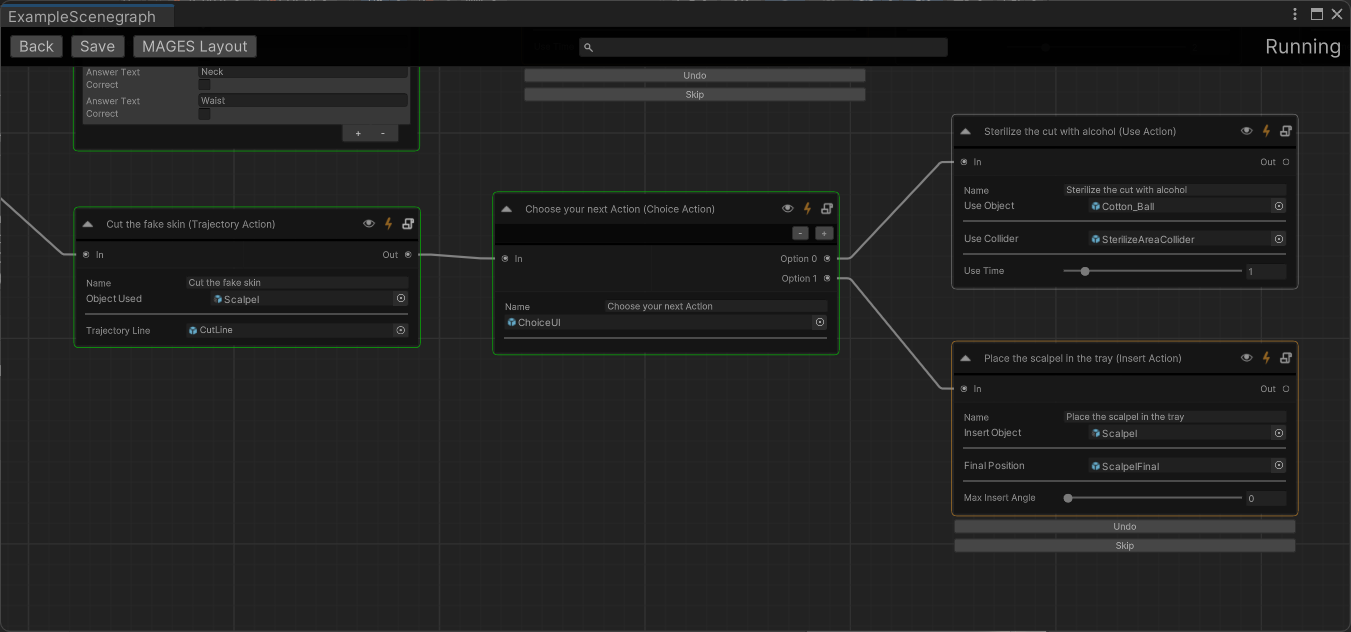
In this tutorial, we will create a Choice Action to provide users with the option to select between two actions. A user interface (UI) will appear with two buttons/options. If the first one is pressed, the scenegraph will initialize a Use Action to sterilize the incision with a cotton swab. If the second option is chosen, an Insert Action will prompt the user to place the scalpel in the metallic tray.
Right-click on the scenegraph editor.
Select
New Action > Choice Action.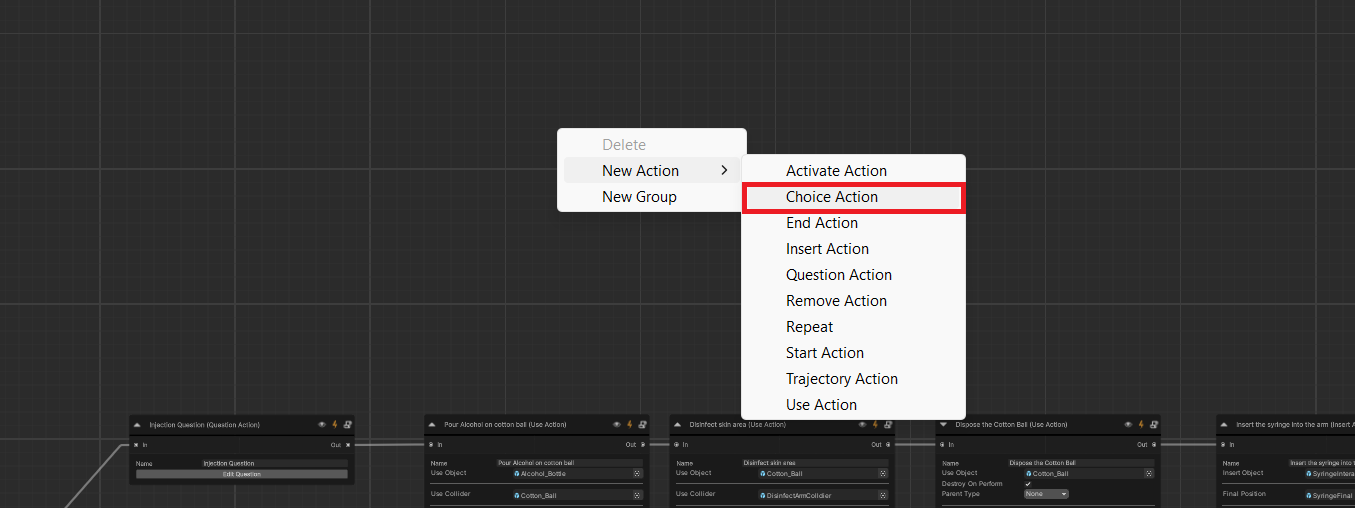
3. The Choice Action node looks like this. On the right side you have the outputs. Those are the available paths. You can add or remove paths by pressing the + and - buttons. At the bottom of the node, you need to add the choice object that manages which path the user follows.
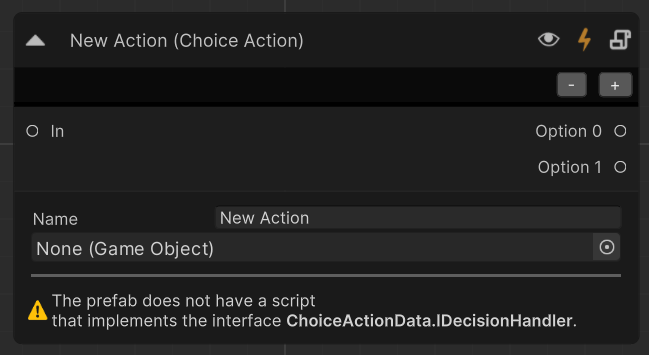
Next, you need to configure the choice object. This object will spawn when the Action initializes. This object sets which action among the available options will be Initialized when the Choice Action performs.
Important
This object must have a script that implements the
ChoiceActionData.IDecisionHandlerinterface. This script is responsible to set the proper path.
In our example we will set the next path through a UI with two buttons, asking the user what should do next. If the first button is clicked, the first path will trigger, otherwise the second.
For more information on how to create your own Creator button see this tutorial.
We will save the UI we created to our assets and drag and drop its reference to the input field.
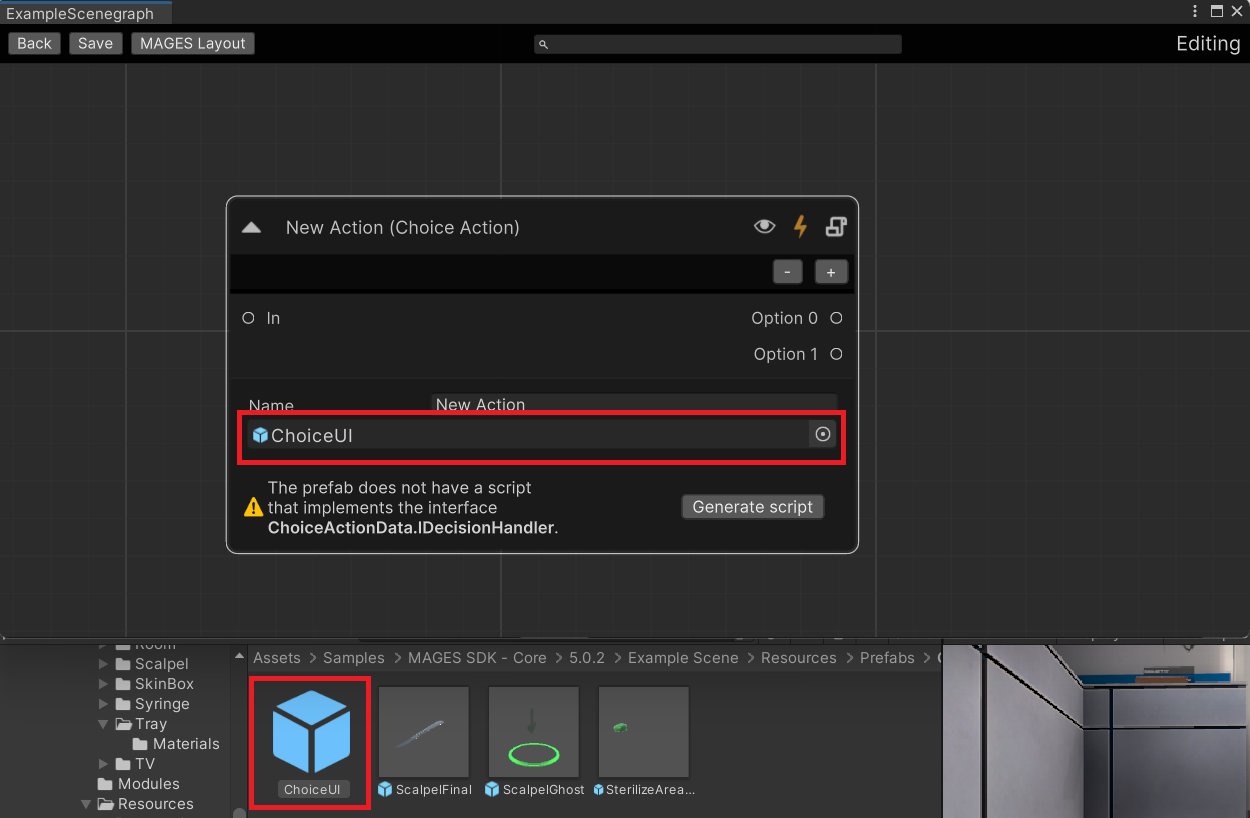
You will see that a warning pops in the Action Node that mentions our prefab does not implement the
ChoiceActionData.IDecisionHandlerinterface.
Press the Create Script button on the Choice Action node. This will create a script that implements the interface.
We will modify the script to our needs. The only function we need to implement from the interface is the SetCallbackHandle. This callback sets which path will be instantiated after we perform the Action.
/// <summary>
/// Class to handle the UI for the ChoiceActionData.
/// </summary>
public class ChoiceActionUI : MonoBehaviour, ChoiceActionData.IDecisionHandler
{
    private Action<int> callbackAction;

    /// <summary>
    /// Method to set the callback handle for the decision.
    /// </summary>
    /// <param name="completeAction">The given Action.</param>
    public void SetCallbackHandle(Action<int> completeAction)
    {
        callbackAction = completeAction;
    }

    /// <summary>
    /// Selects the choice for the ChoiceActionData.
    /// </summary>
    /// <param name="choice">The id of the path.</param>
    public void SelectChoice(int choice)
    {
        callbackAction.Invoke(choice);
    }
}
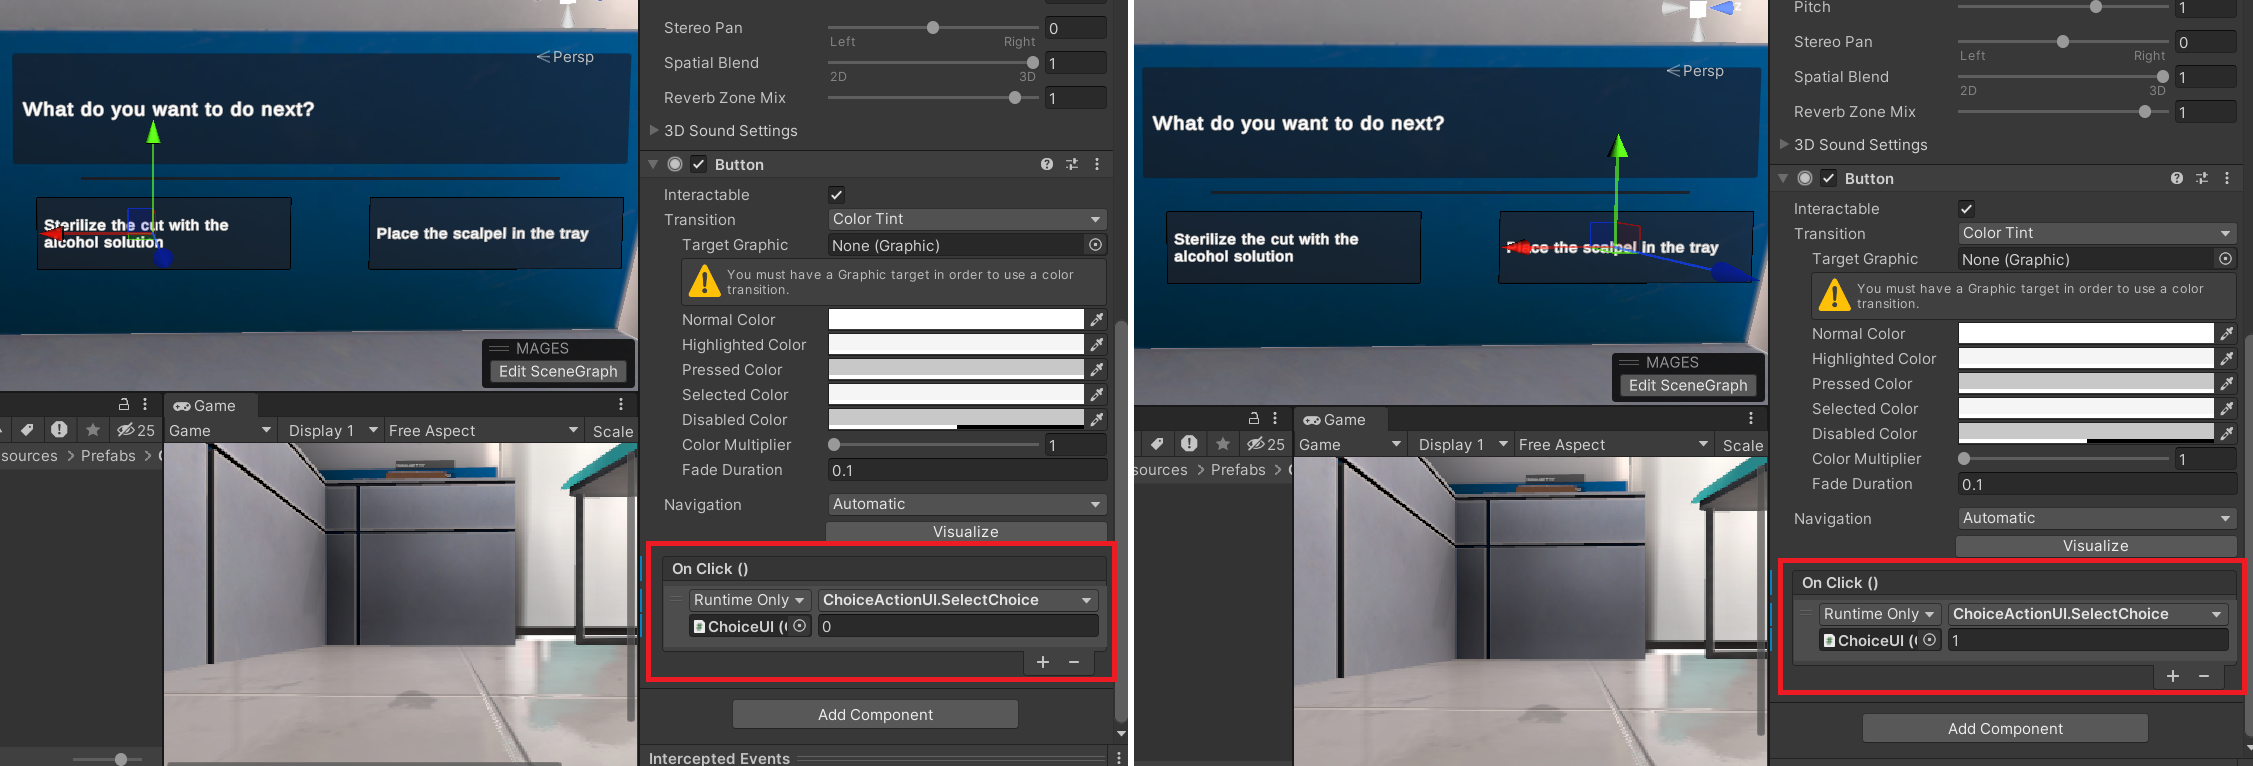
We will attach the SelectChoice() method with the proper argument (0 or 1) to invoke when each button is pressed.
We attach our script to the UI with the question.
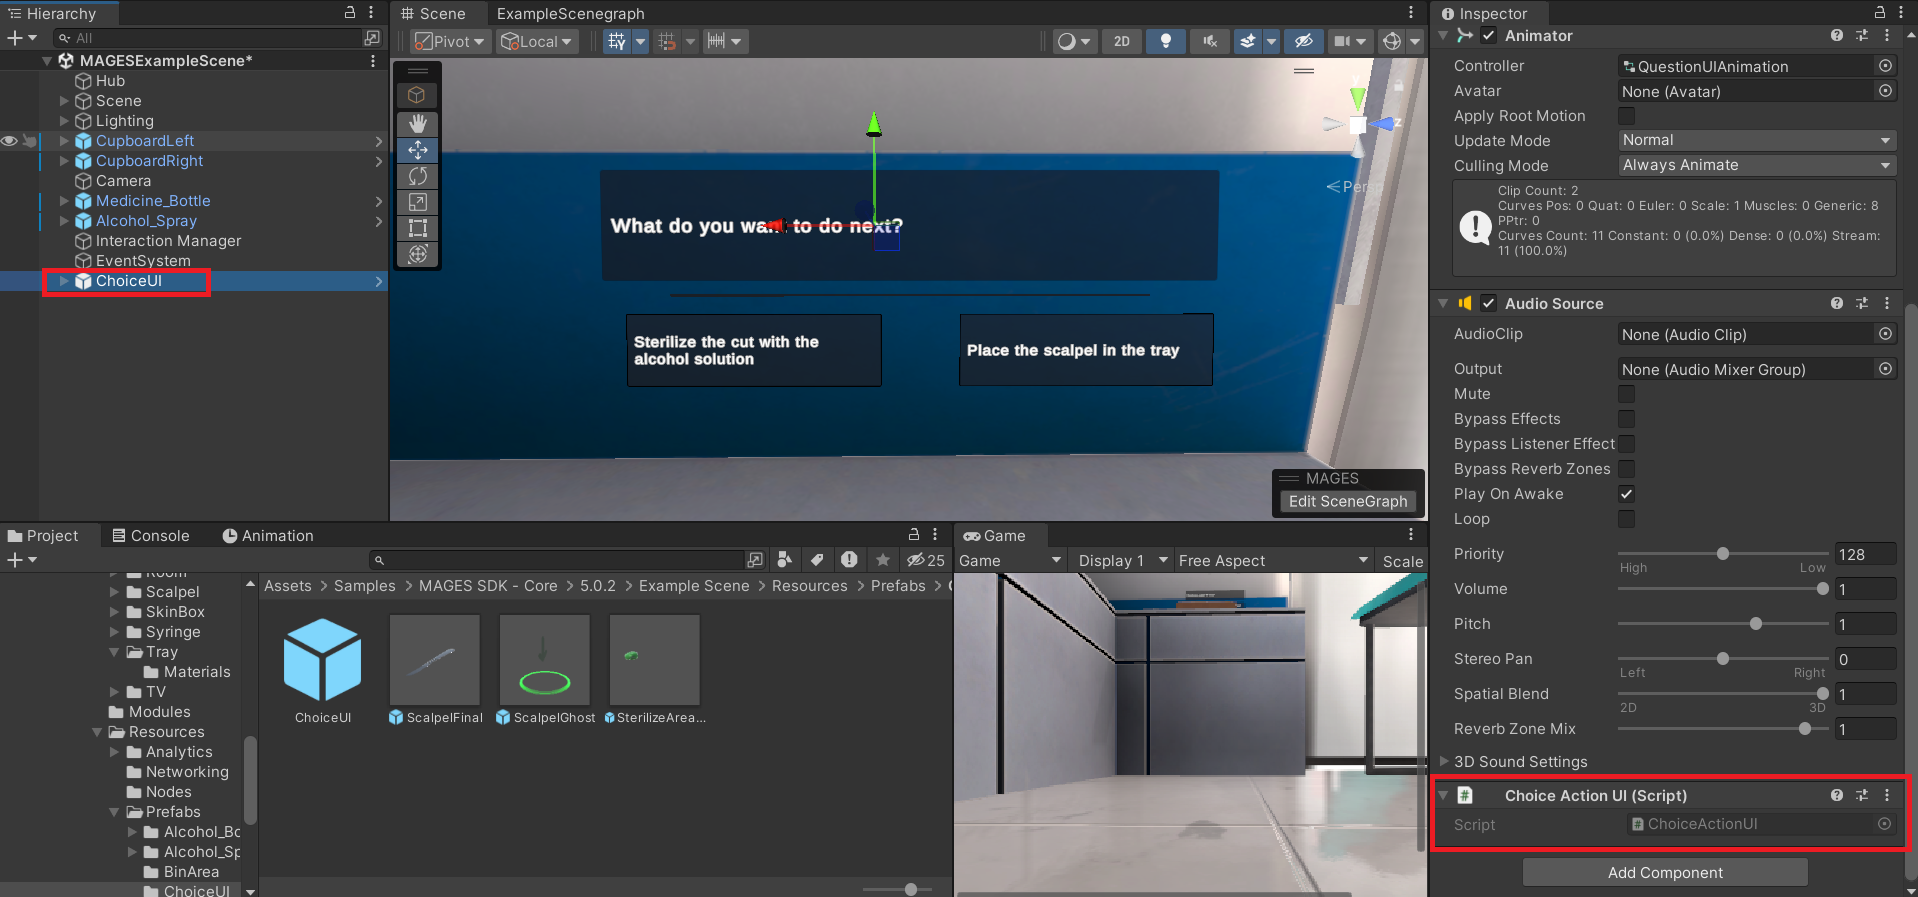
Then, we configure the script to call the SelectChoice() when each button is pressed with argument 0 for the first choice and 1 for the second.
Save the changes to the prefab.
Name the action, e.g., “Choose your next Action”.
At this step we can implement the two paths, in our case an Insert and a Use Action. For more information on how to create them navigate to the Insert and the Use Action tutorials.
Our scenegraph looks like this.

How to Perform
The Action performs when the user clicks any of the two buttons from the UI.
As you see when we click on the first button, the Choice Action performs and the Use Action is instantiated.
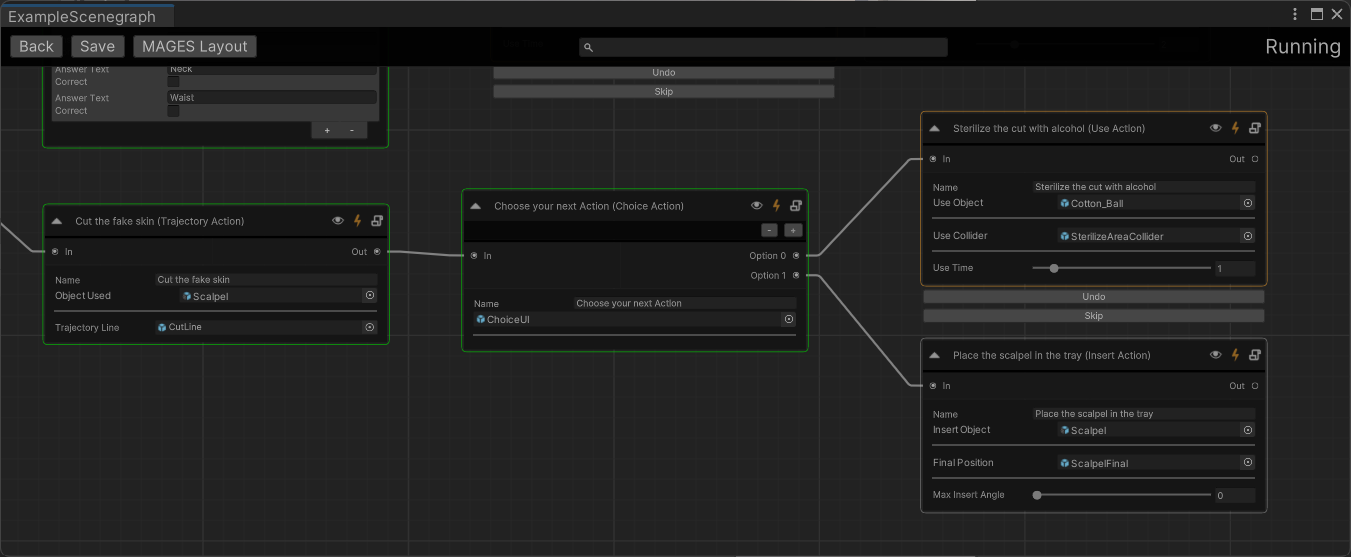
Whereas when we click on the second one, the Insert Action is instantiated.
More options
In this example we used a UI to navigate the user to the proper path.
However, you can use the Choice Action in many different ways. For example, you can choose your path based on a user error. You can save the error to the DataContainer and then navigate the user to another path based on this.