Setting Up Azure
In order to host the services on Azure Cloud, an Azure account is required.
Note
You can create a free account at Azure Portal
The services require Azure Web Apps to function properly.

When creating the Web App:
Select your active subscription
Select a resource group OR create a new one
- Input the name of the web app
e.g.: testwebappservice2
Select .NET 6.0 as runtime stack
Fill in the rest of the required information
Click “Review + Create”
Click “Create”
Important
Please select a pricing plan providing at least 1GB of available memory (RAM)
For the services you will need two .NET 6 web apps. One for LoginAzure and one for AnalyticsAPI
For AnalyticsClient (Portal) use a web app with runtime stack set to Node 14+
Deploying Apps To Azure
There are 2 ways the web apps can be published (uploaded) to an Azure Web App
Via Publish XML Profile
Directly through visual studio (requires a connected azure account to visual studio)
Getting the Publish XML Profile
After creating the Web App on Azure, click the created resource (web app) to be redirected the its main page
At the top bar, click the “Download Publish Profile” button

This will download an xml file containing the web apps’s publish information
Afterwards, go to Visual Studio:
- Right-Click on the project file in the solution explorer
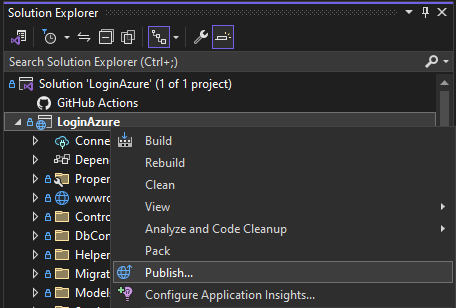
- This will open a new window
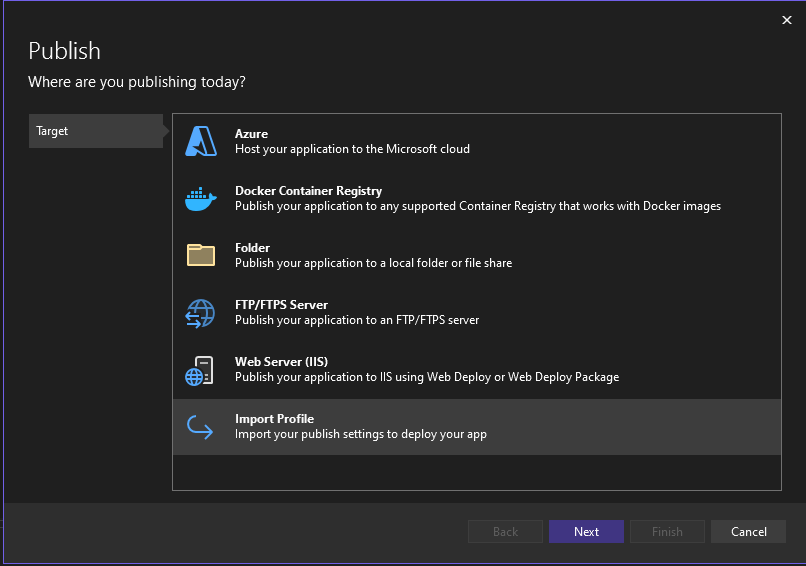
Select “Import Profile”
Browse to the downloaded publish profile
Click “Finish”
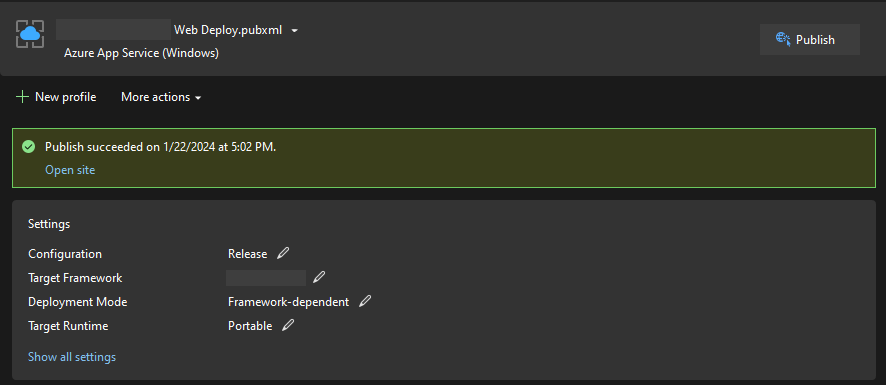
- It will now show the publish page
Note
In case it does not show automatically, right-click the project file and select publish again
Click “Publish” and wait for the process to finish
Publish using Azure Account on through Visual Studio
Sign in to Visual Studio using the Azure Account you created for the Azure Web Apps
Right-Click on the project file and select “Publish…”
- Click Azure

- Click “App Service (Windows)”
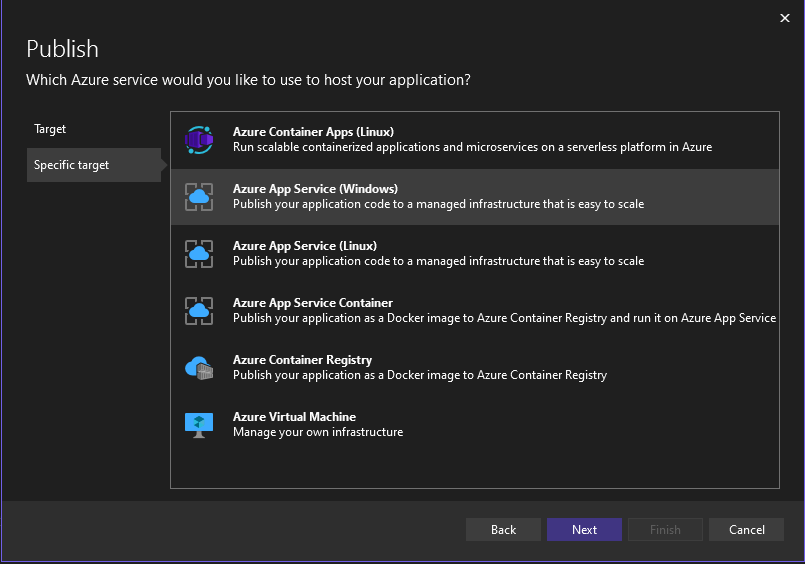
- Select the resource where the app will be uploaded
Note
Should be an Azure Web App
- You will be redirected to the publish page
-
Click “Publish”
Wait for the process to finish
Deploying AnalyticsClient (Portal)
- The recommended way to publish is to install Azure Tools to your Visual Studio Code
After building the project configured for production: npm run build --prod
it will create a dist/ folder with the built files
Use the Azure Tools Extension to Deploy this folder to your Azure Web App
Hint
In case you use GitHub for version control, you can setup a github action on a “release” branch to automate the deployment process of AnalyticsClient