Migration from MAGES 4 to MAGES 5 (NXT)
This is a guide for users who want to migrate from using MAGES 4 to using MAGES 5 (NXT). In this guide, we will showcase how to import your assets from a MAGES 4 project to use with MAGES NXT as well as recreate Actions from MAGES 4 in MAGES NXT. In our case, we will use the Medical simulation sample as an example. It is recommended to follow this tutorial step-by-step.
Create your project with MAGES NXT
Create a clean MAGES NXT project following the instructions in the MAGES NXT Installation guide. Ensure all issues are fixed before continuing.
Although it’s optional, in order to add Multiplayer, make sure to follow the Multiplayer Setup.
Once you are done, import the Empty sample scene as shown here in order to kickstart your project.
Importing from MAGES 4 to MAGES NXT
Import any of your MAGES 4 assets (e.g. models, materials, textures, prefabs) simply by drag and dropping them from their asset folder inside your MAGES NXT asset folder.
Importing Models from MAGES 4 Medical simulation sample.

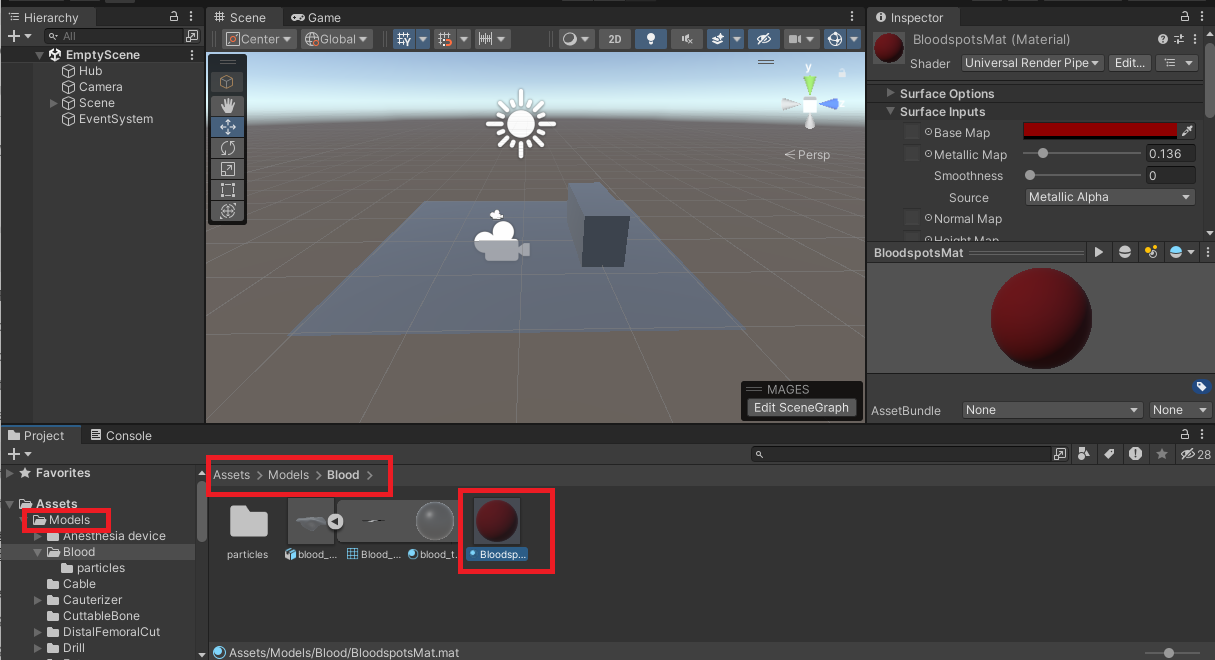
Here are a few things to look out for when importing from a MAGES 4 project:
Import any assets you want from your old project however, some of the scripts may not be supported, and you may get the missing script warning. In that case, you may need to recreate that specific script.
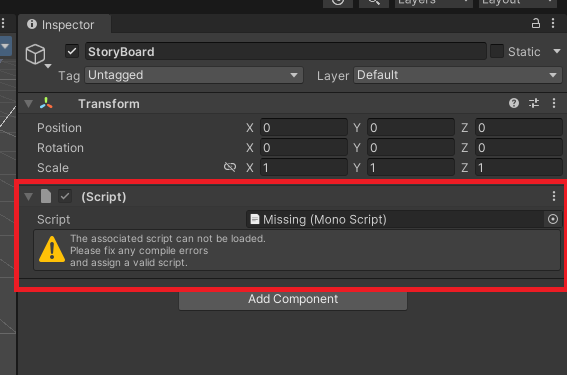
Note
You may get missing scripts, especially for multiplayer objects, as in MAGES NXT the objects don’t need an individual multiplayer script in order to work. Please delete the missing references.
When you import your project to MAGES NXT, you might have to recreate or delete certain assets that are missing or modified in MAGES NXT.

Don’t import any old ActionScripts from MAGES 4 to MAGES NXT as they are not supported anymore. In the next section, we will show you how to create Actions from scratch with the Scenegraph.

Action creation with MAGES NXT
We will now set up the Scenegraph and recreate the old actions with MAGES NXT.
Navigate to
MAGES > MAGES Panel
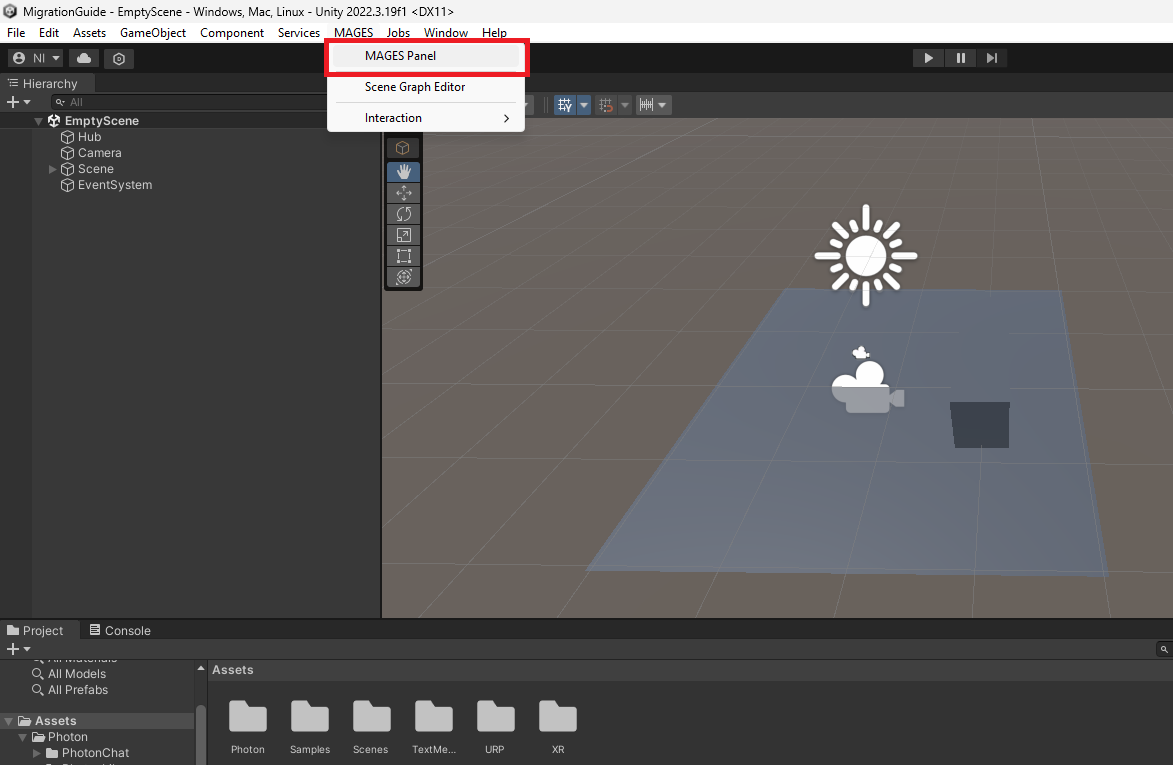
Click on
Scenegraph Editor.
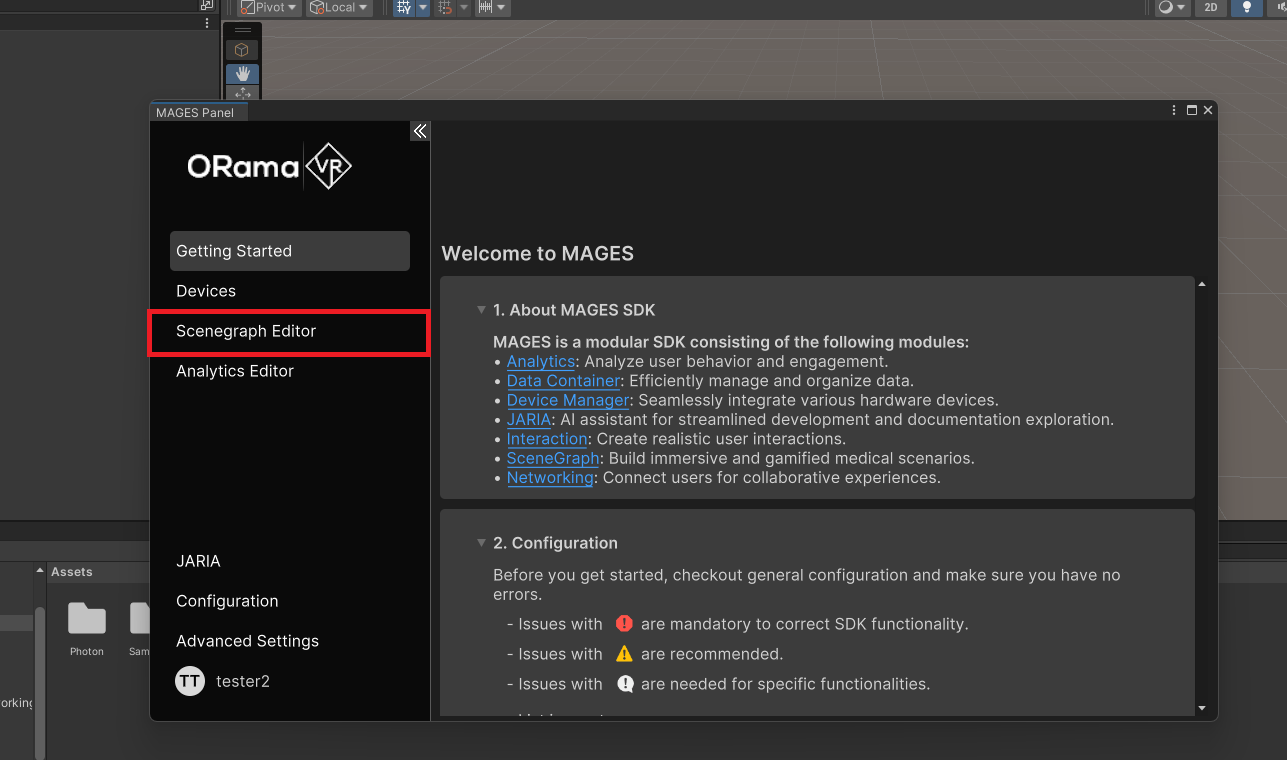
Now you can easily create any action you want with the Scenegraph editor.
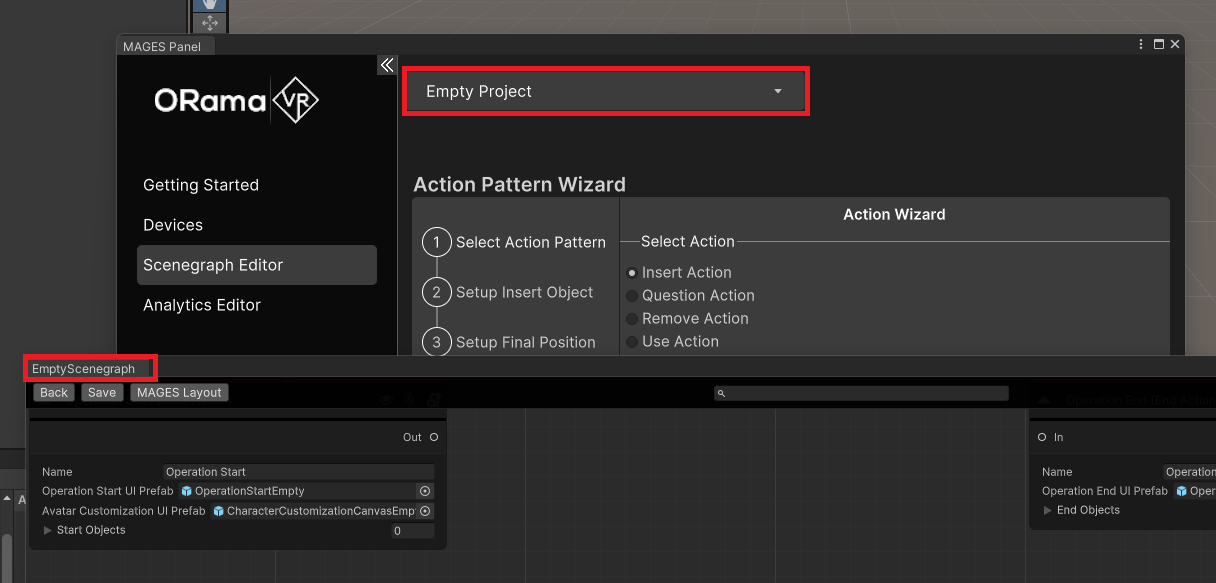
Warning
Make sure you have selected the correct Scenegraph; in our case, it’s the Empty Scenegraph from the Empty Project.
Now you can close the MAGES panel and start experimenting with the Scenegraph. For starters, you can create two simple Actions.
The Question Action. MAGES 4 vs MAGES NXT
Info
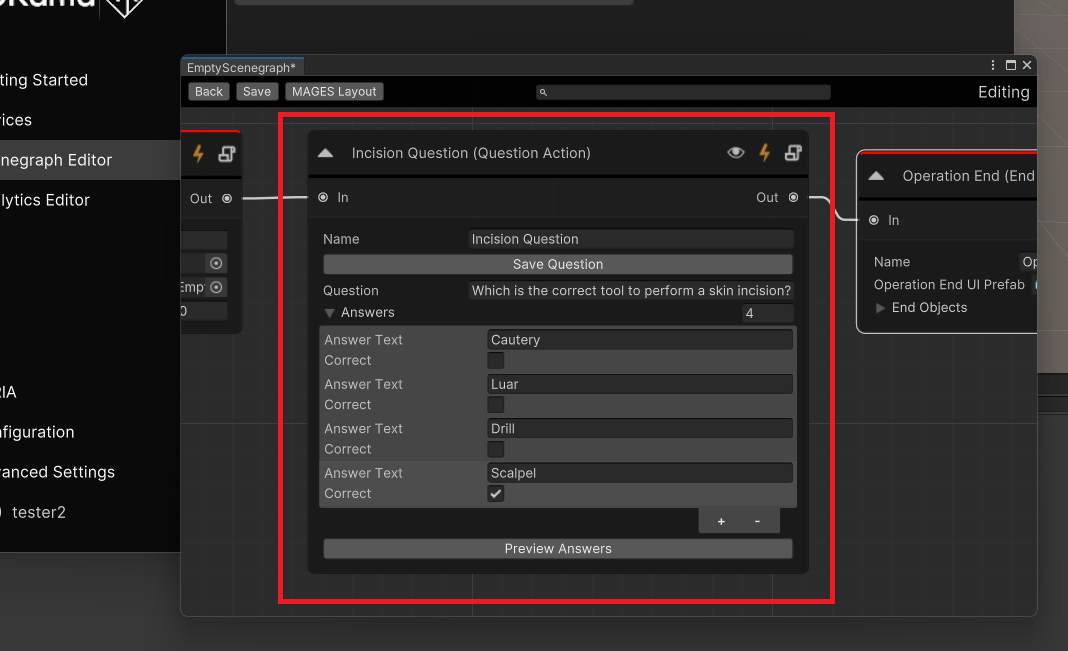
With the Question: Which is the correct tool to perform a skin incision?
Wrong Answers: Cautery, Luar, Drill. Right Answers: Scalpel.
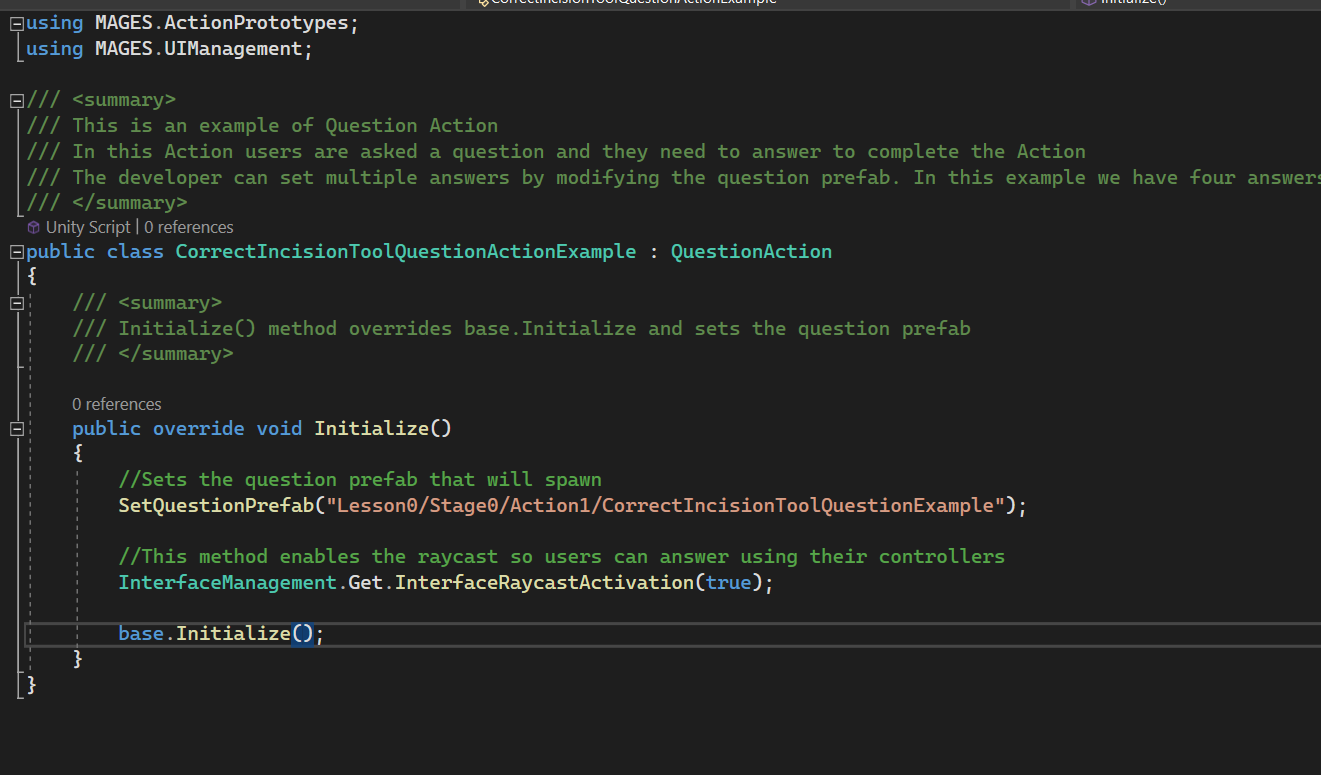
With MAGES 4
You would need to create a script, with its class inheriting from its parent Action:
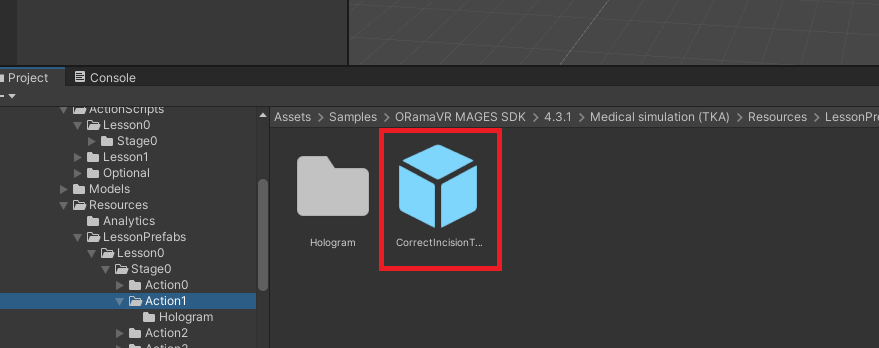
As well as create a separate question prefab.
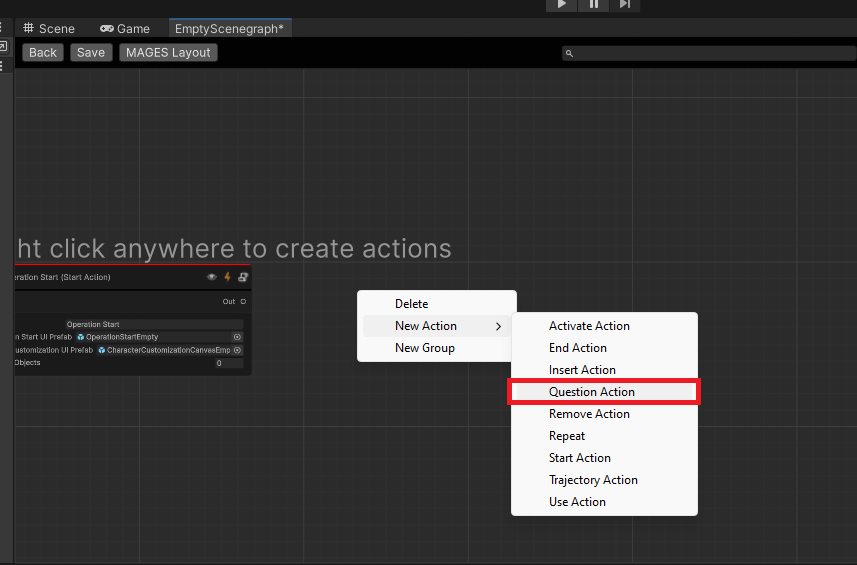
With MAGES NXT
Simply right-click in the scenegraph and you are ready to start setting up your Action.
The Insert Action. MAGES 4 vs MAGES NXT
Info
The Insert Object (Initial position) will be at the table.
The Final Position will be on top of the Hand of the Patient.
With MAGES 4
You would need to manually set the initial and the final position of the Insert Action as well as its Hologram.

With MAGES NXT
Simply drag your prefabs to the respective field, with the Hologram being generated automatically.
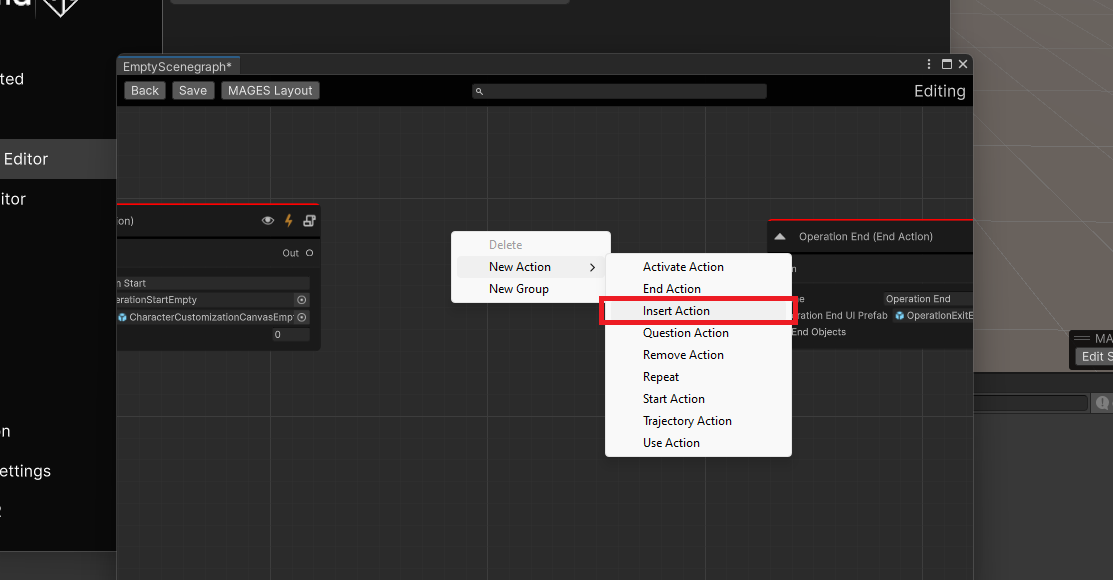
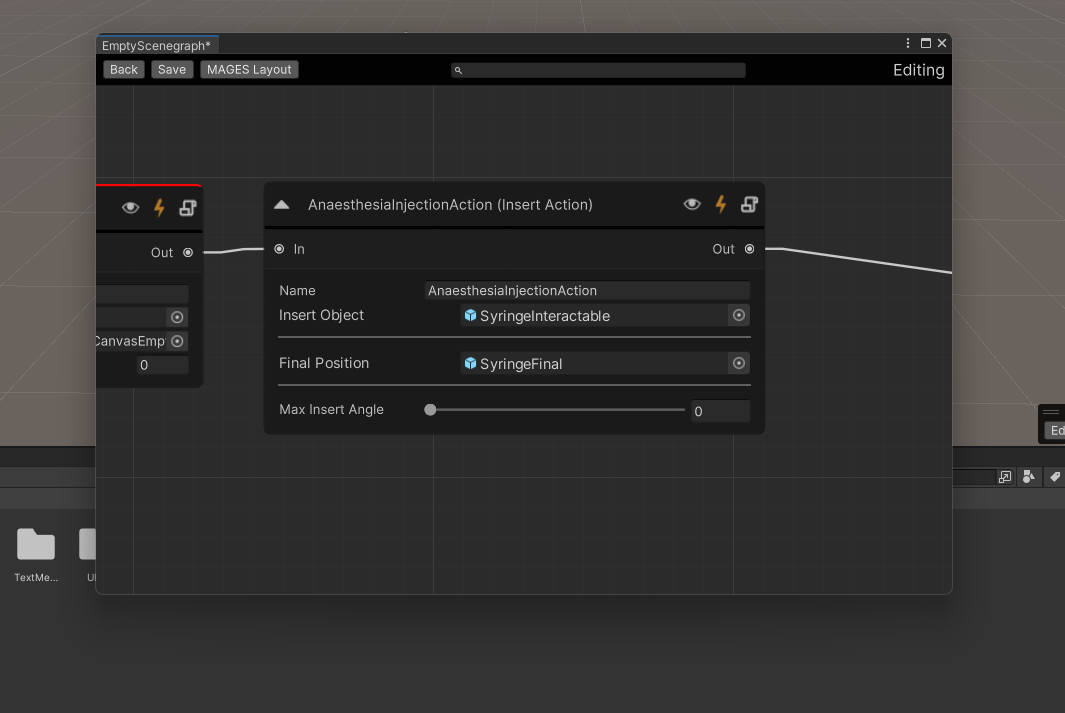
Follow these tutorials to create these Actions, Question Action and Insert Action.
Note
The scenegraph is no longer saved in a .xml file, so there’s no need to import it into the new project anymore.
If you created these Actions, the rest of the Actions should be pretty easy to replicate; simply follow any of the respective tutorials here.
With this, you can easily recreate any simulation from MAGES 4 in MAGES NXT.
Analytics with MAGES NXT
The Analytics Editor has also seen massive upgrade with MAGES NXT. Although its concept is the same there are some key differences:
You cannot import Analytics from MAGES 4 to MAGES NXT instead you will to recreate them with the Analytics Editor which has been integrated inside the MAGES Panel.
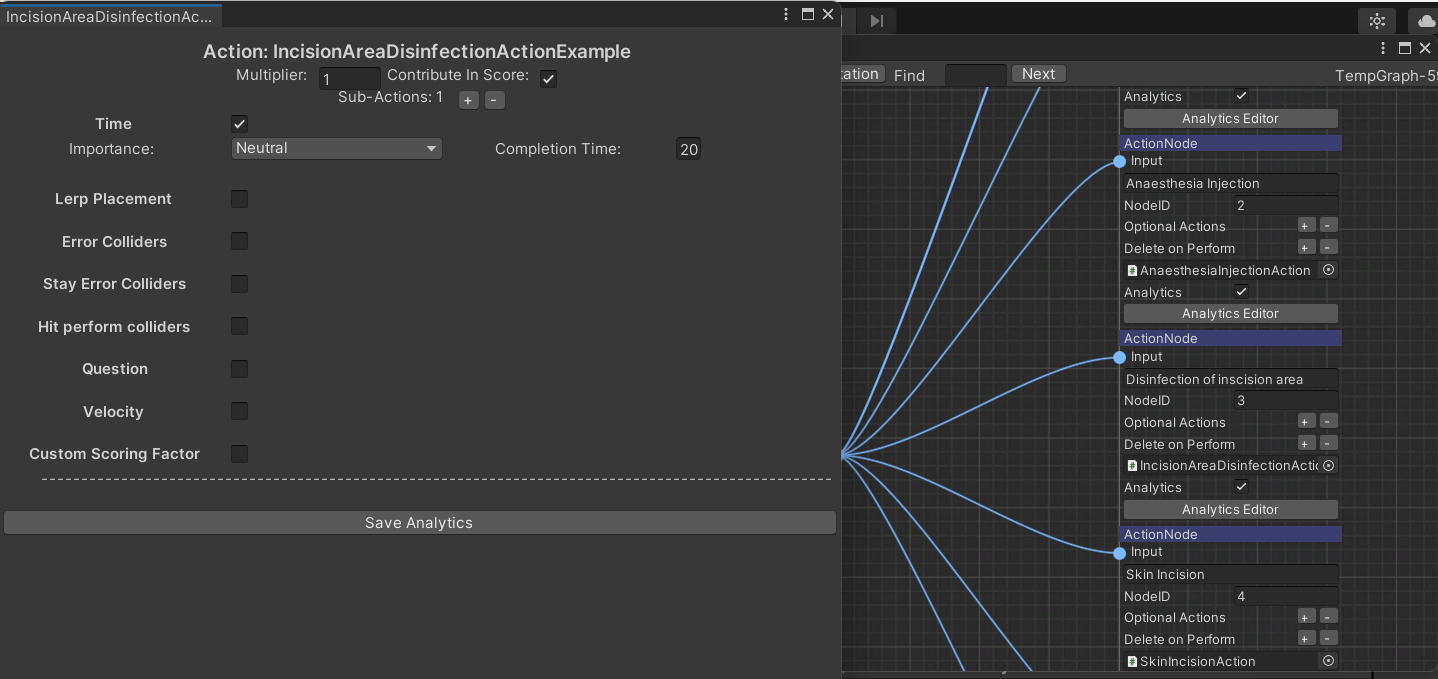
With MAGES 4
Messy and convoluted UI.
With MAGES NXT
Clean and straightforward to use UI.

2. UI is now split with 3 categories, Errors, Objectives and Events. You can now aside from Errors, setup Events that lets you add extra details to your analytics using key-value pairs tied to specific actions, as well as Objectives to define overall goals for an entire operation, evaluated upon completion.
With MAGES 4
Limited to basic Errors.
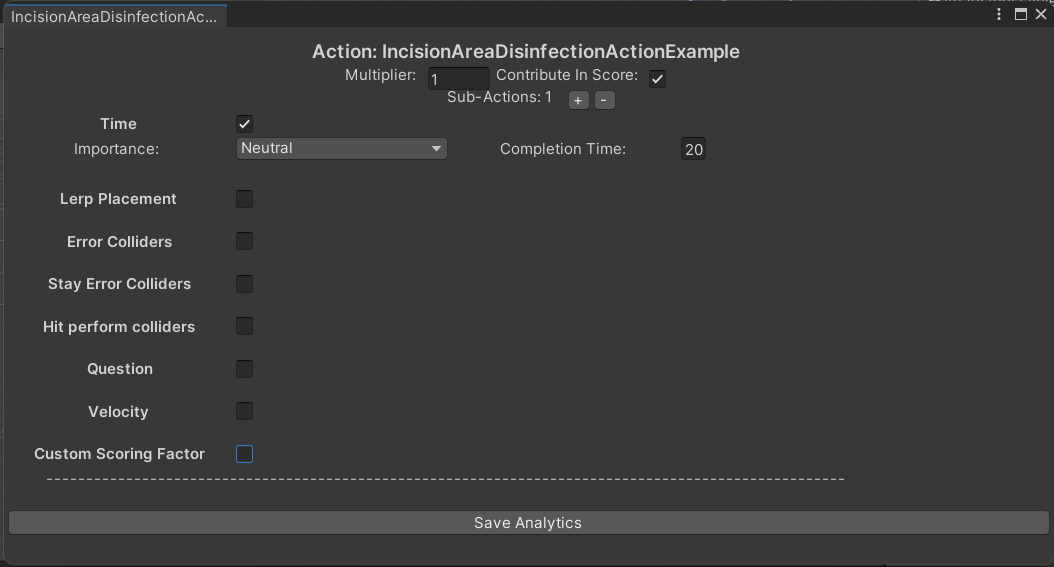
With MAGES NXT
Offers three distinct categories which can be used to create complex scoring and evaluation systems.

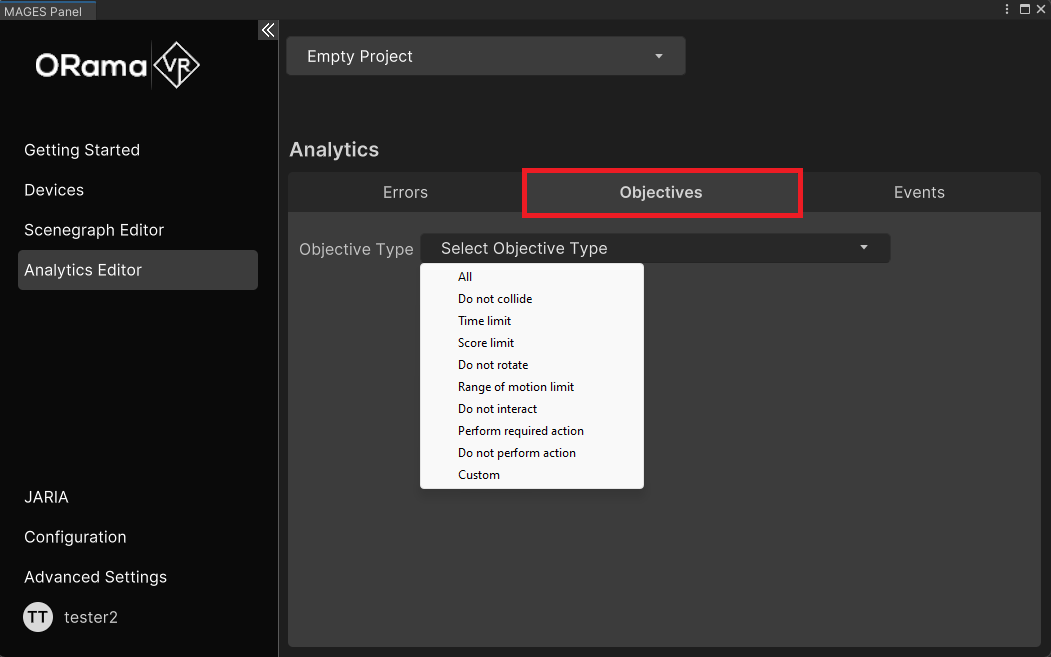
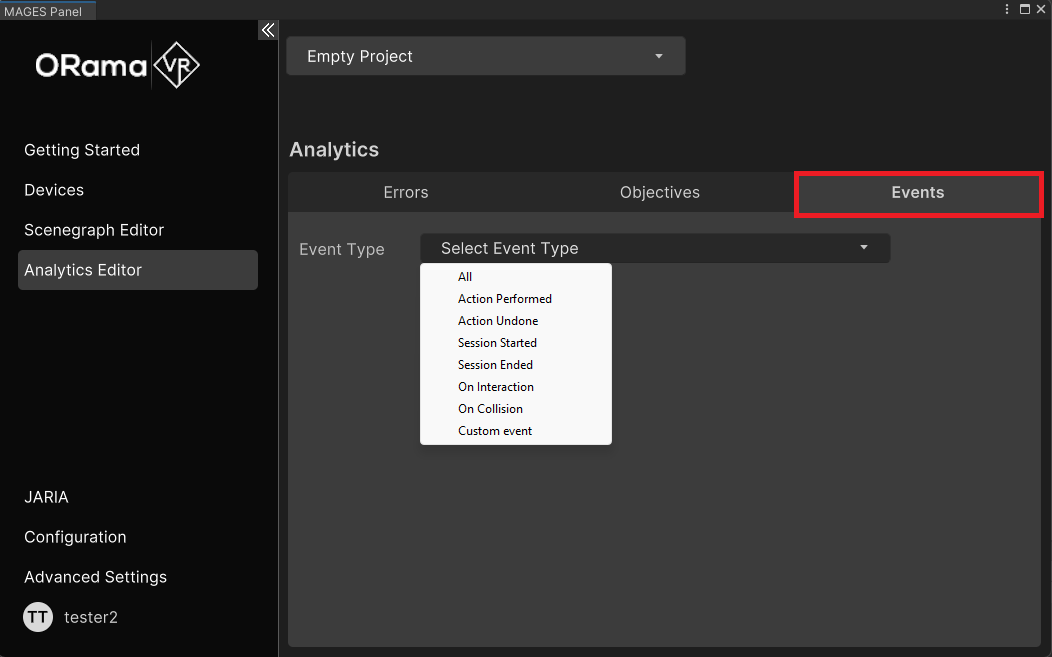
To start adding your own Errors, Objectives and Events start by taking a look at these tutorials Errors, Objectives and Events.
Important
Its also important to note that its possible to now create your own custom Errors, Objectives or Analytics.
UIs with MAGES NXT
UIs are greatly simplified with MAGES NXT.
For a simple button you would need:
With MAGES 4
You need a Rigidbody.
You need a Box collider.
MAGES Interactable Item.
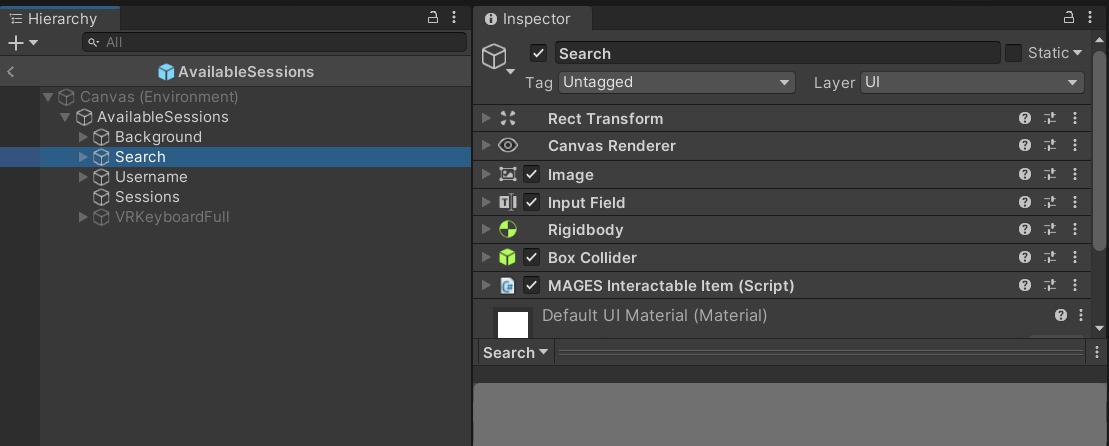
With MAGES NXT
You only need the MAGES Graphic Raycaster to be able to use Unity’s system to interact with the UI.
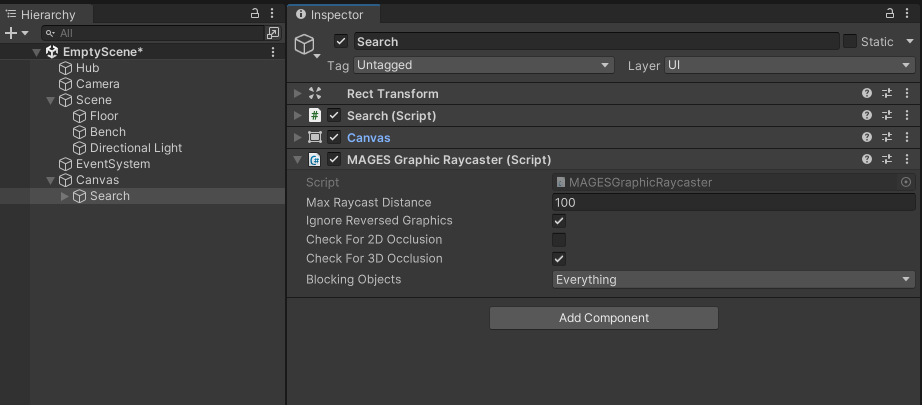
Check out the documentation about interaction with UI.
Setup the players Rig with MAGES NXT
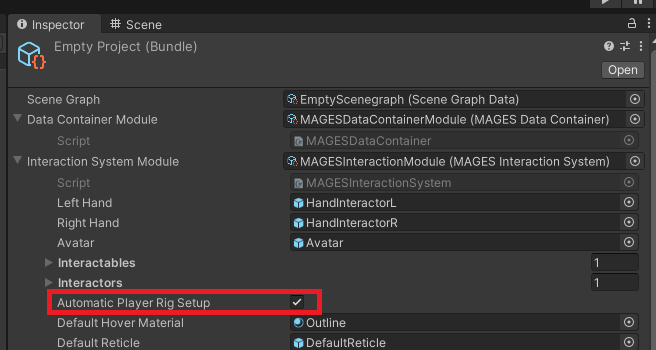
In MAGES NXT the players rig is automatically generated as long as:
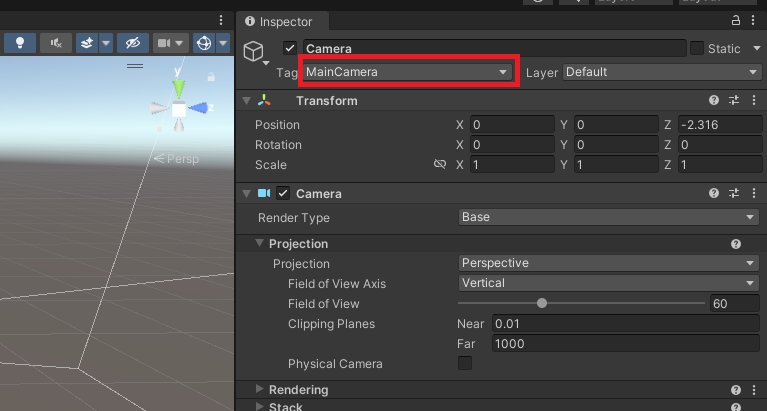
There is a Camera in the scene with the MainCamera Tag.
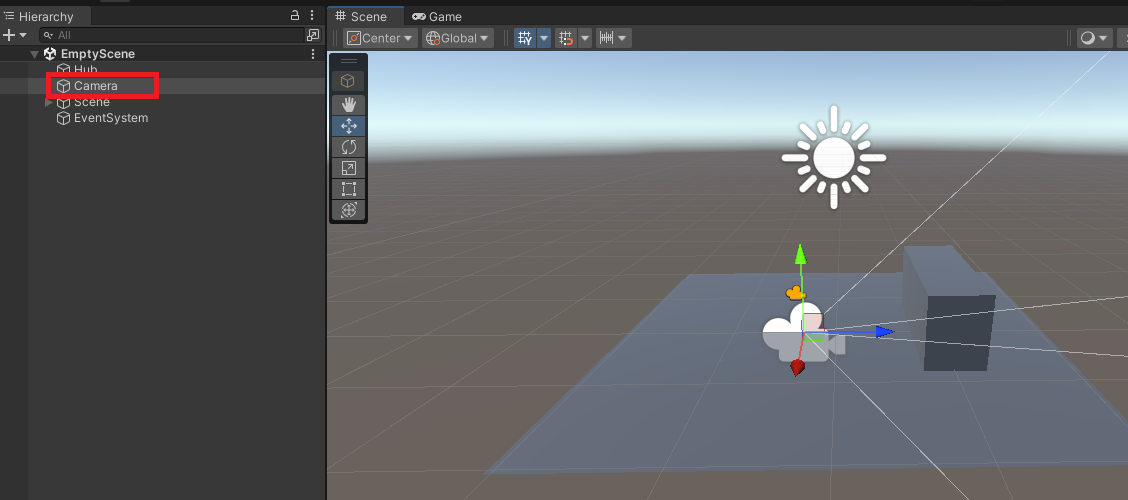
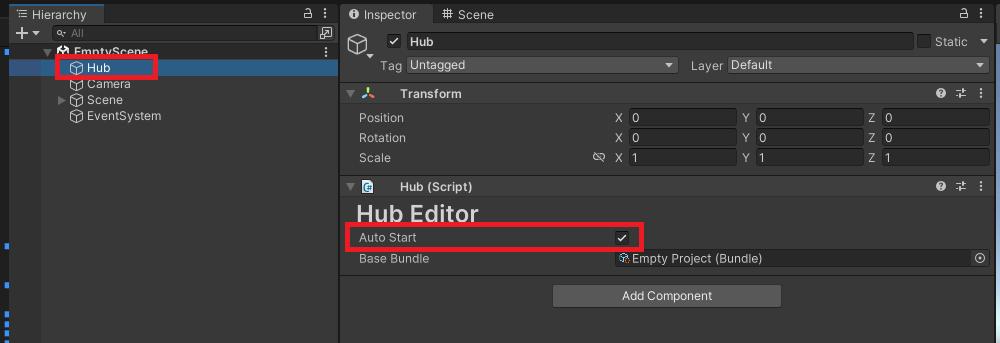
Auto Start is checked in the Hub Editor.
Automatic Player Rig Setup is checked in the Interaction System Module.
Important
2DoF is not supported in MAGES NXT. Use Mobile3D instead for mobile devices.
The XRrig will spawn at the position of the Camera.
Select your Camera according to this guide and you are ready to play.