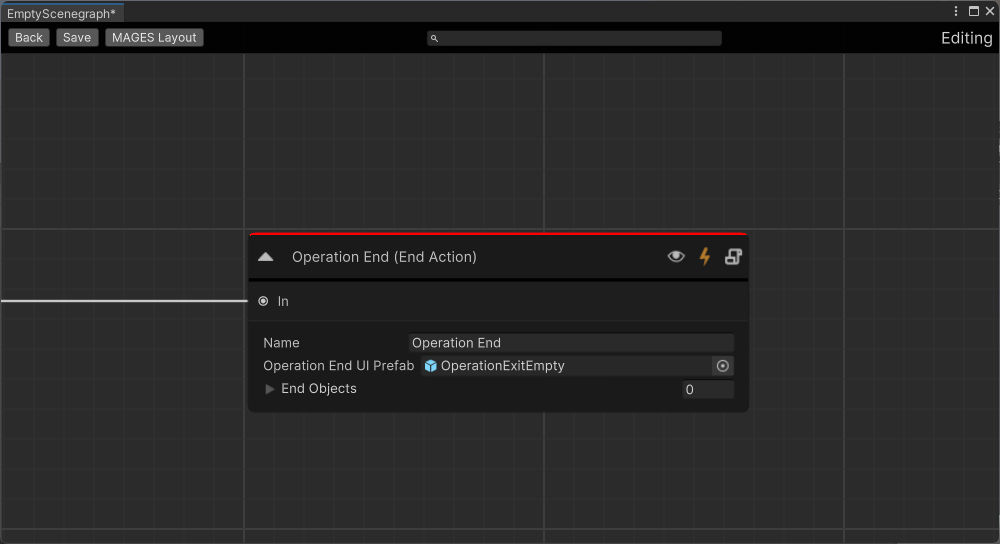
Create your first MAGES project
Import the empty scene
From Unity’s top bar menu navigate to
MAGES > MAGES Panel > Getting Started > Samples. Then import the Empty Scene MAGES sample. This downloads the Empty MAGES Project underAssets > Samples, opening the Empty Scene with Camera and MAGES Hub.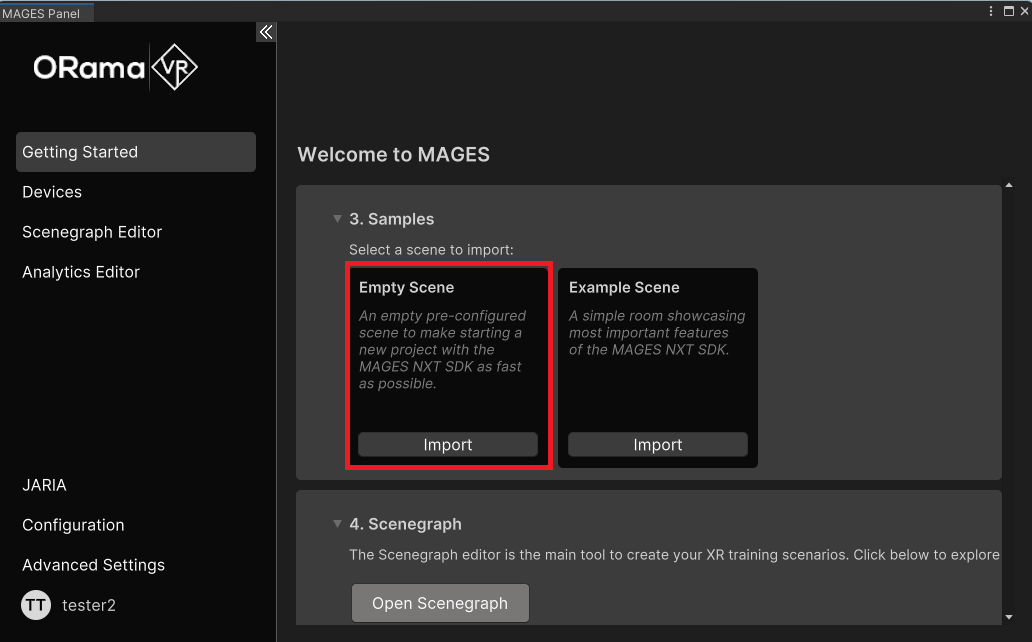
In the Unity Editor, go to
MAGES > MAGES Paneland click on theScenegraph Editortab.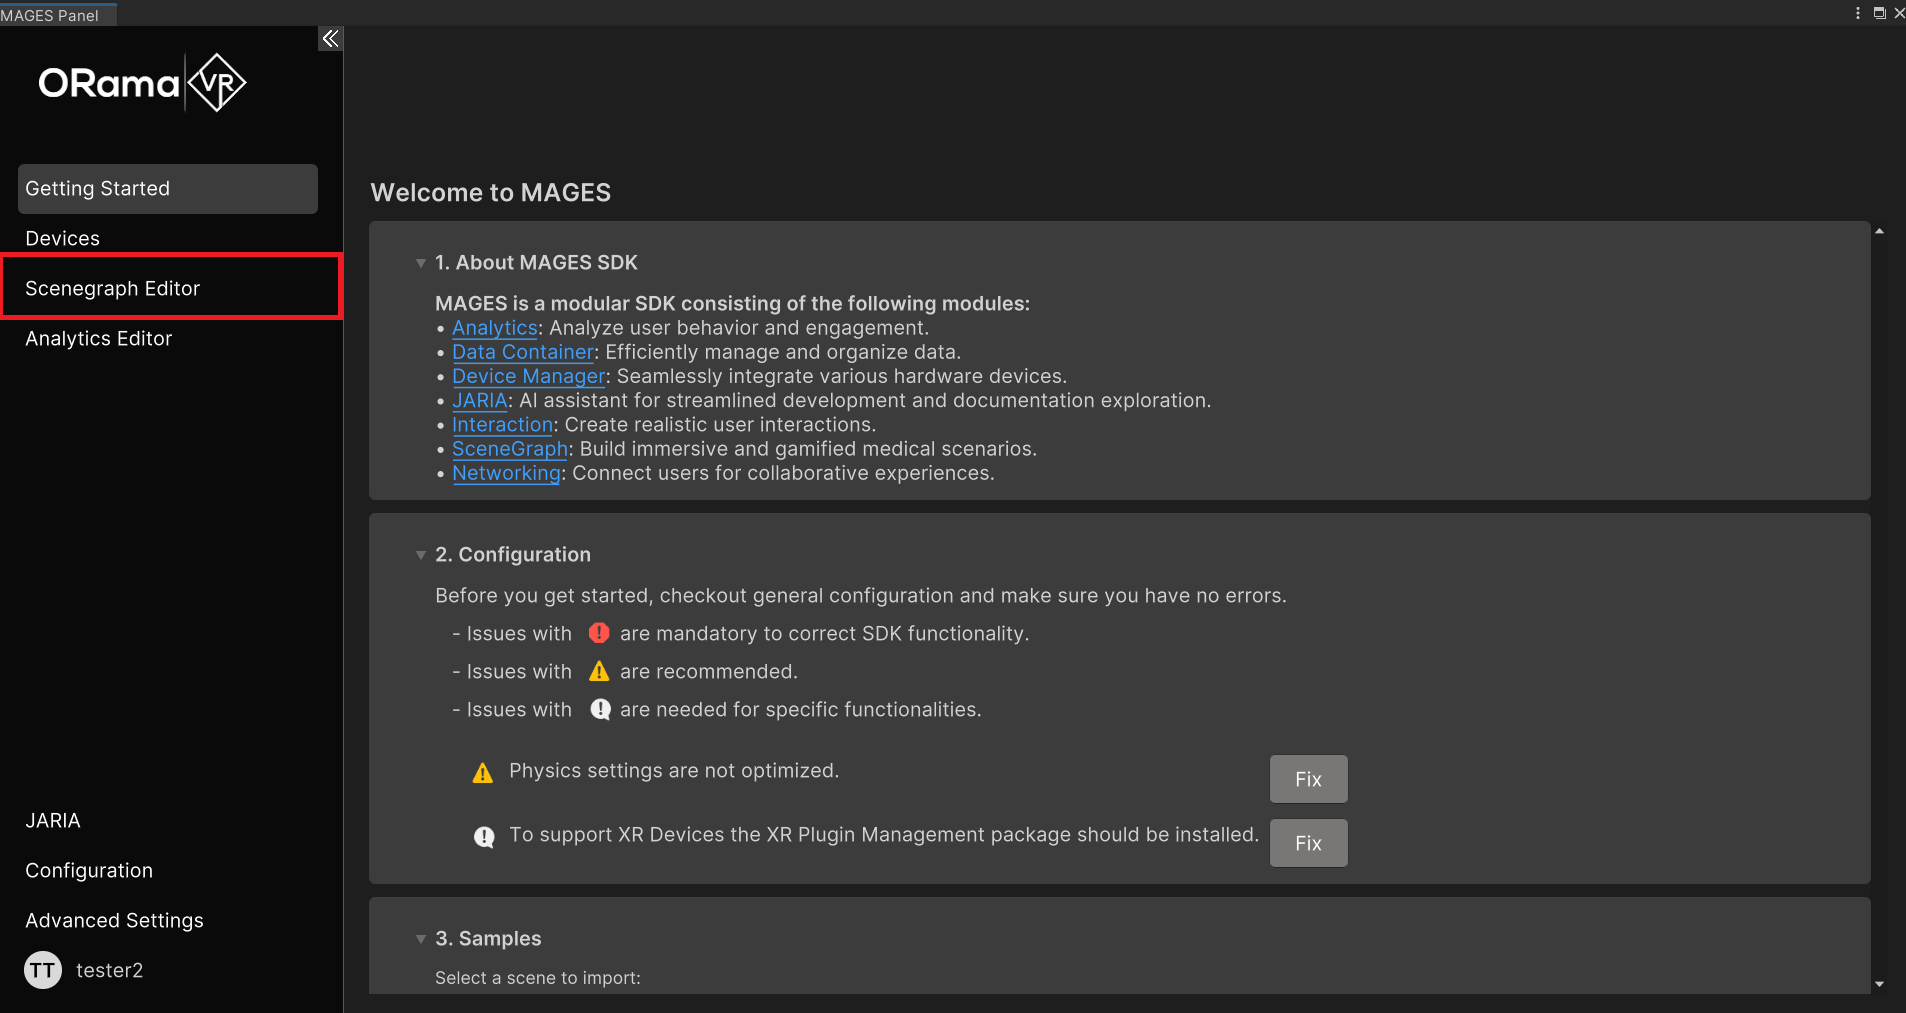
After clicking, you will be redirected to the Action Wizard. Additionally, the scenegraph editor of the active scenegraph will pop up, and you’ll have the option to activate the recommended layout. Choose as you wish.
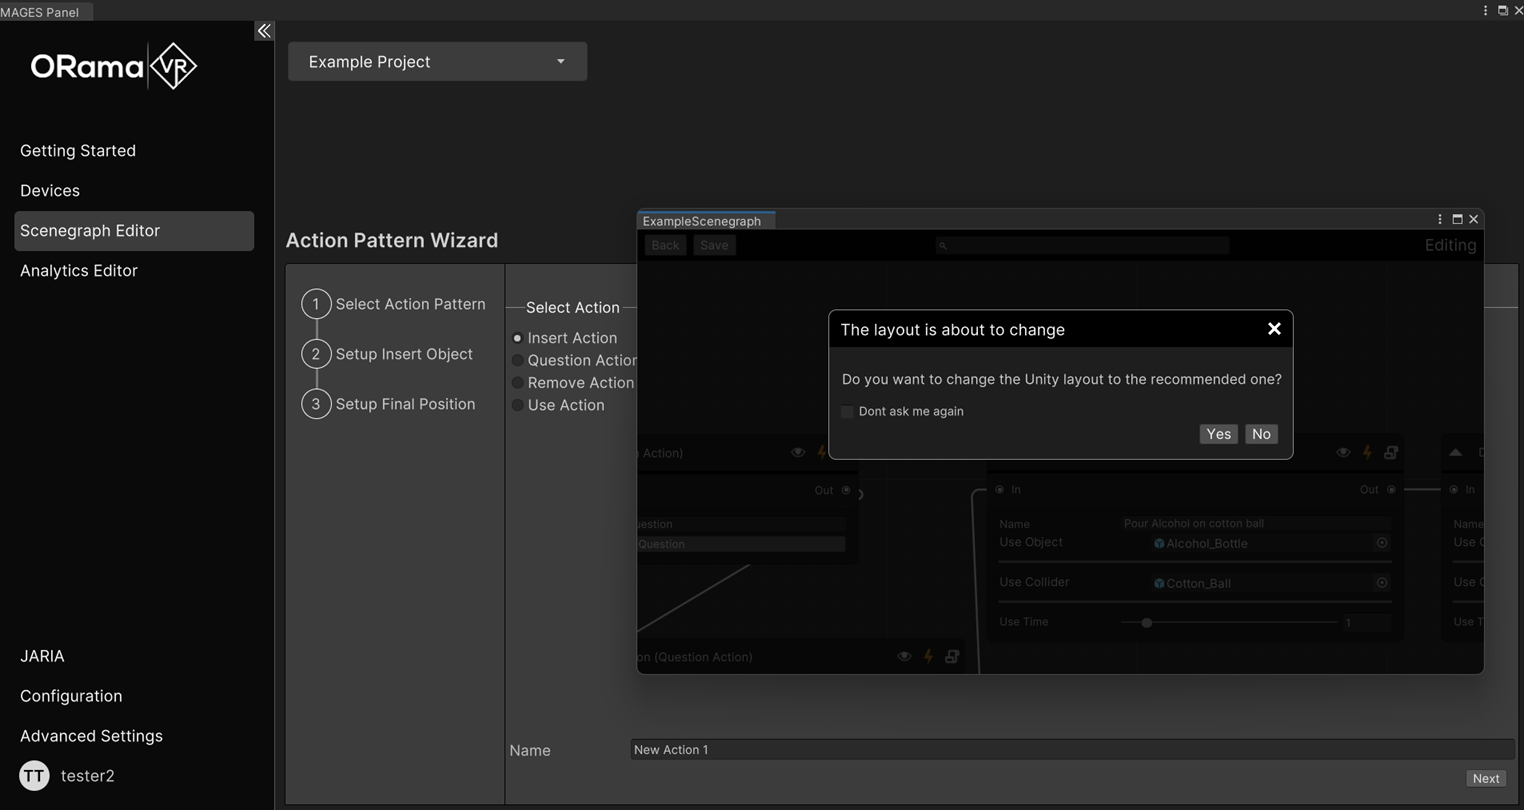
If you select the recommended layout, your Unity Editor will be set up as follows. Click on the collapse button of the MAGES Panel to better view the wizard.
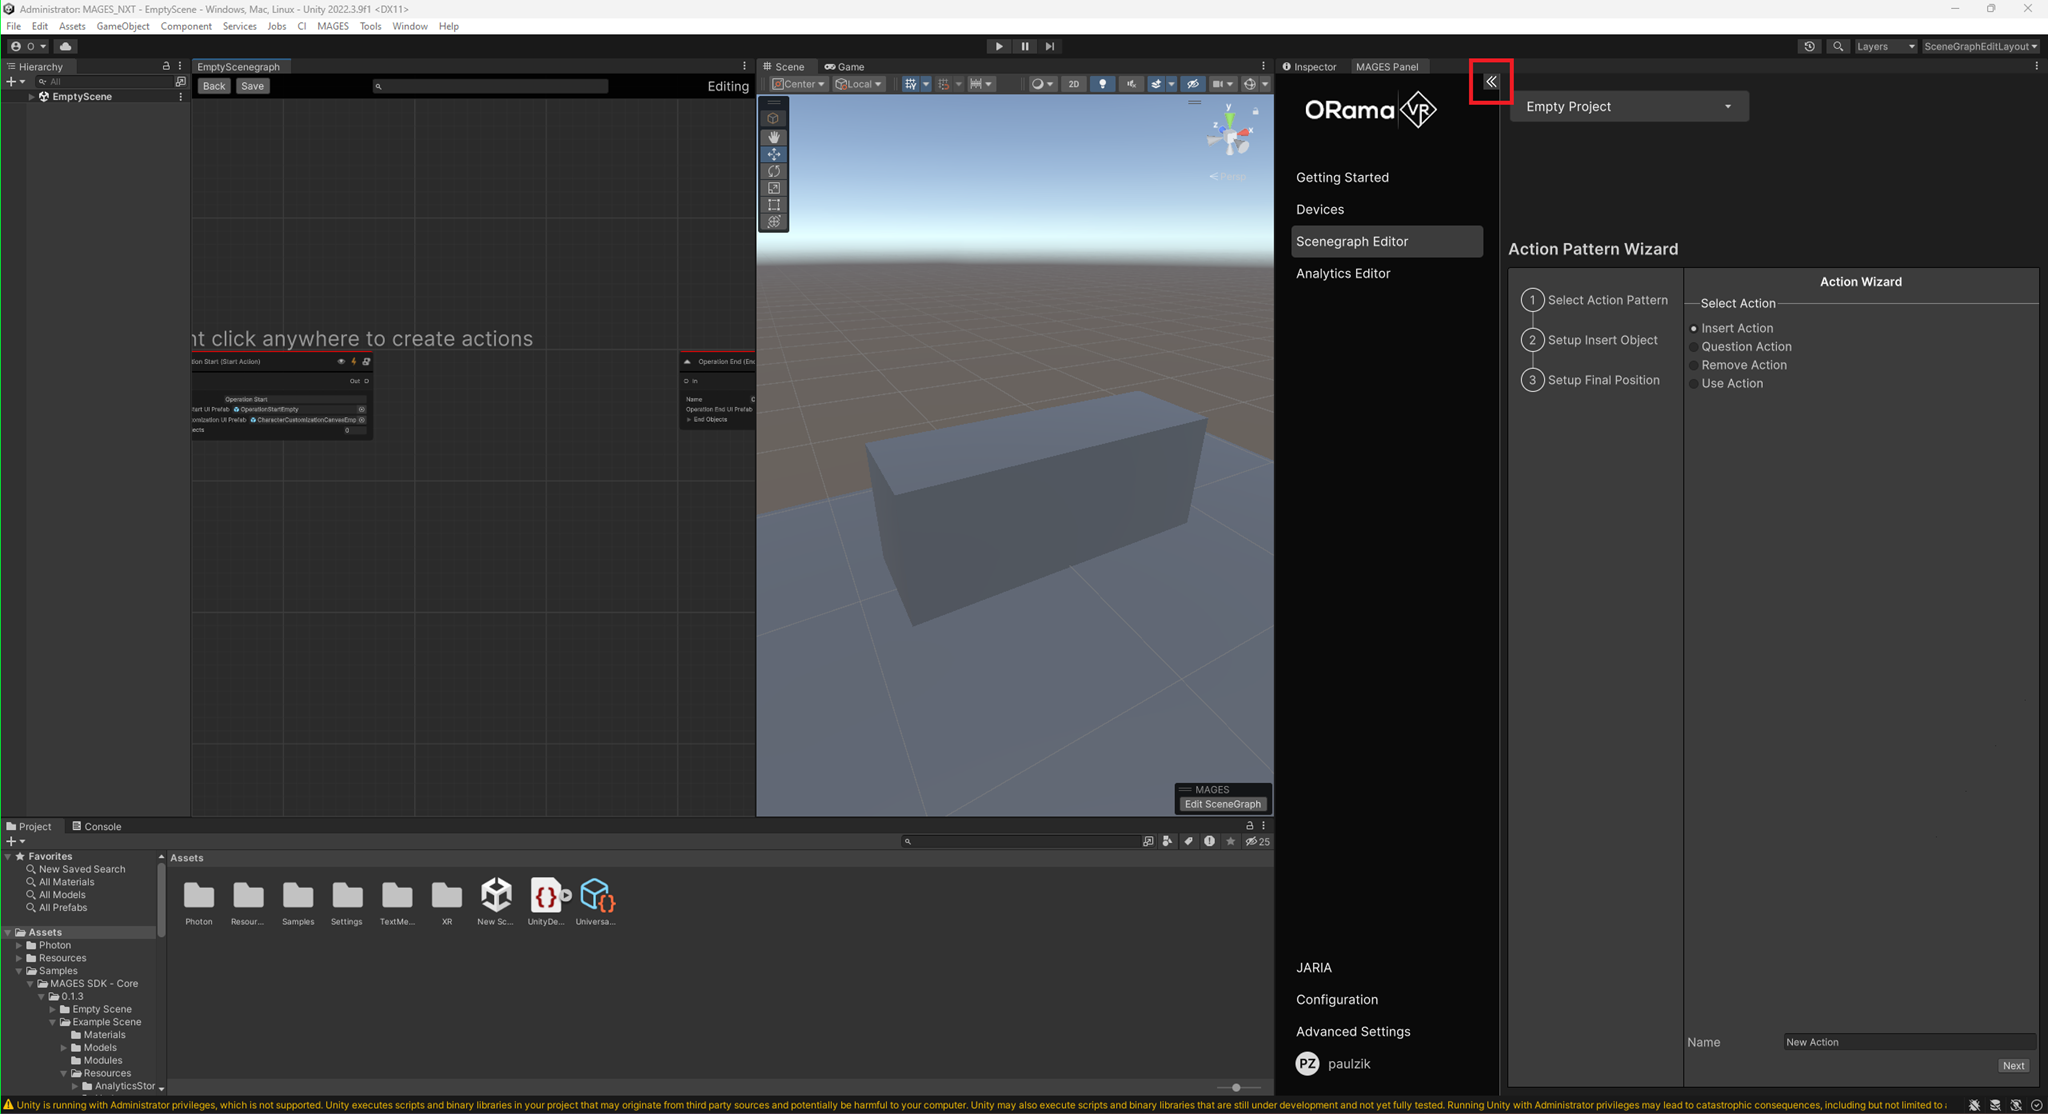
Once done, you can see the available actions, select the one you want to create, the active scene, and the active scenegraph editor. Now, you are ready to create your actions.
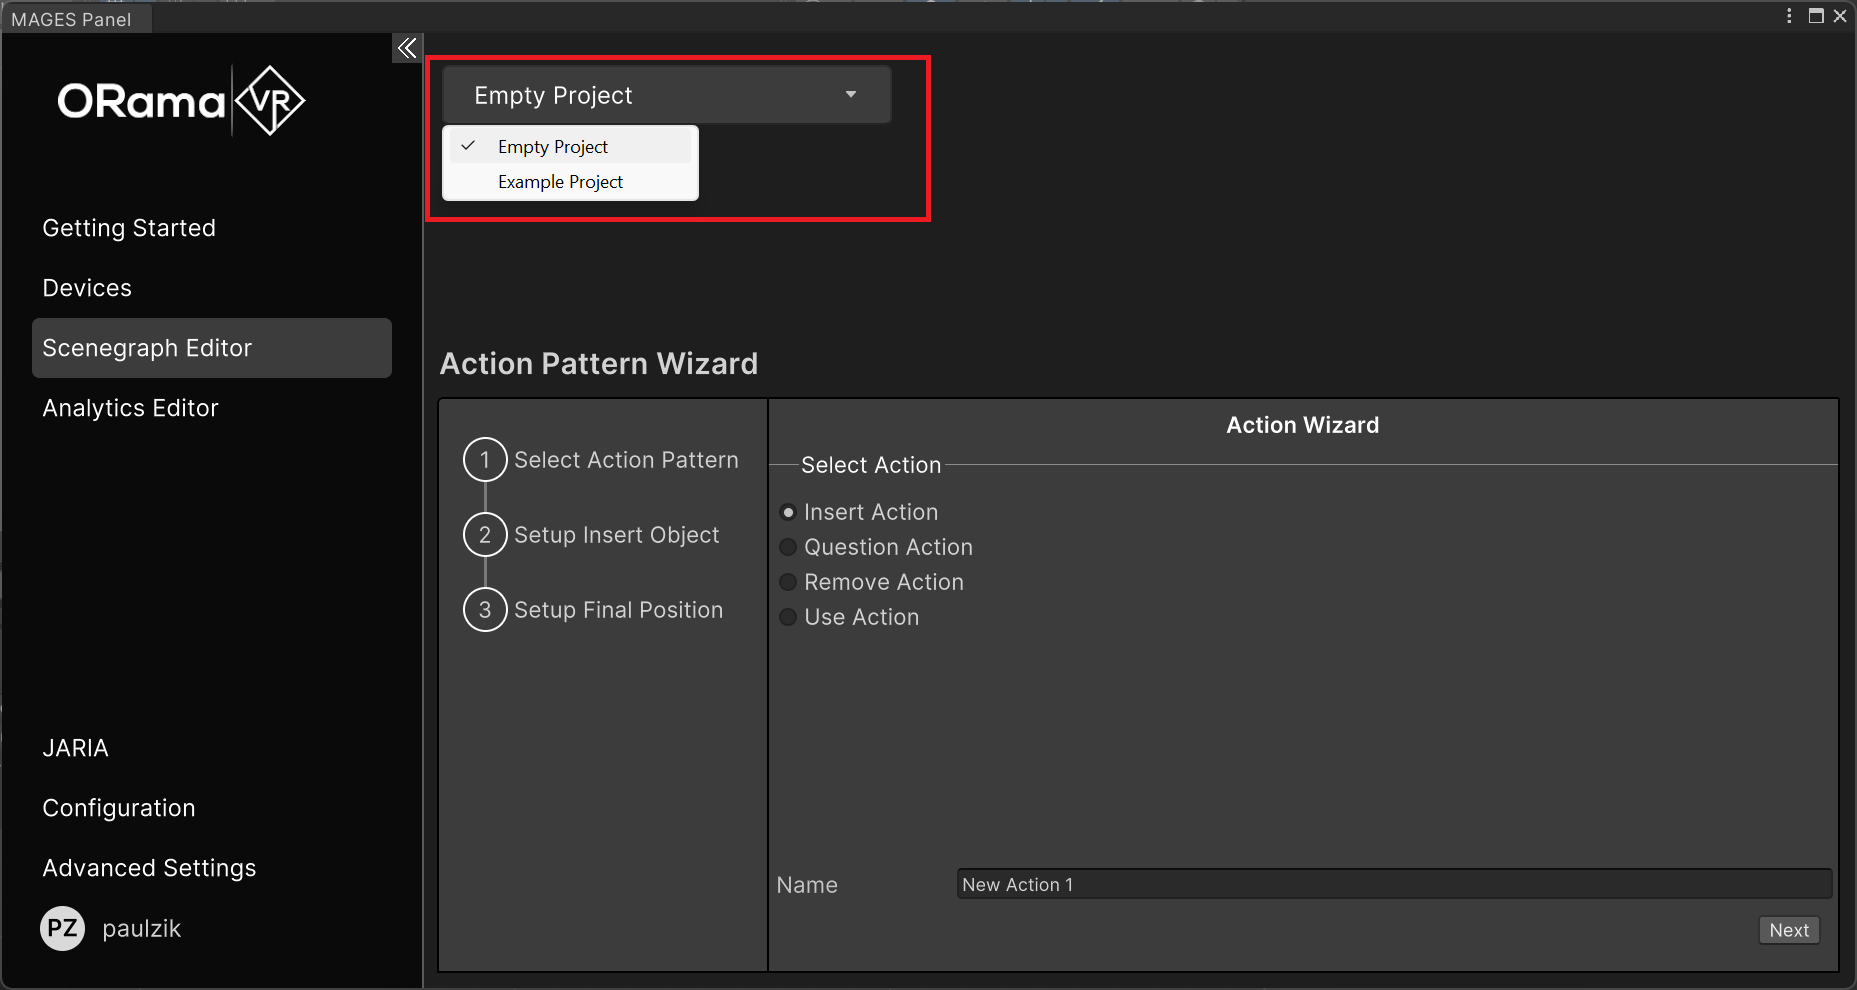
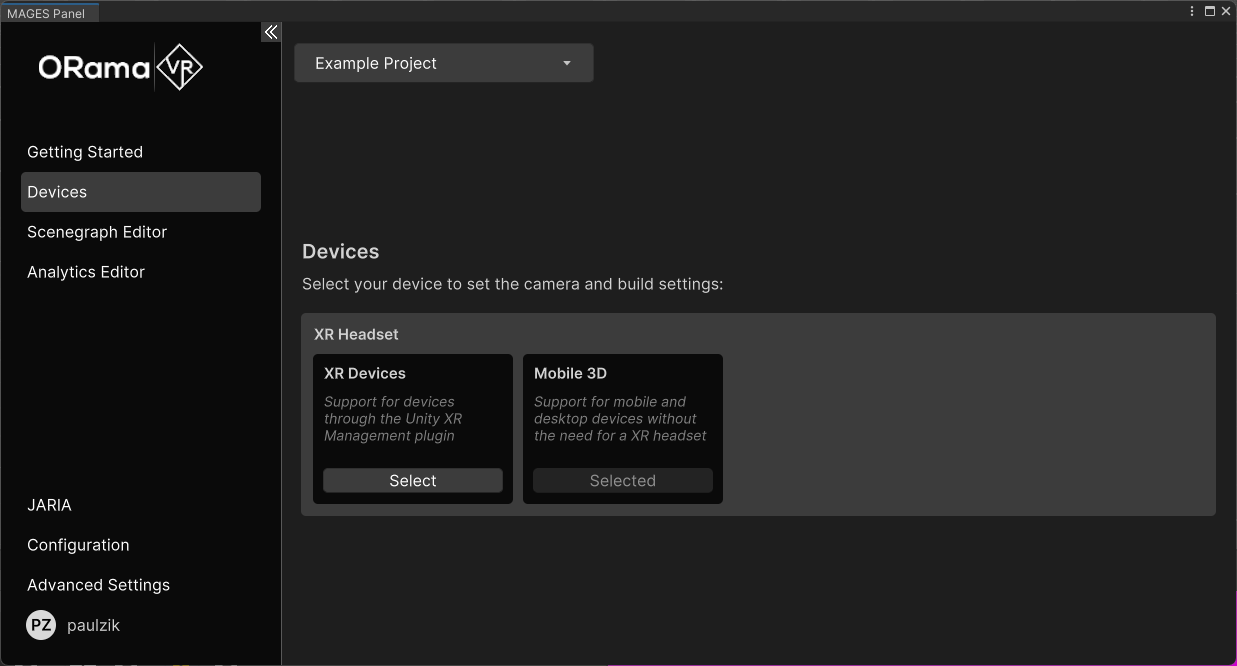
Make sure that you have selected the Empty Project from the dropdown list.
Create your first Insert Action
Now we will demonstrate how to create your first Insert Action using the Action Pattern Wizard
Note
Our Action will require the user to take a cube and insert it in a new position.
Click on the
Insert Actionbutton among the available actions. The side panel displays the necessary steps to create the action. Enter your action’s name in the name property, then click theNextbutton to proceed.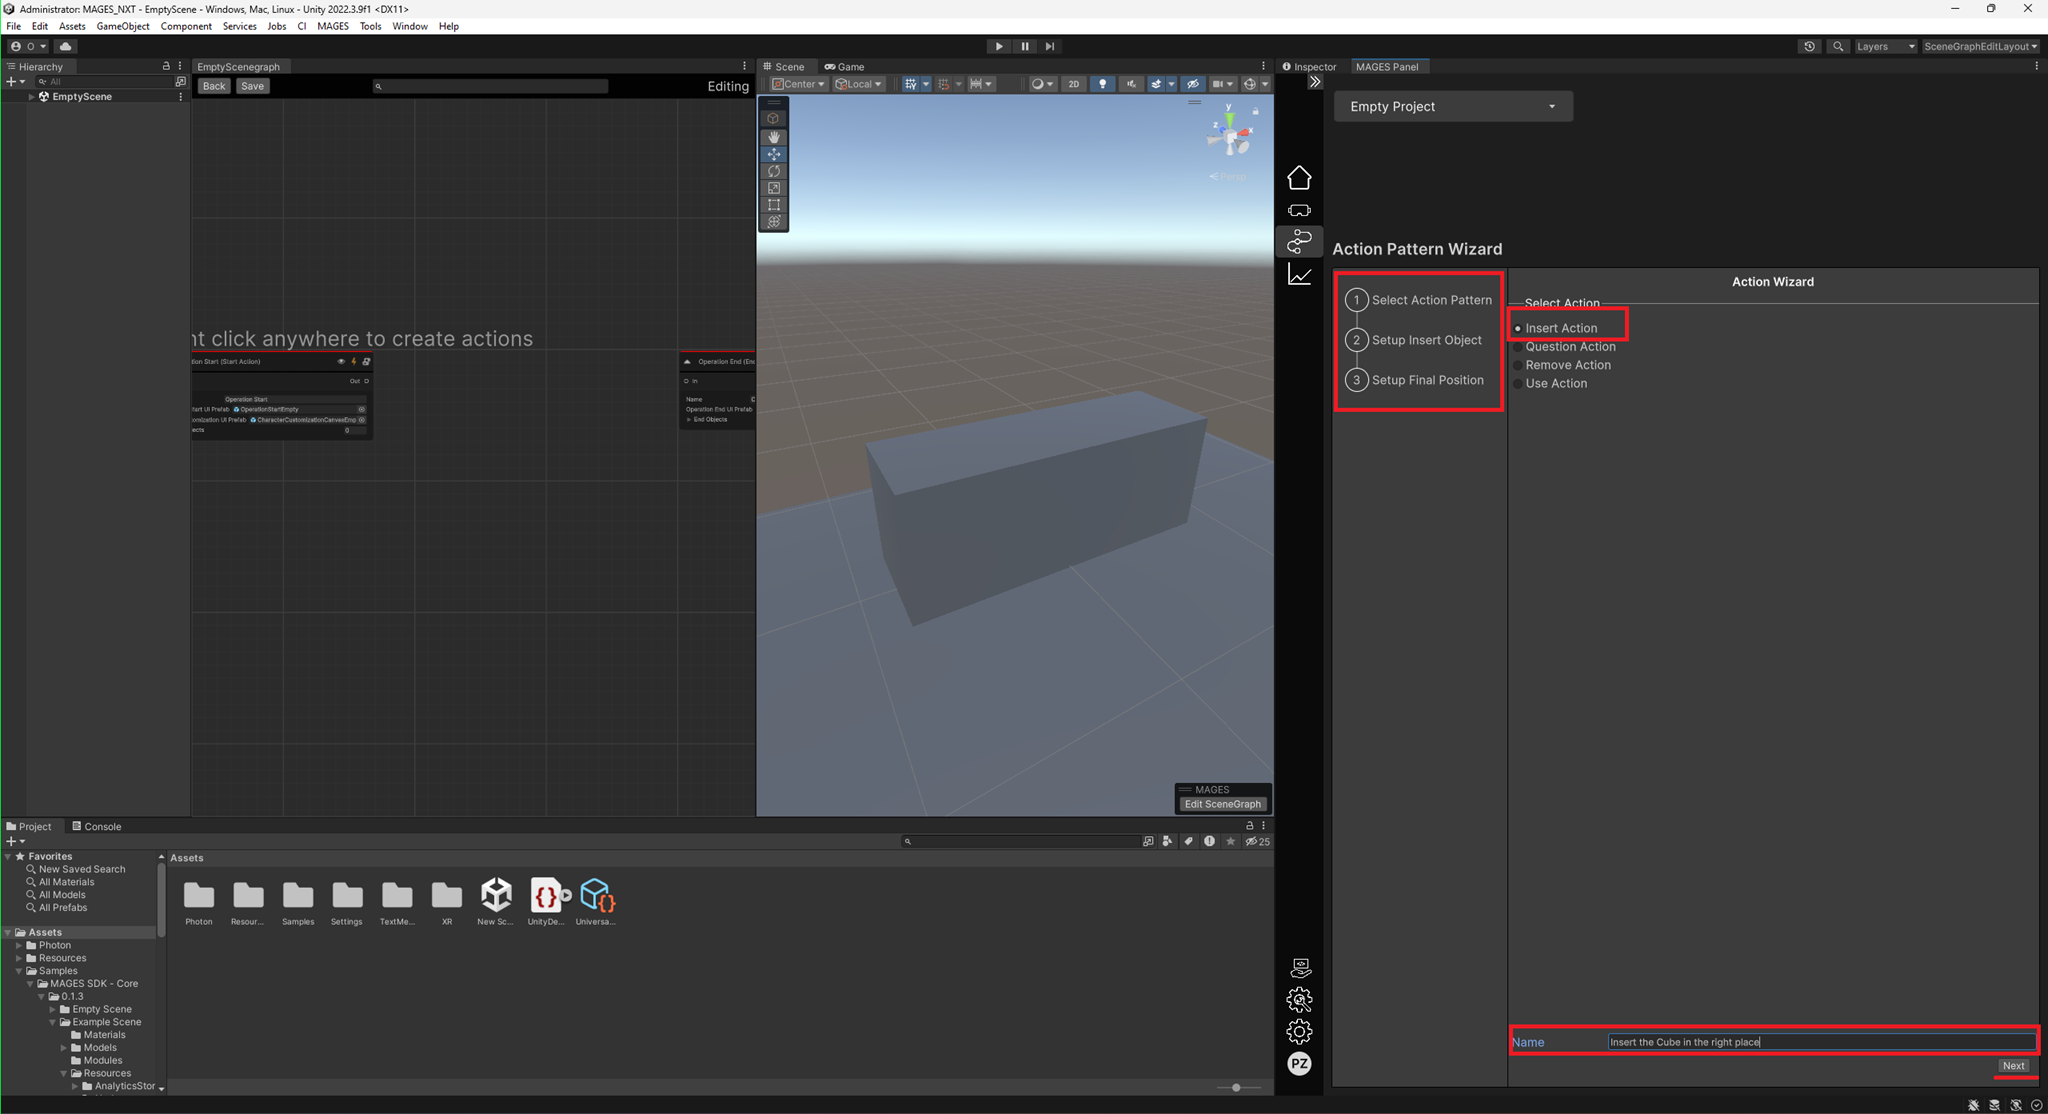
After clicking
Next, you will be redirected to theSetup Insert Objectstep. Here, you can either create a new GameObject from a model in your assets or select an existing prefab from your assets.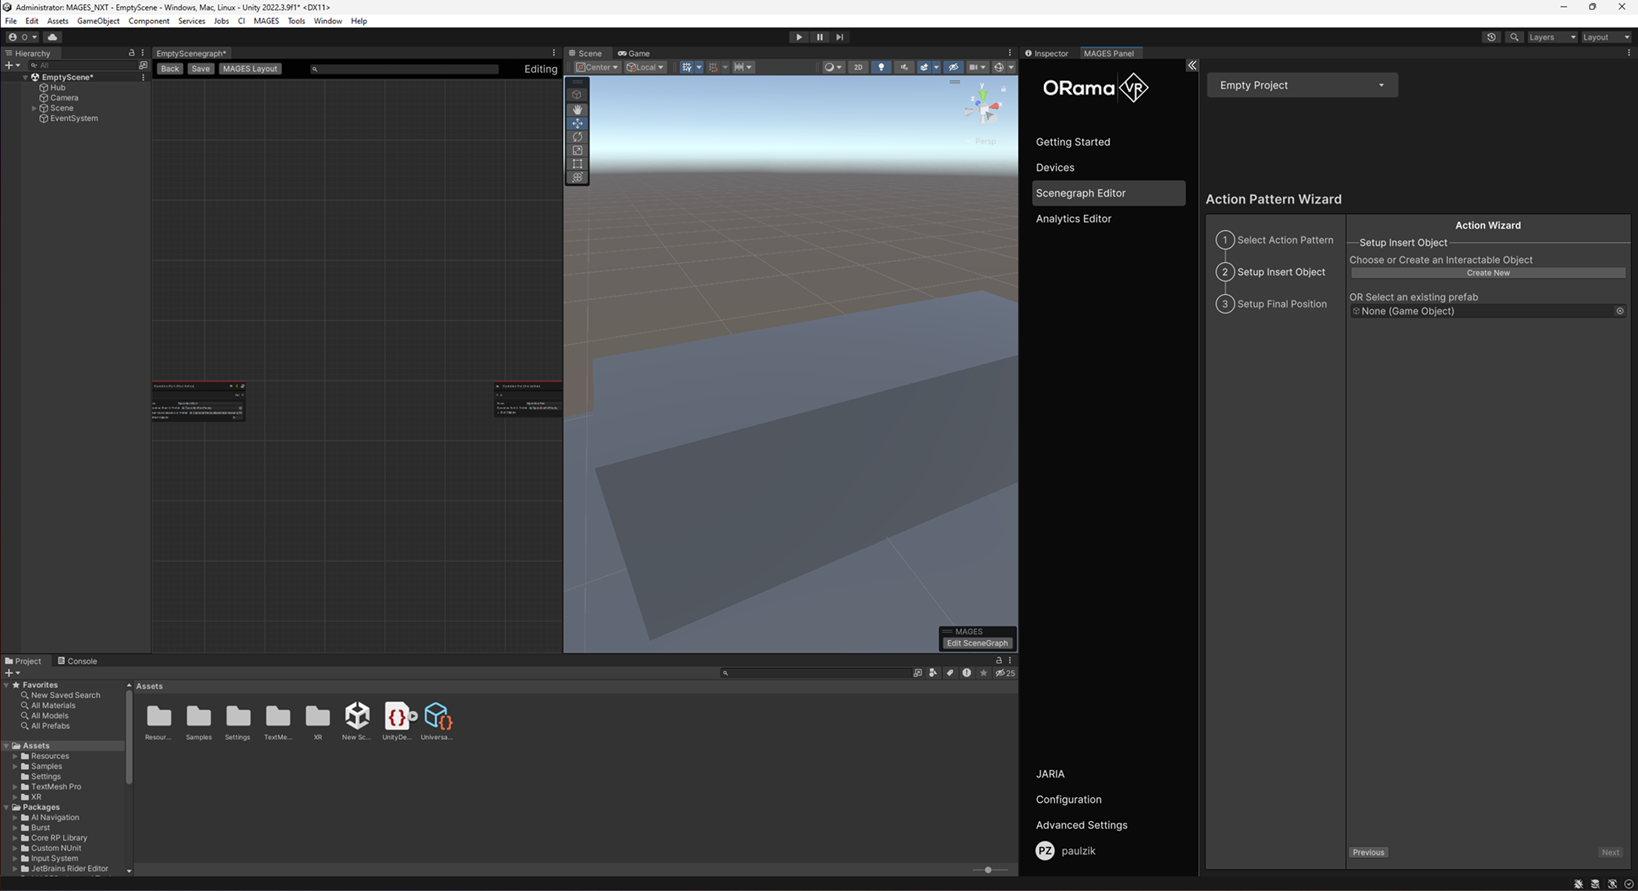
Click the
Create Newbutton, then select theCubemodel from your assets. This creates a GameObject of the cube in your scene that you can position as desired. This will be the position that the GameObject will be initially spawned.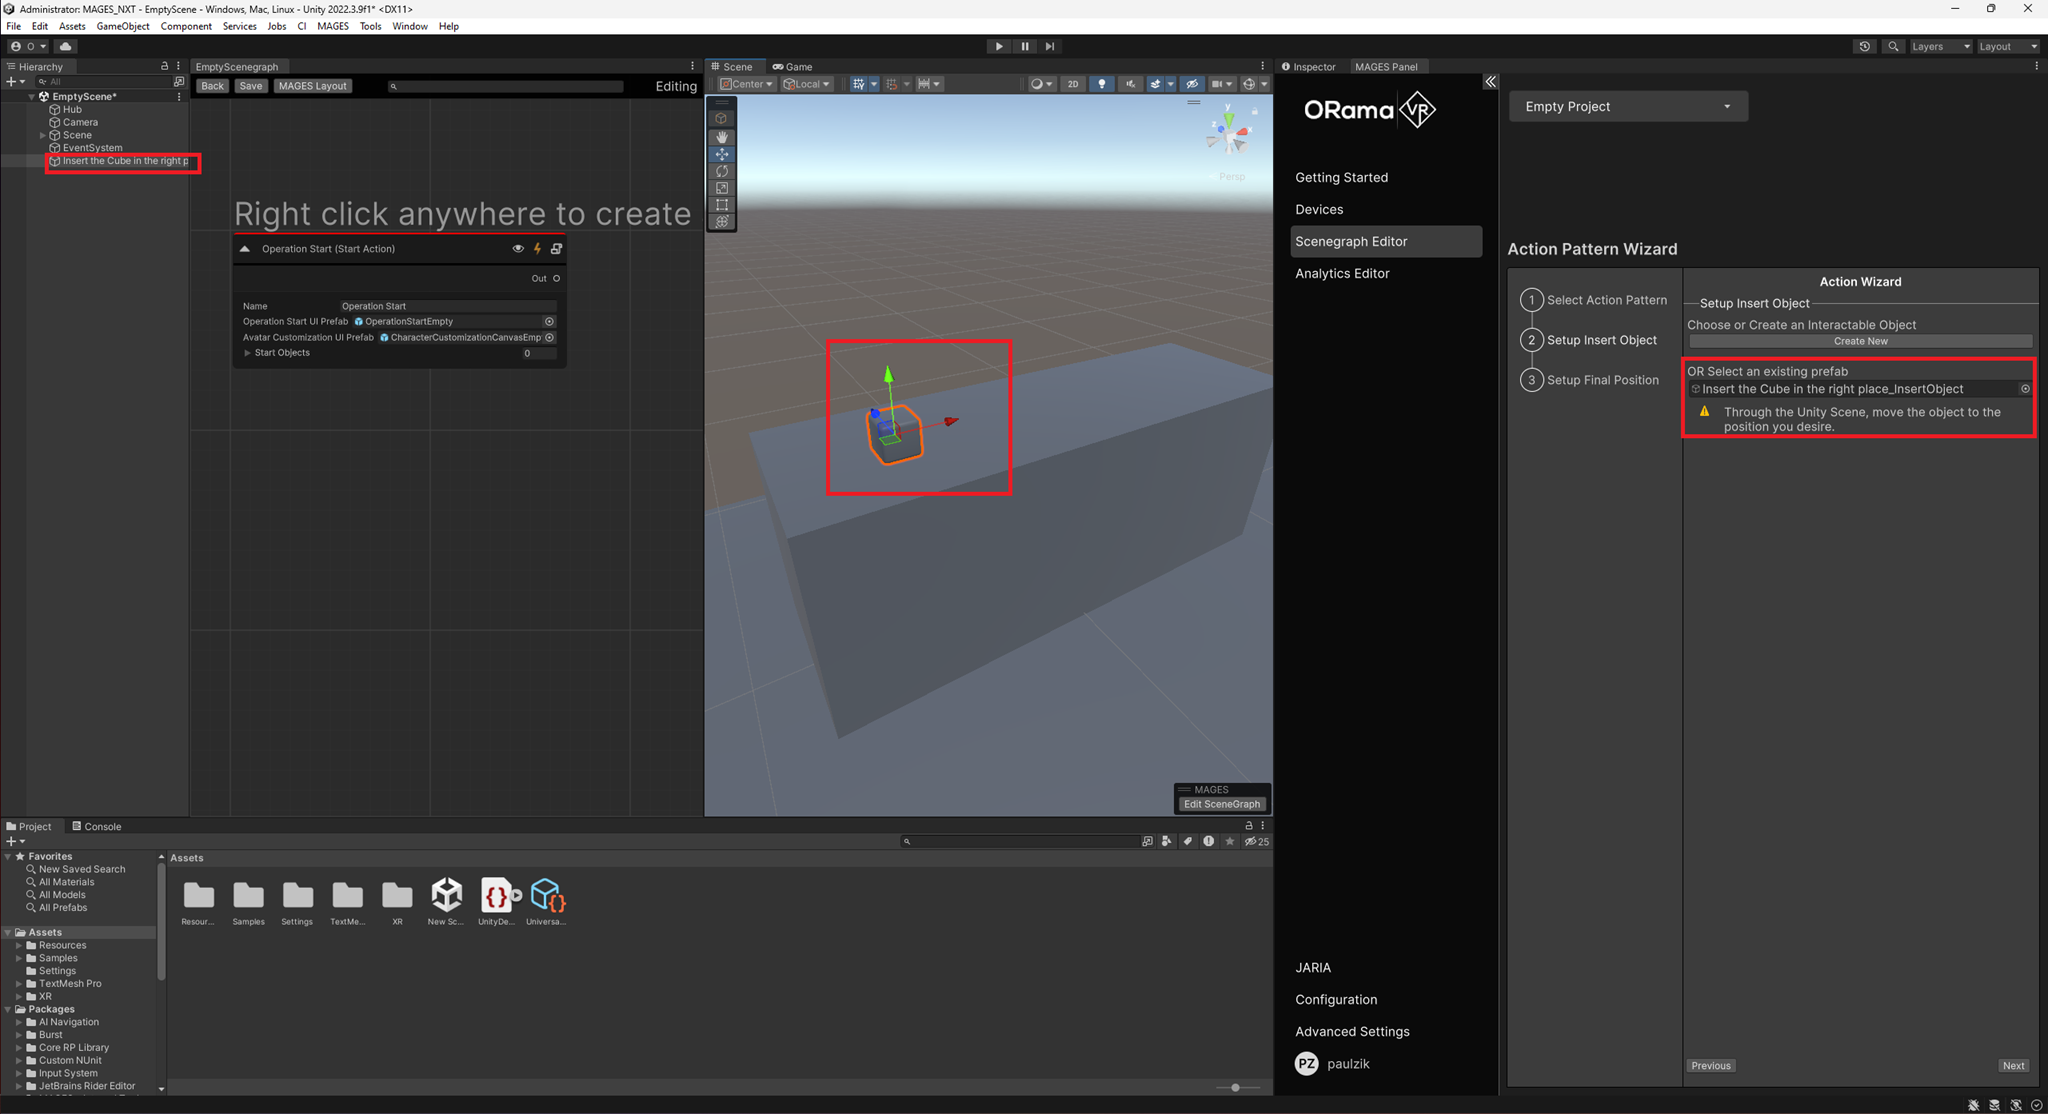
Position the Cube on the table in your scene using the gizmos, and then click the
Nextbutton again.You will be redirected to the final step, where you need to set up the final position of the insert object. In this step, a new GameObject of the cube will be spawned to represent the final position.
Once again, using the gizmos, move the final GameObject to the position where you want to be inserted and then click the
Finishbutton.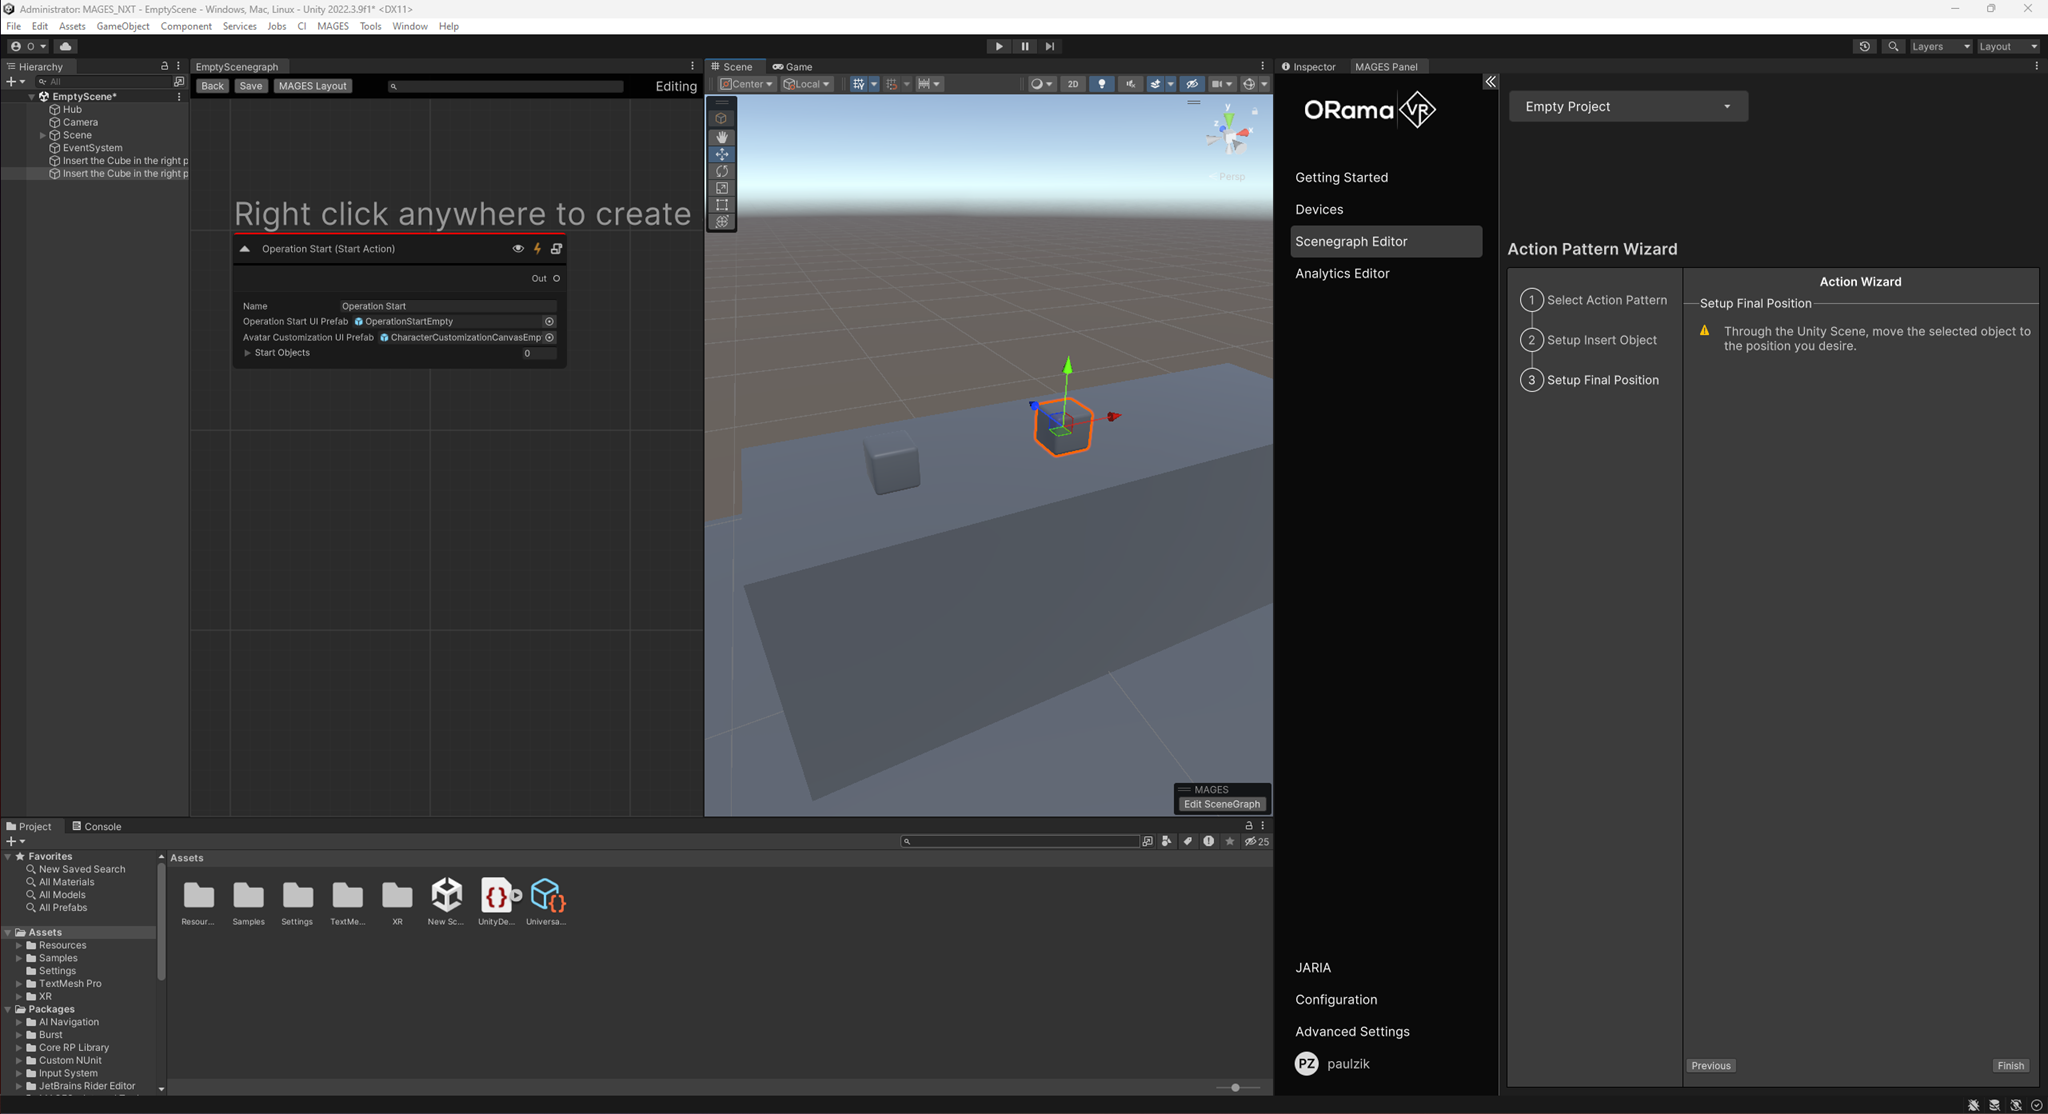
Your insert action has been created and placed in your scenegraph as the second action, ready to be used.

Make sure to save the scenegraph editor by clicking the Save button.

Note
If you’d like to explore and learn more about our Actions Patterns, refer to the Action Pattern Section. Otherwise, you can proceed with the rest of this tutorial.
Also, if you want you can skip the rest of the Actions and select your camera and play.
Create your first Use Action
Note
Our Action will require the user to take two spheres and bring them in contact for 1 second.
Click on the
Use Action. Enter your action’s name in the name property, then click theNextbutton to proceed.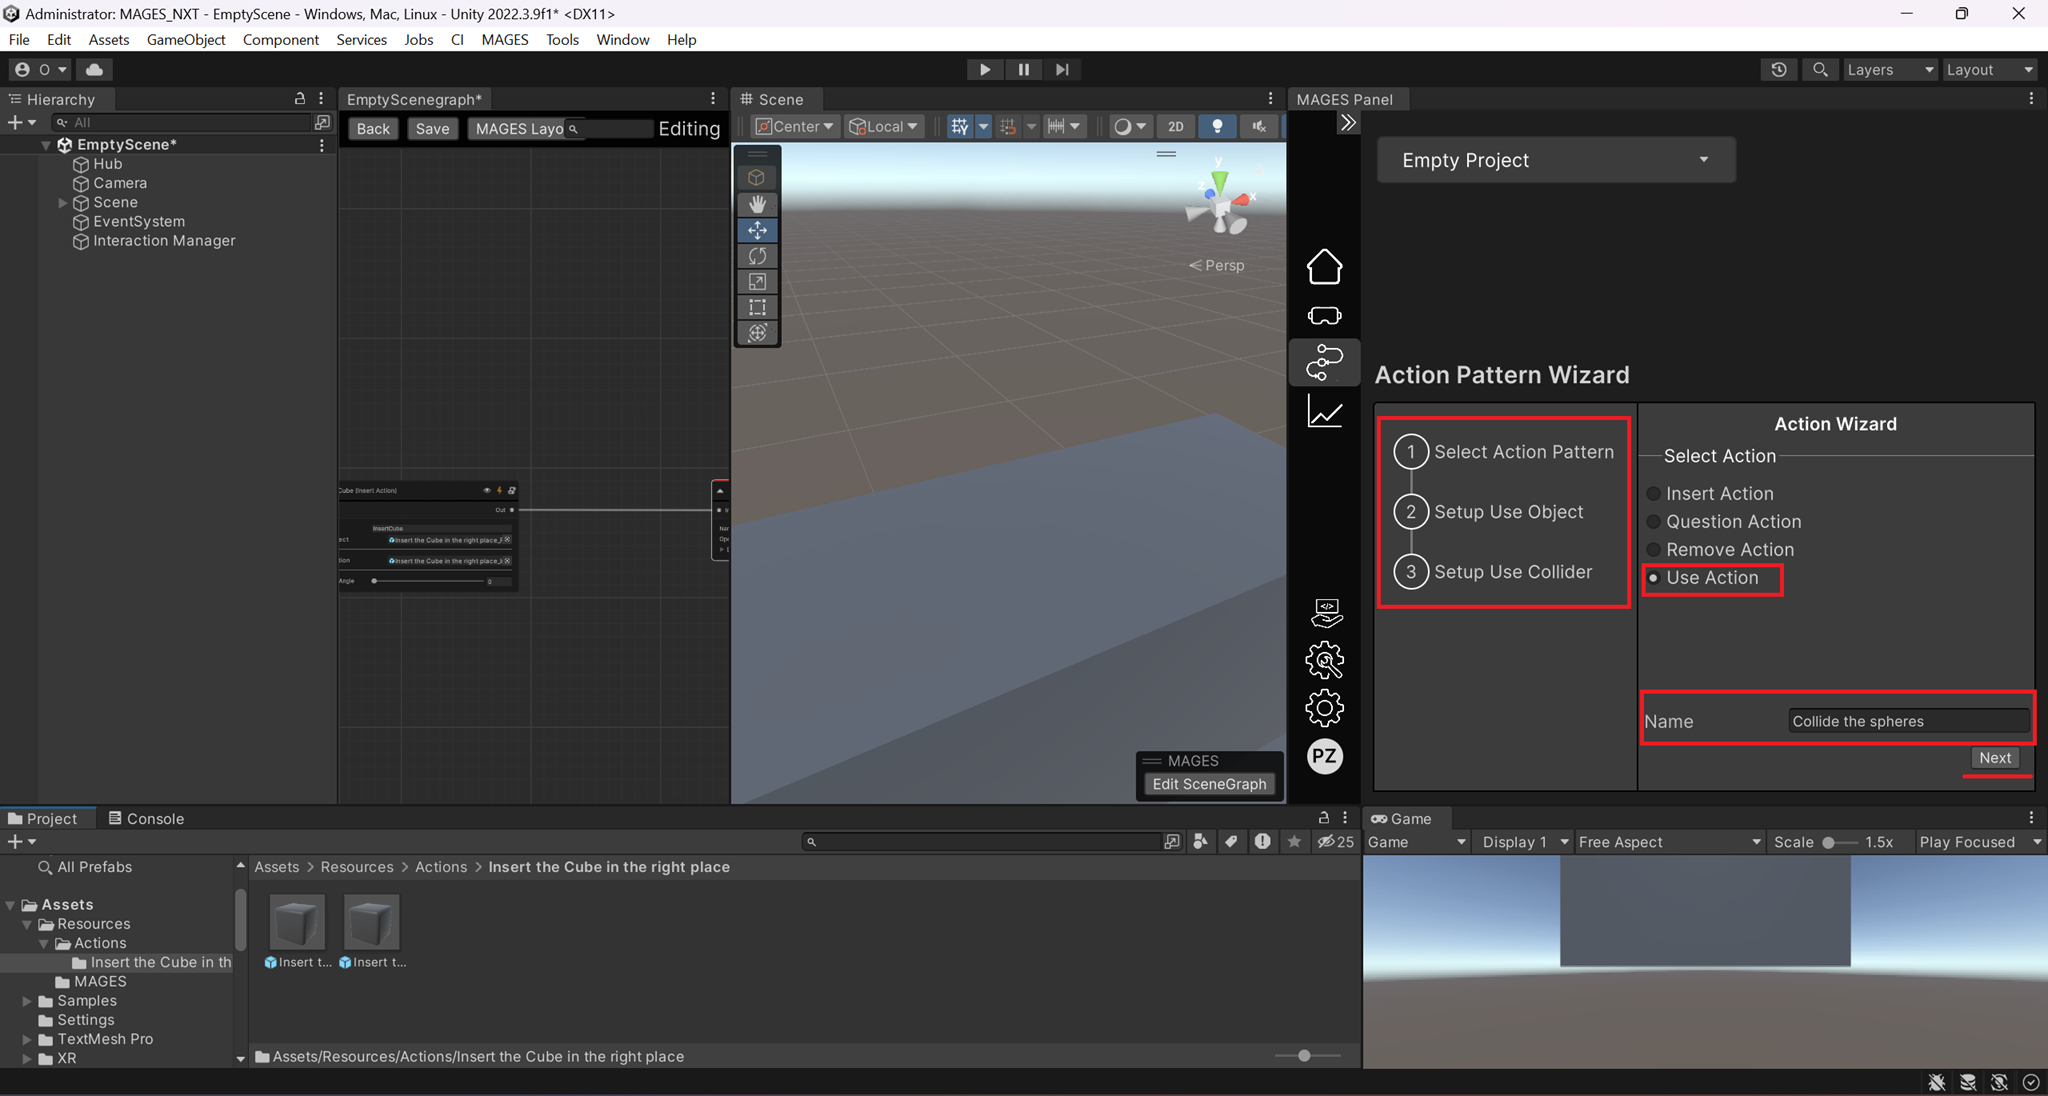
After clicking
Next, you will be redirected to theSetup Use Objectstep. Here, you can either create a new GameObject from a model in your assets or select an existing GameObject from your assets.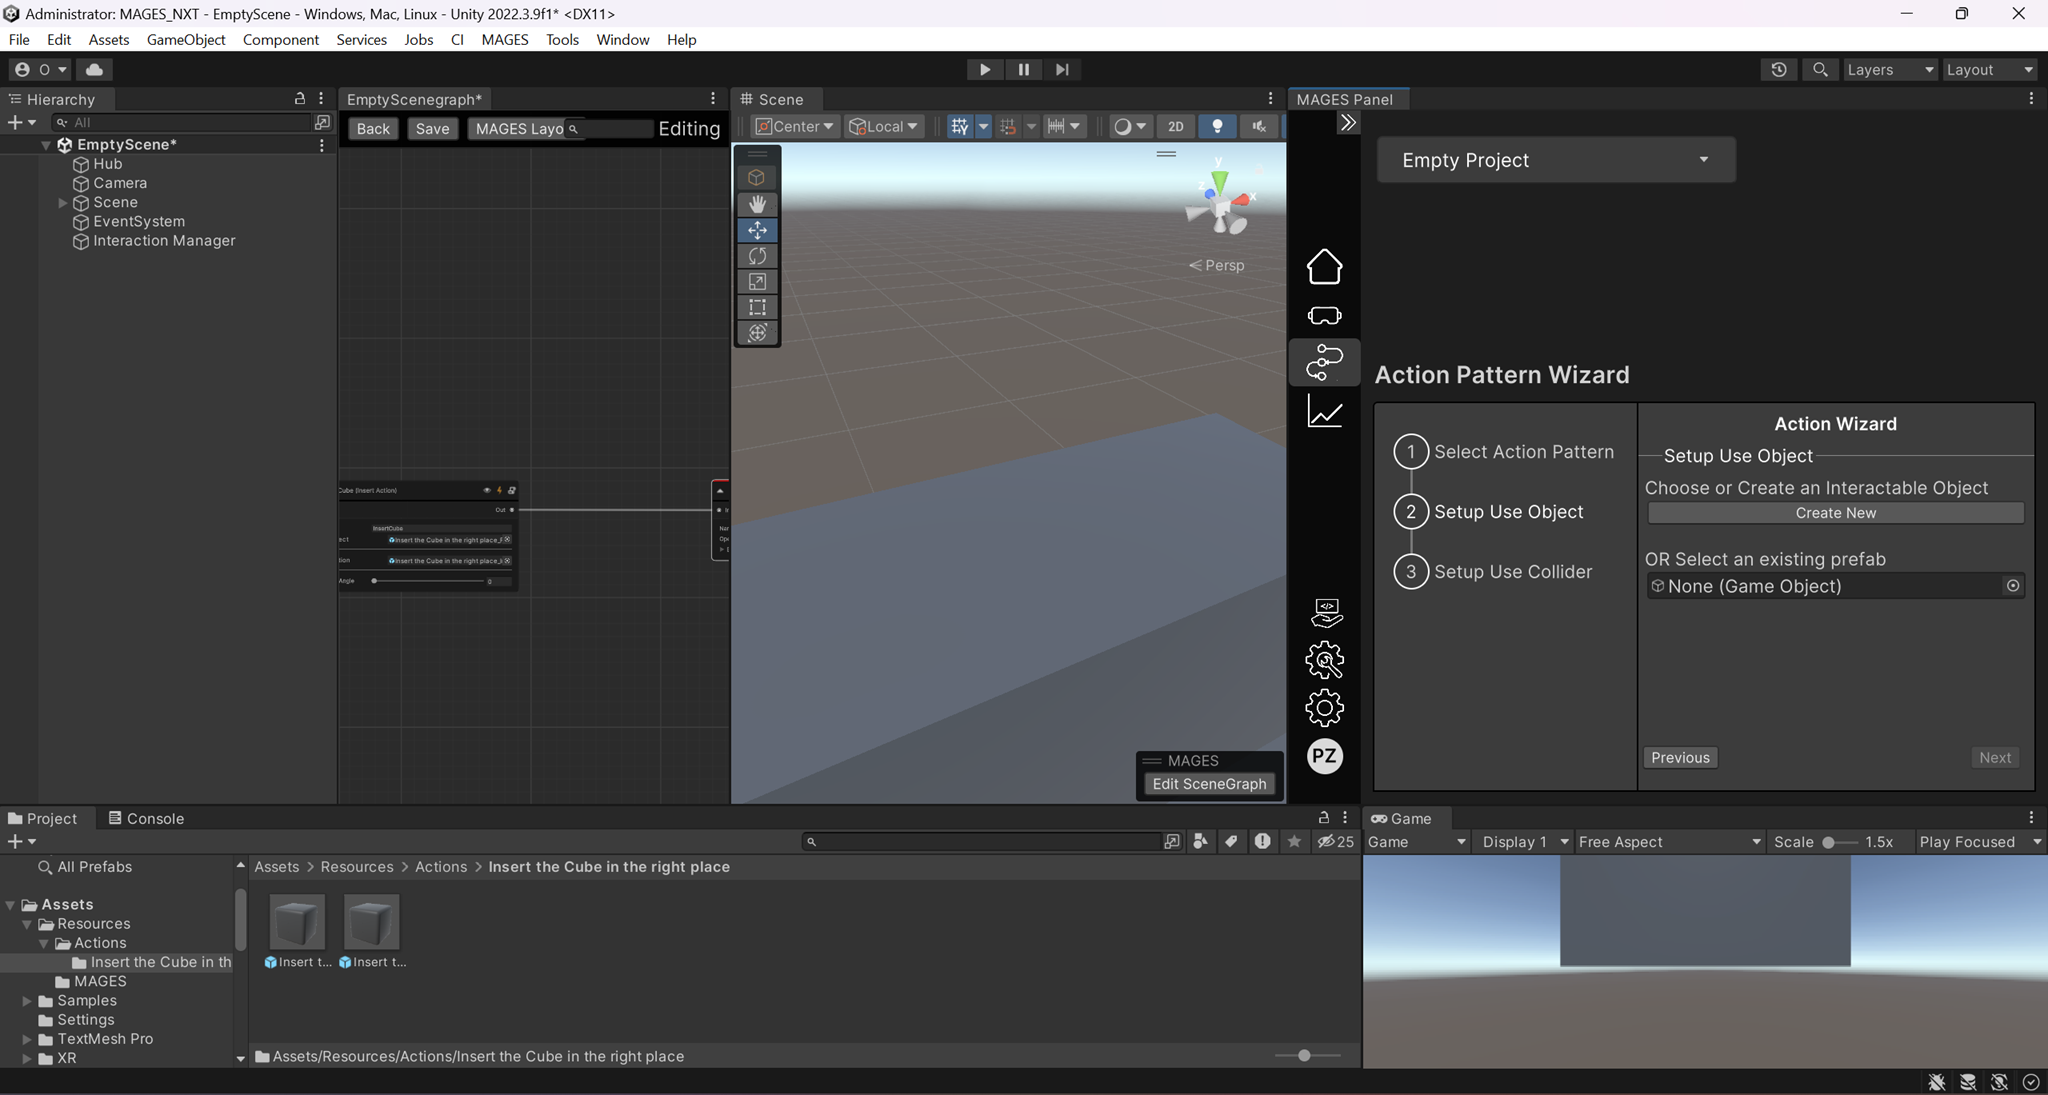
Click the
Create Newbutton, then select theSpheremodel from your assets.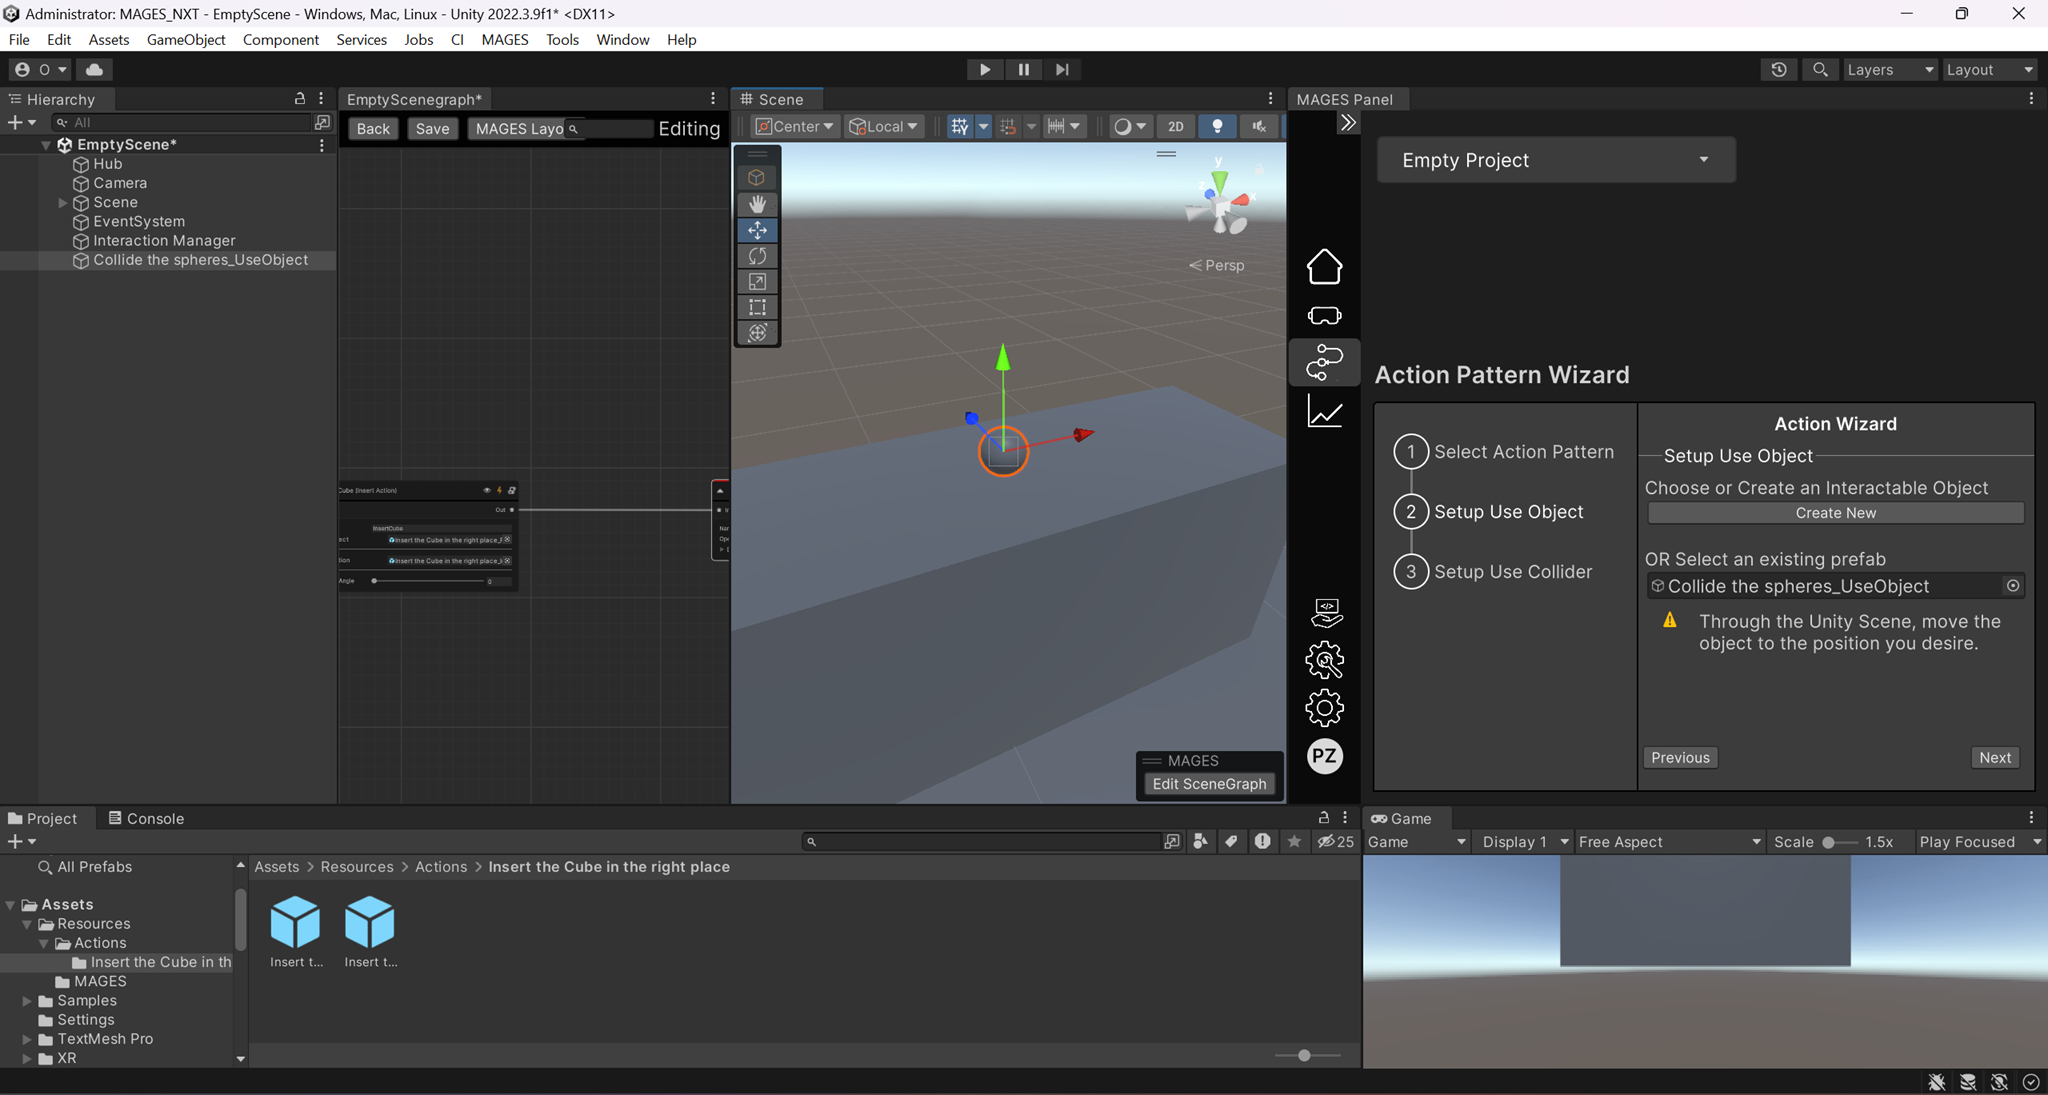
Position the sphere in your scene using the gizmos, and then click the
Nextbutton again.Now you need to set up the use collider of the use object. Again, press the
Create Newbutton, and select theSpheremodel from your assets.Once again, using the gizmos, move the use collider GameObject to your desired position, where you want the Cube to be used, and then click the
Finishbutton.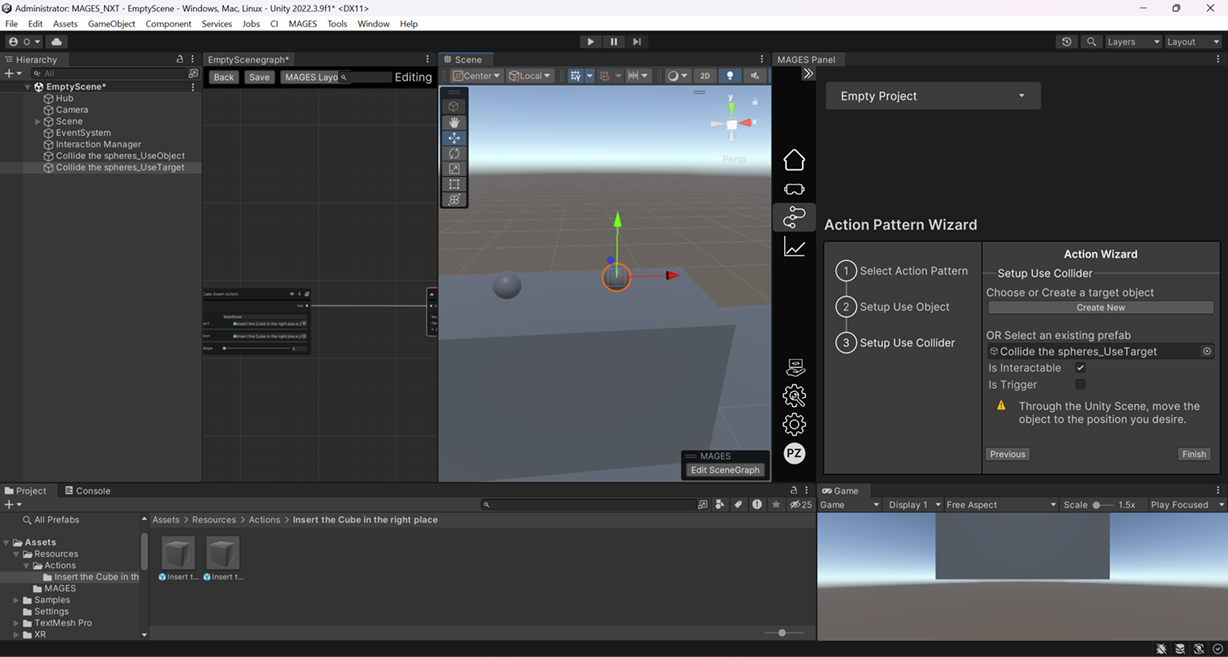
Click the
Finishbutton, the use action will be created in your scenegraph after the Insert Action.
Make sure to save the scenegraph editor by clicking the Save button.

Create your First Remove Action
Note
Our Action will require the user to grab the cube once again and throw it away.
Click on the
Remove Action. Enter your action’s name in the name property, then click theNextbutton to proceed.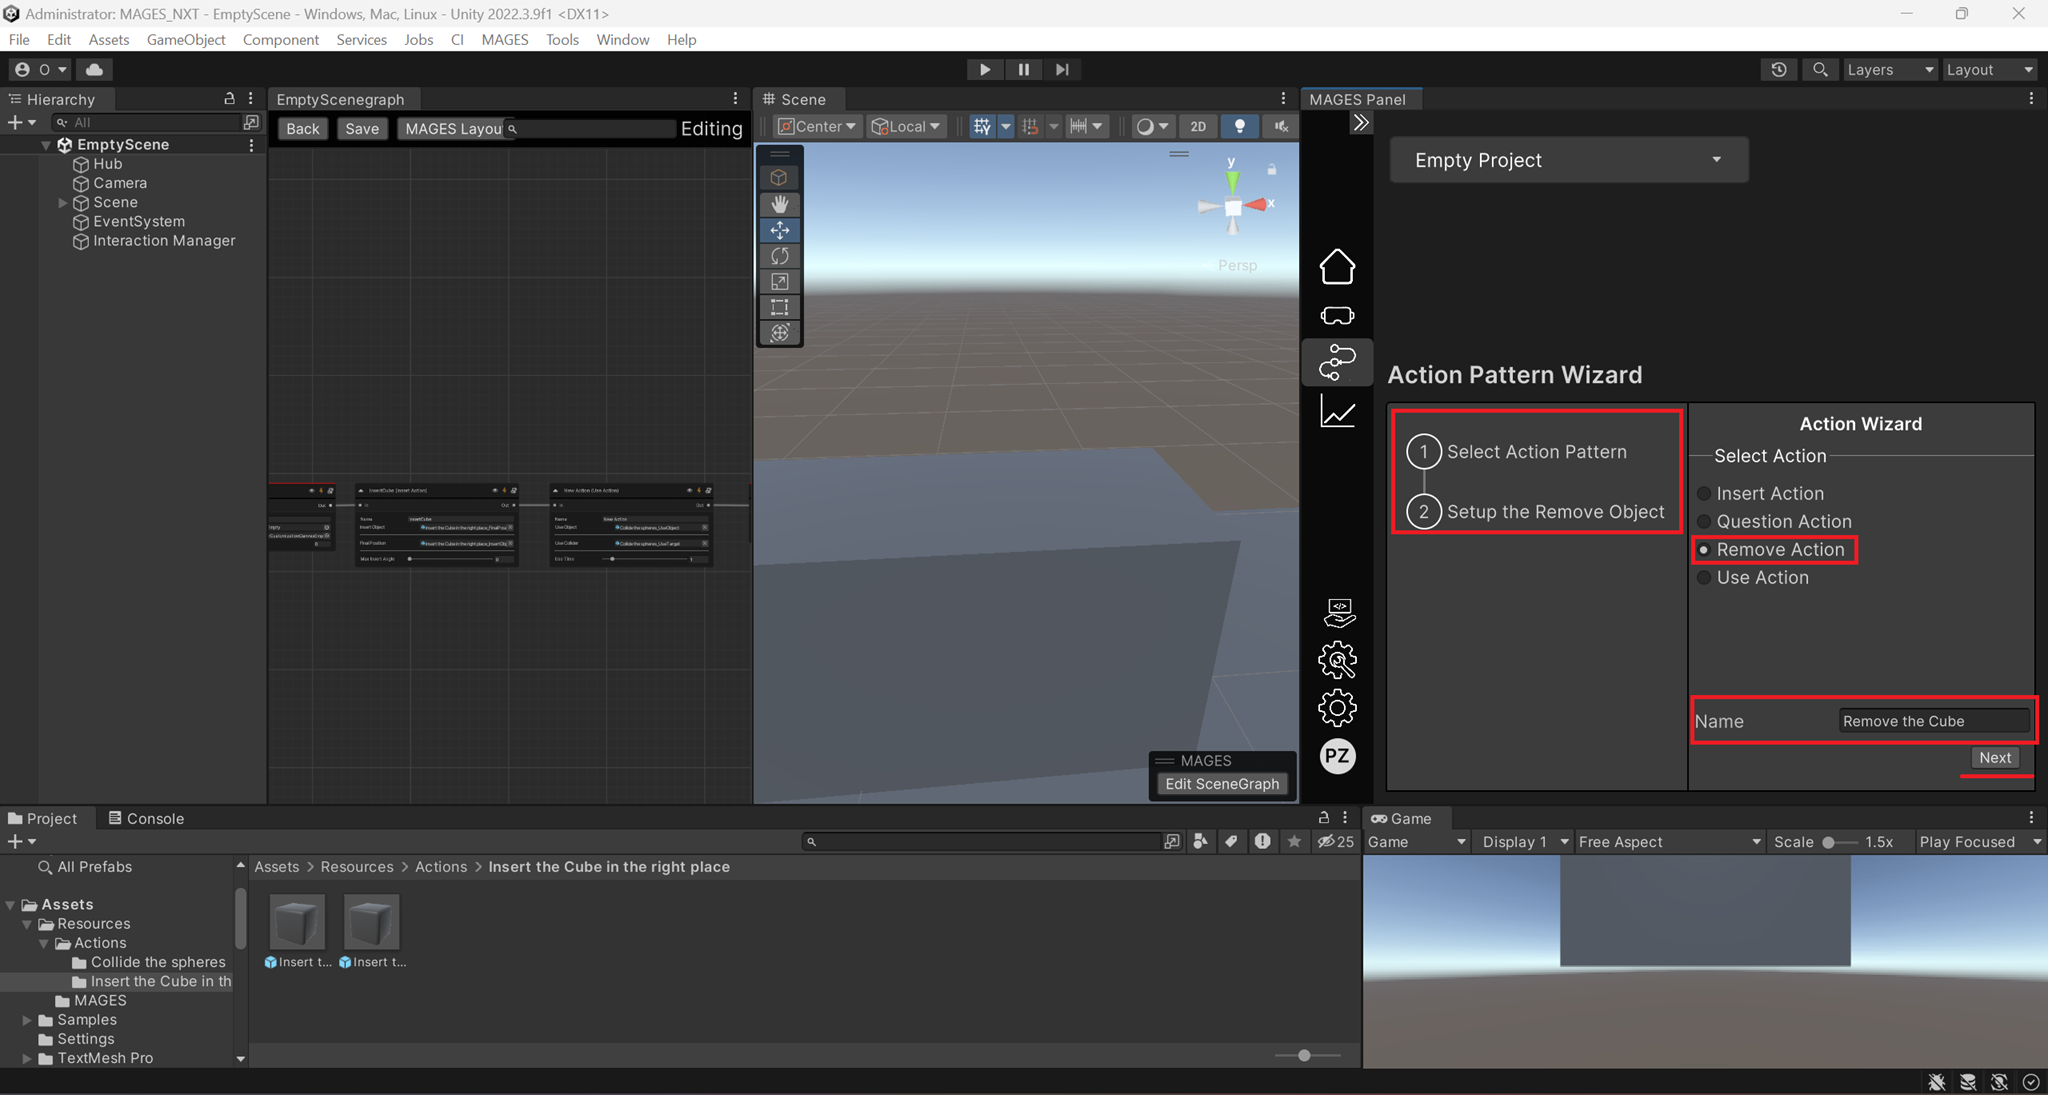
Since we will use the cube from the previous Insert Action, search the interactable cube (not the final position) from your Assets and drag and drop it in the prefab field. In our case its path is
Assets/Resources/Actions/Insert the Cube in the Right Place/Insert the Cube in the right place_InsertObject.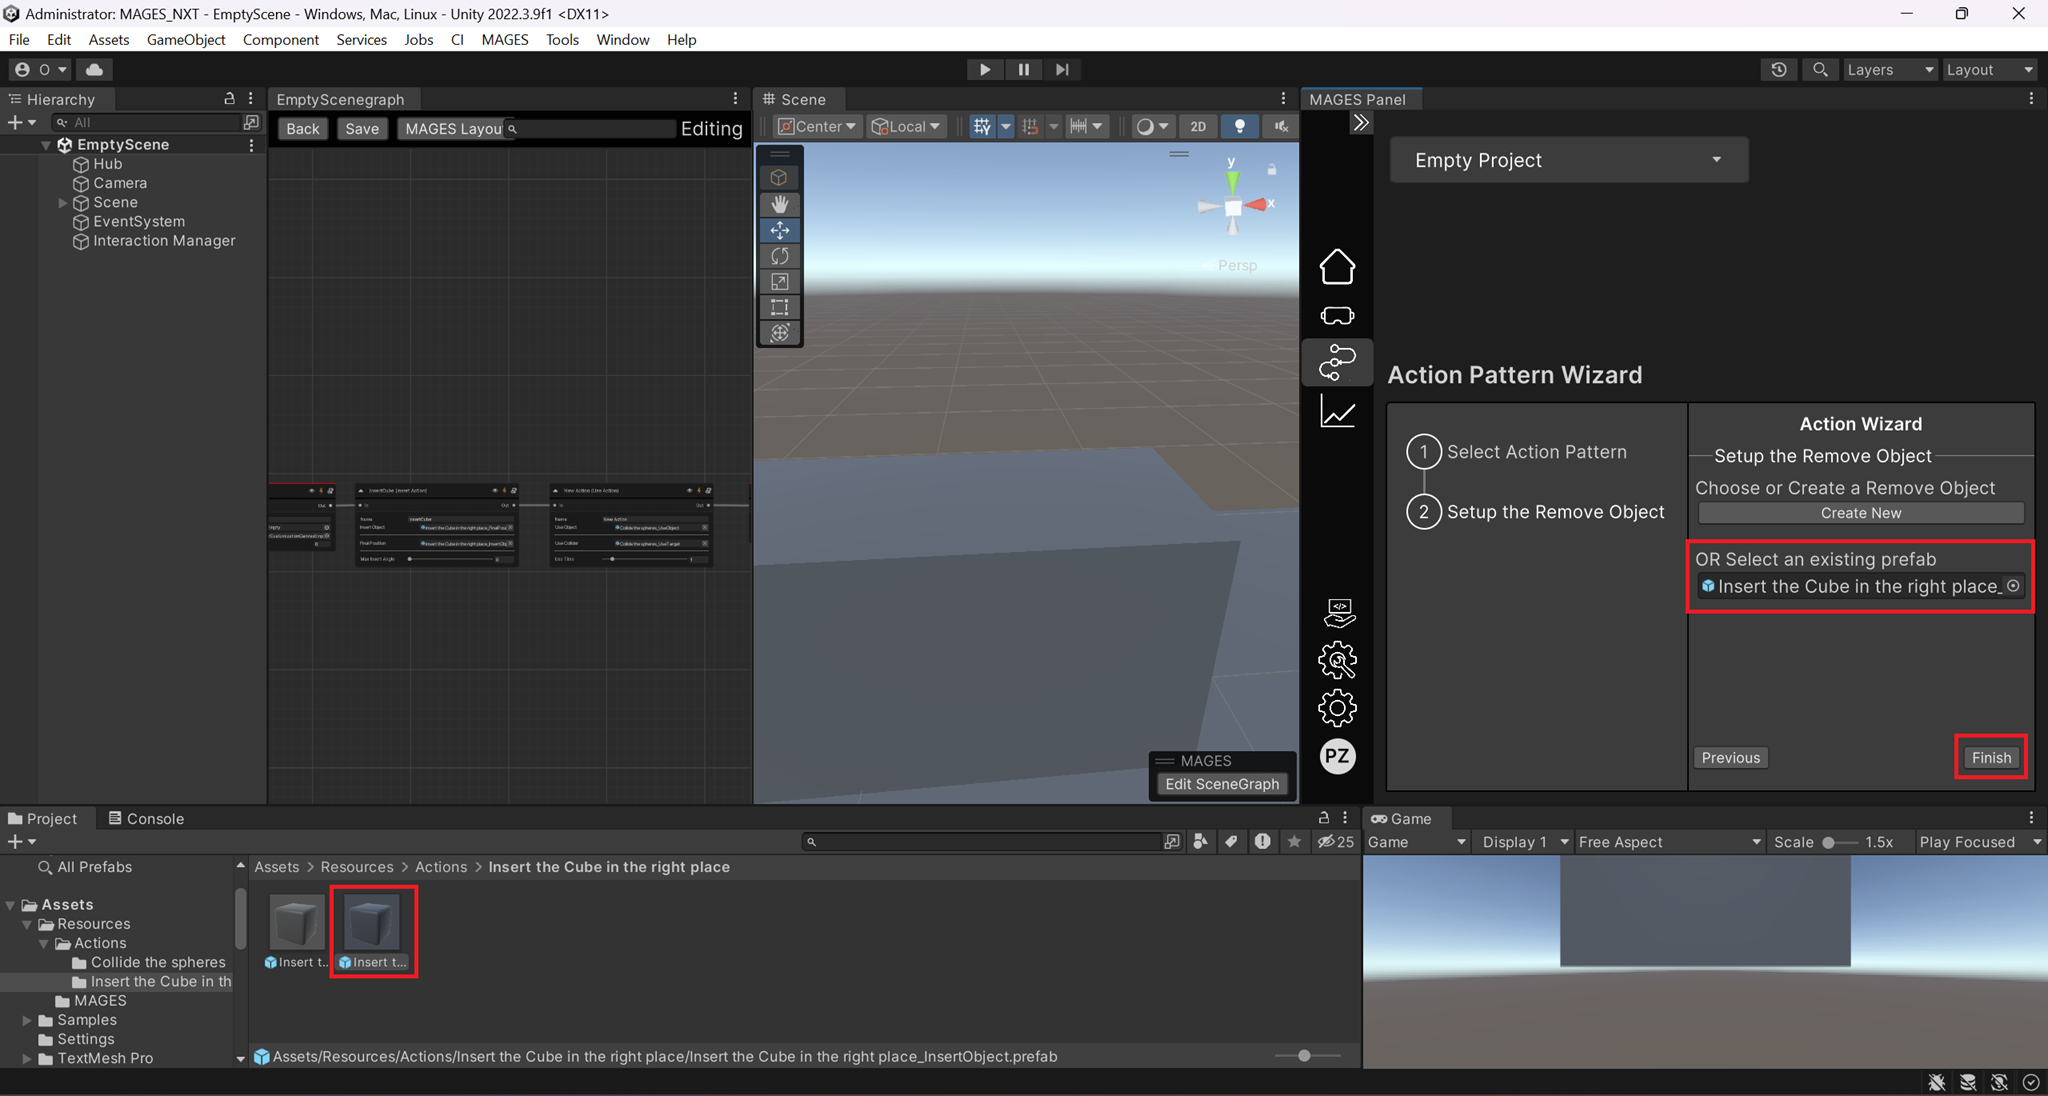
Click the
Finishbutton. The remove action will be created in your scenegraph after the Use Action.
Make sure to save the scenegraph editor by clicking the Save button.

Create your First Question Action
Note
Our Action will require the user answer a simple question.
Click on the
Question Action. Enter your action’s name in the name property, then click theNextbutton to proceed.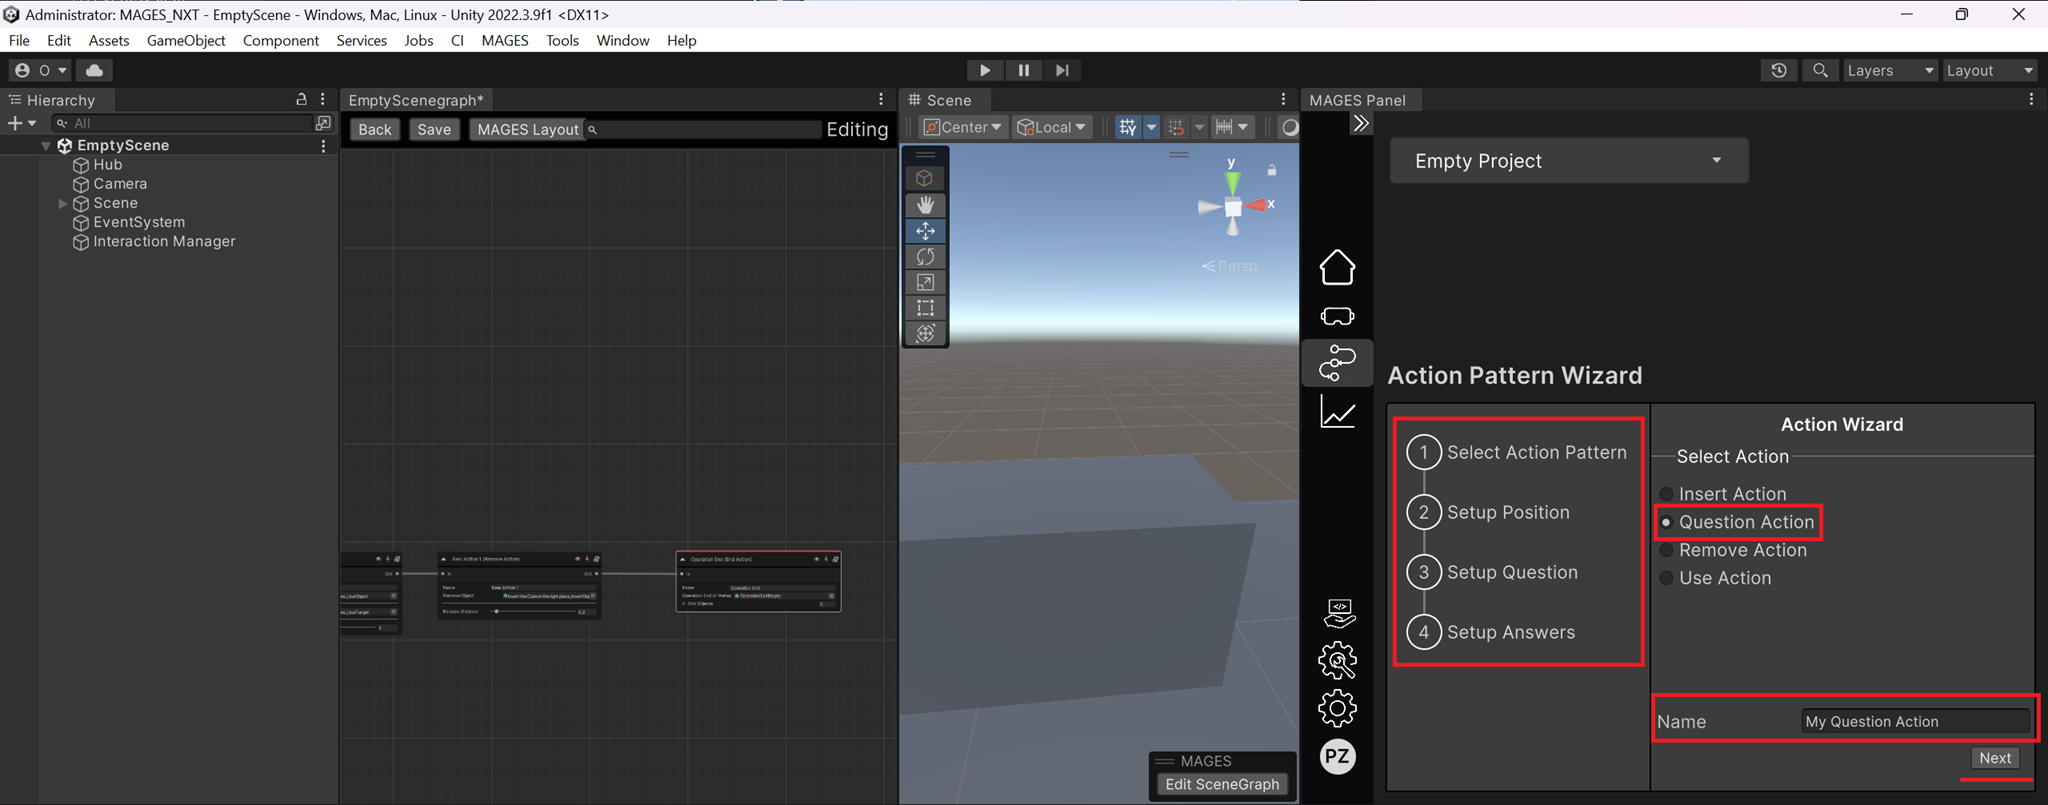
Position the question object where you wanted to be and click the
Nextbutton.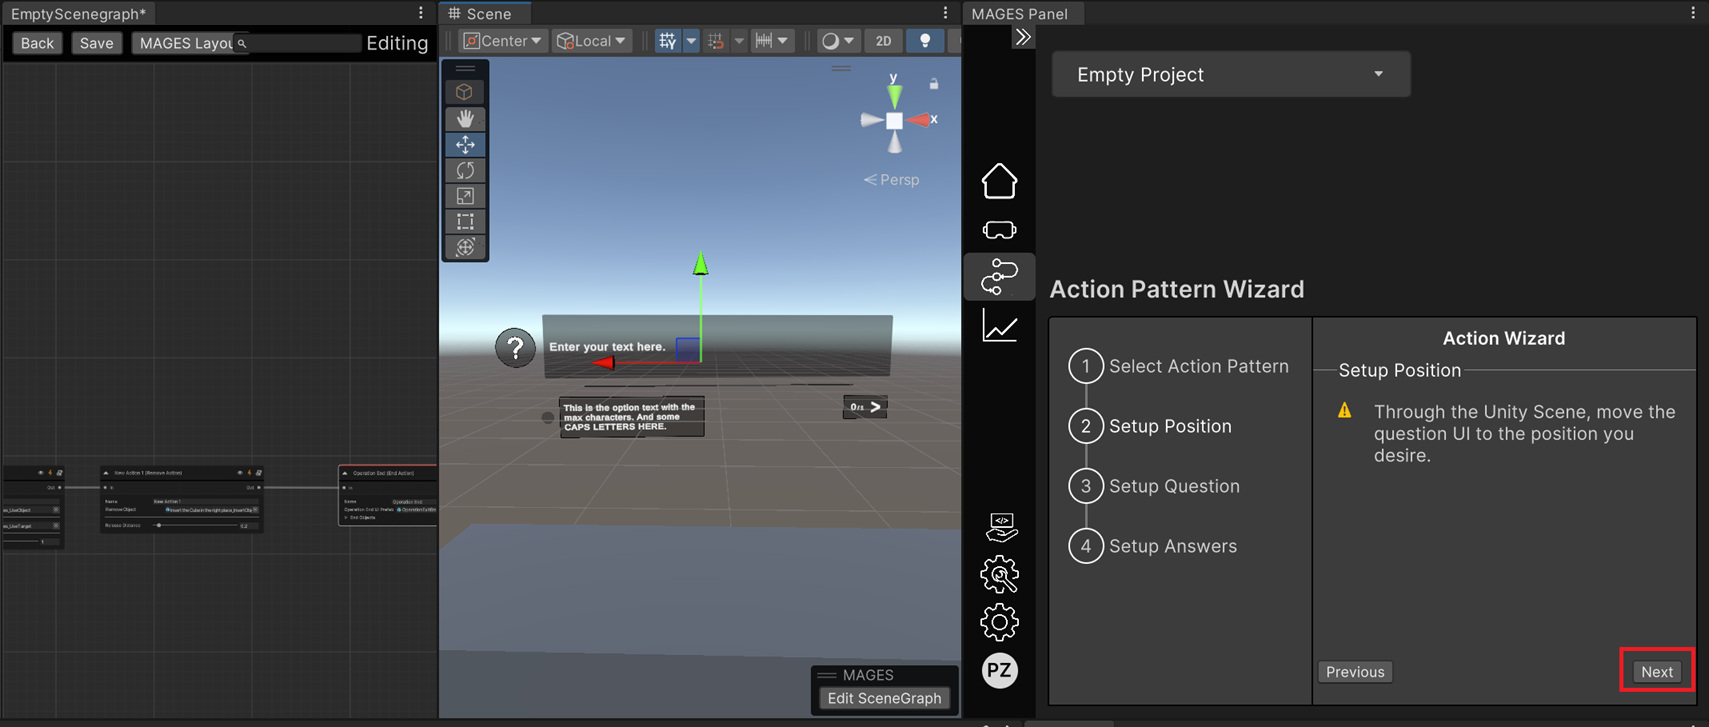
Fill the question to be asked and click the
Nextbutton.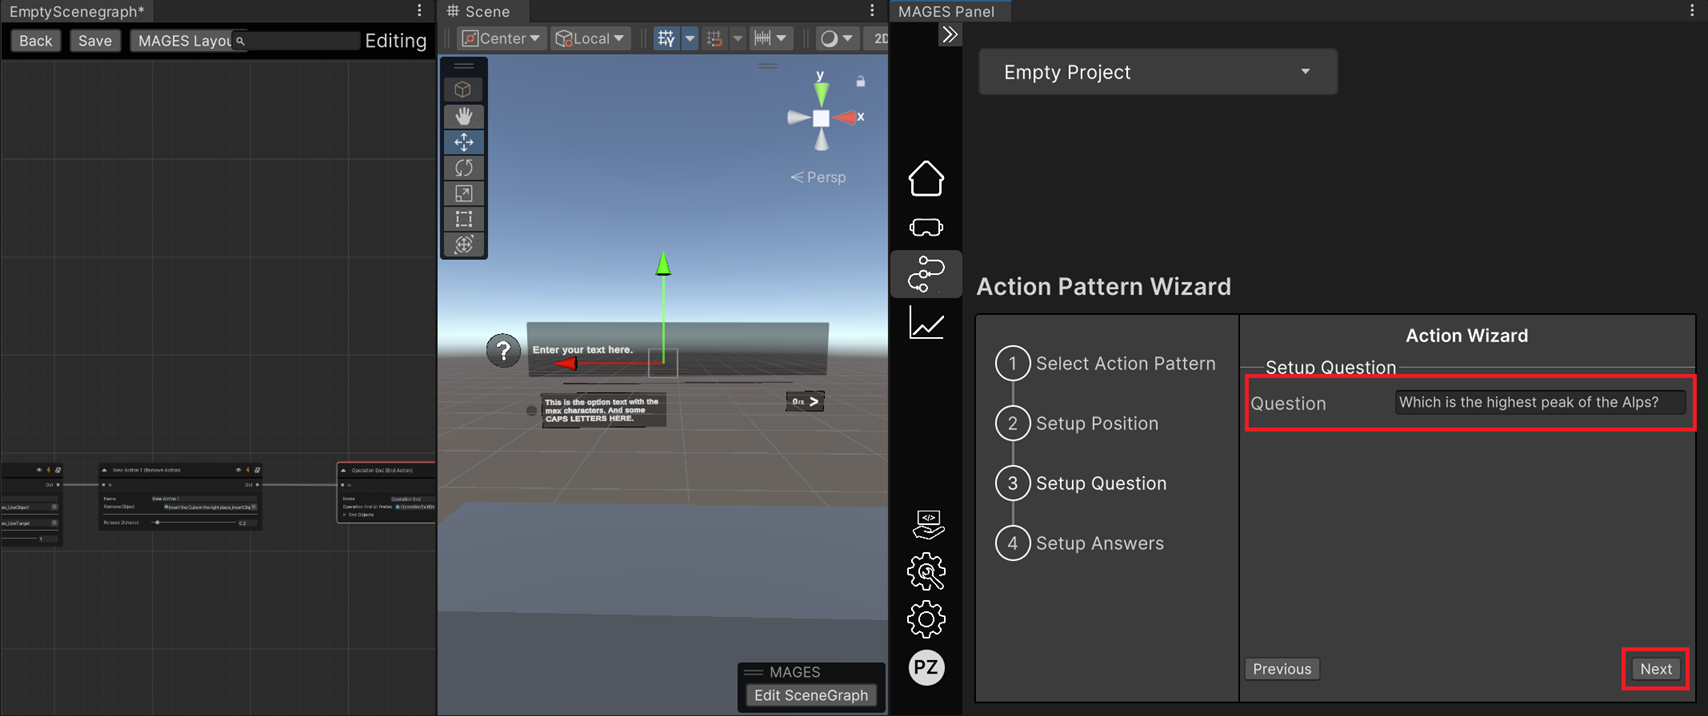
Populate a list with possible answers to this question by clicking the
+button. Also select which answer is the correct one by clicking the correct button. Then click theFinishbutton.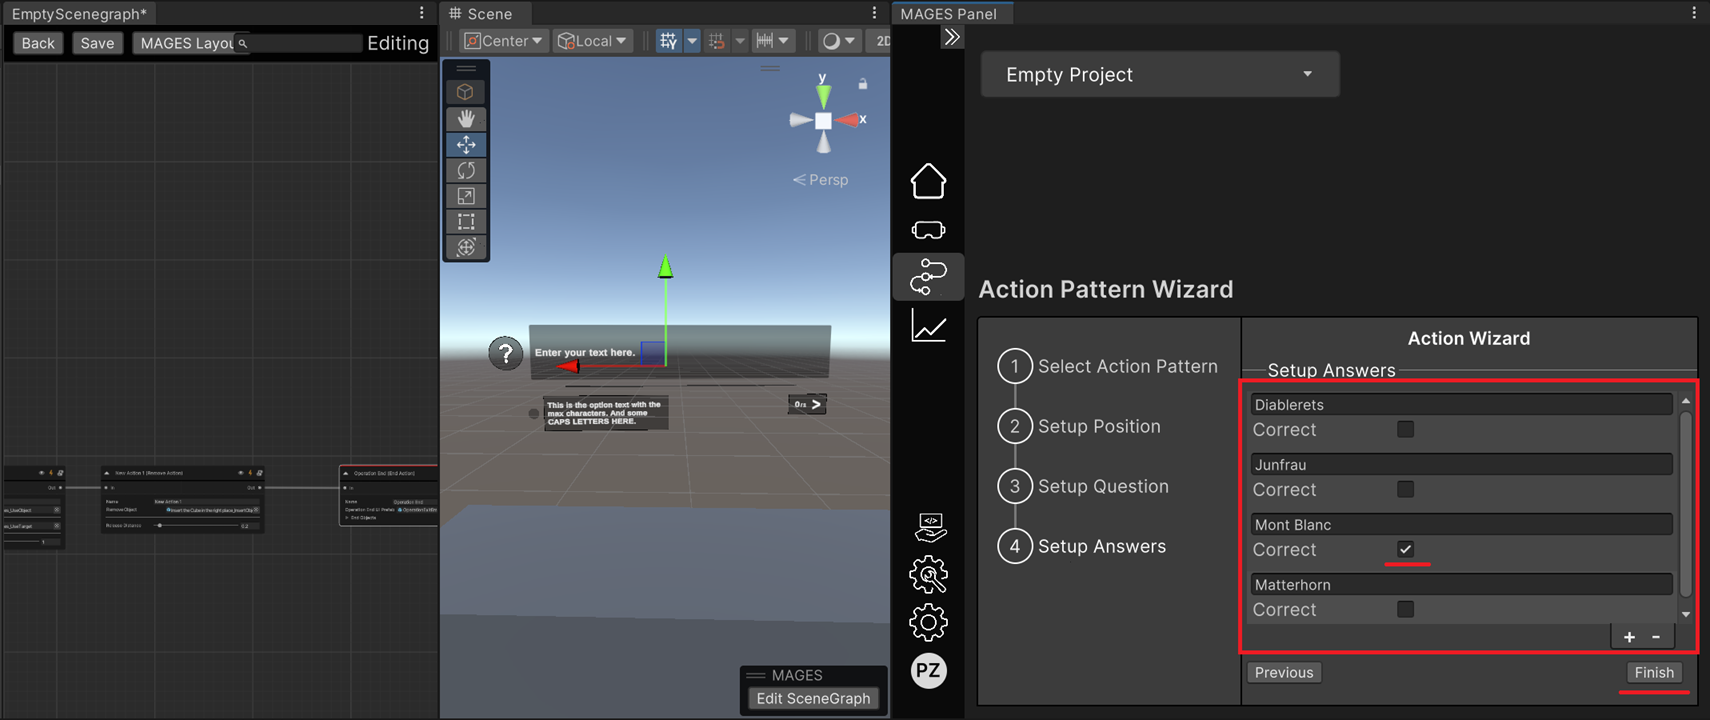
The Question action will be created in your scenegraph after the Remove Action.

Make sure to save the scenegraph editor by clicking the Save button.

Select your camera and play
Select the appropriate device from the MAGES Panel. Mobile 3D refers to the device for non-VR play mode, while XR Devices refers to using a Head-Mounted Display (HMD). For detailed controls associated with each device, please consult the information located at the bottom of the page.
Note
The Mobile 3D camera is only for spectating as it does not support any interaction with the 3D objects. You can only perform and undo the Actions by pressing the corresponding buttons on your screen.
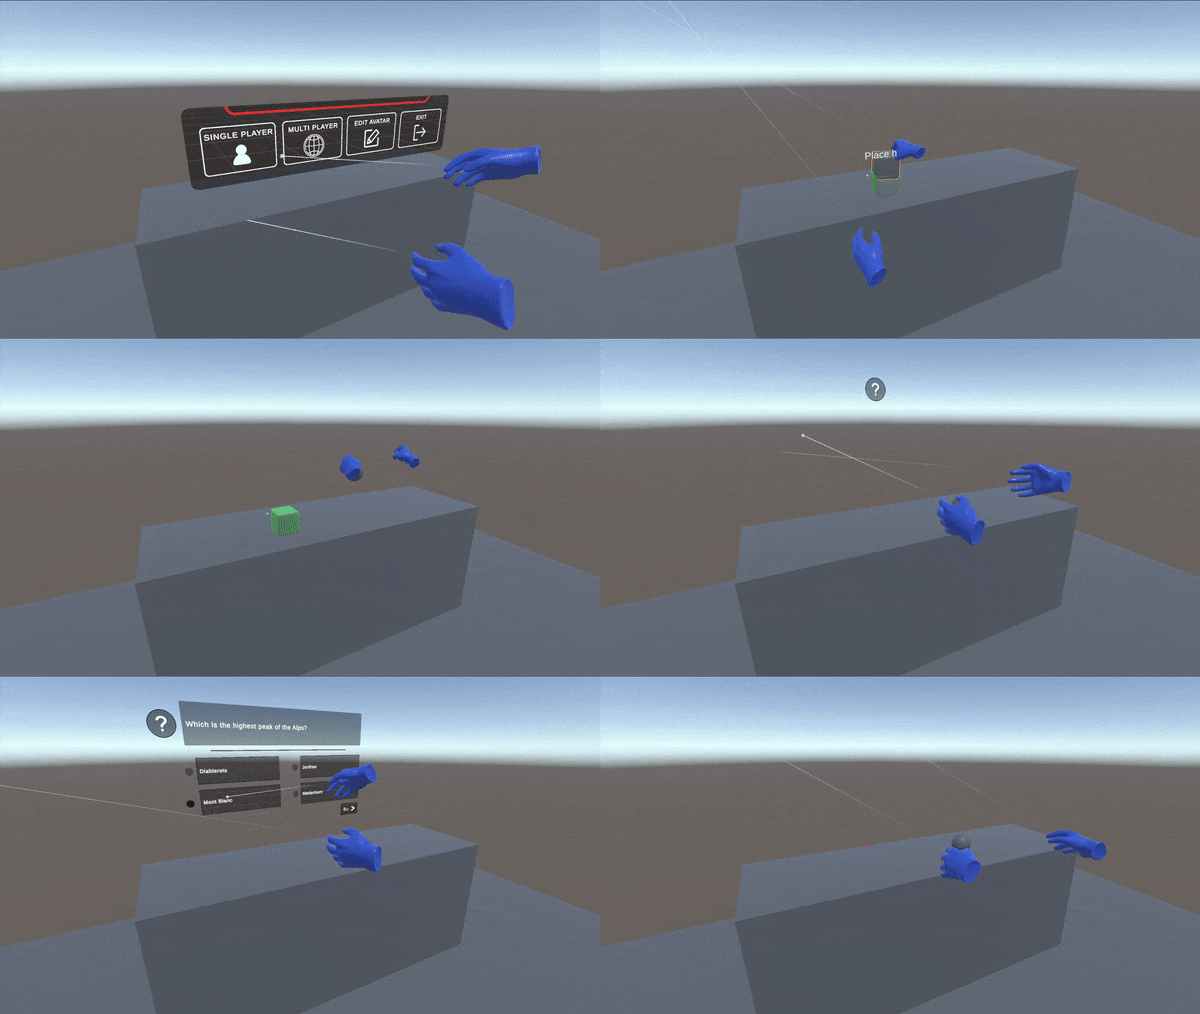
Playthrough using the XR Device and a VR Headset.
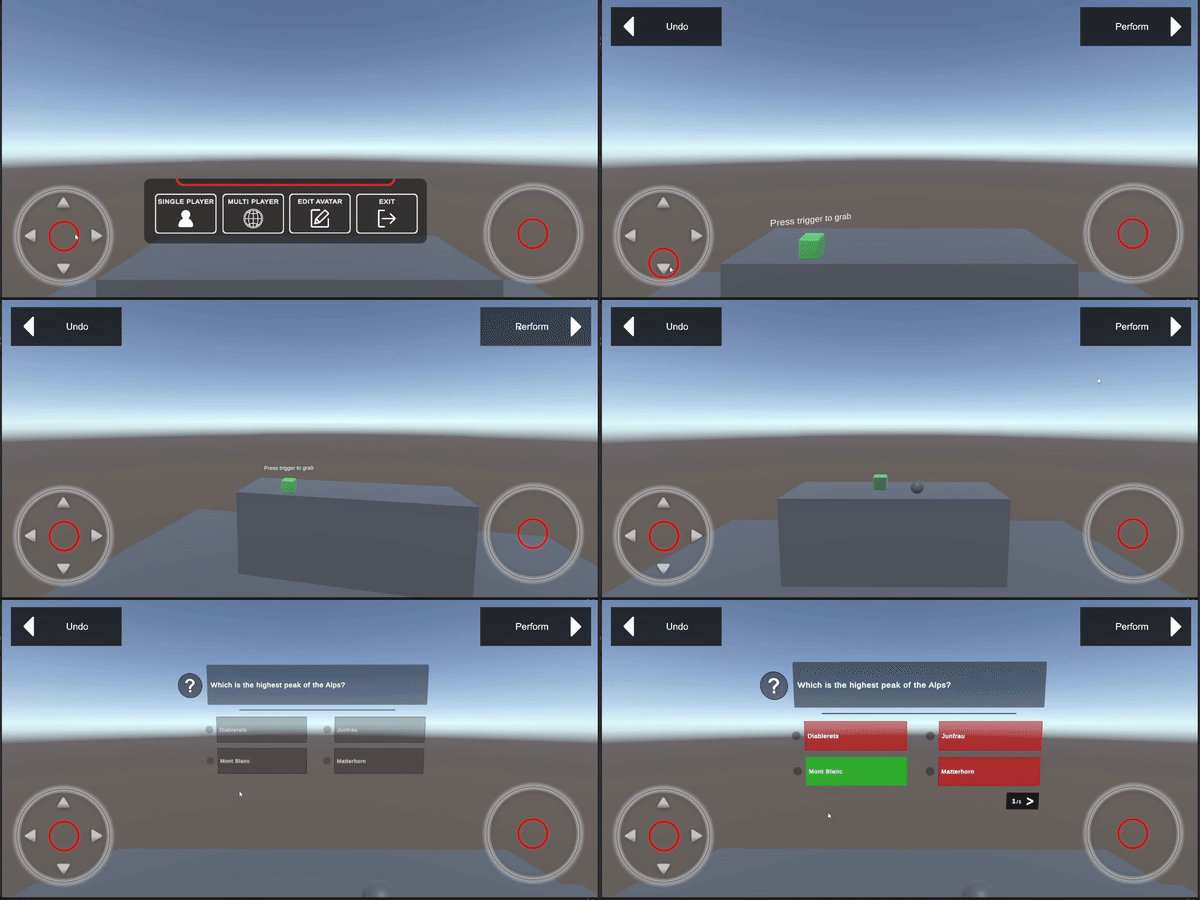
Playthrough using the Mobile 3D device.
While in play mode, by clicking the Open SceneGraph button at the bottom right during the scene preview, you can watch the Scenegraph in running mode.
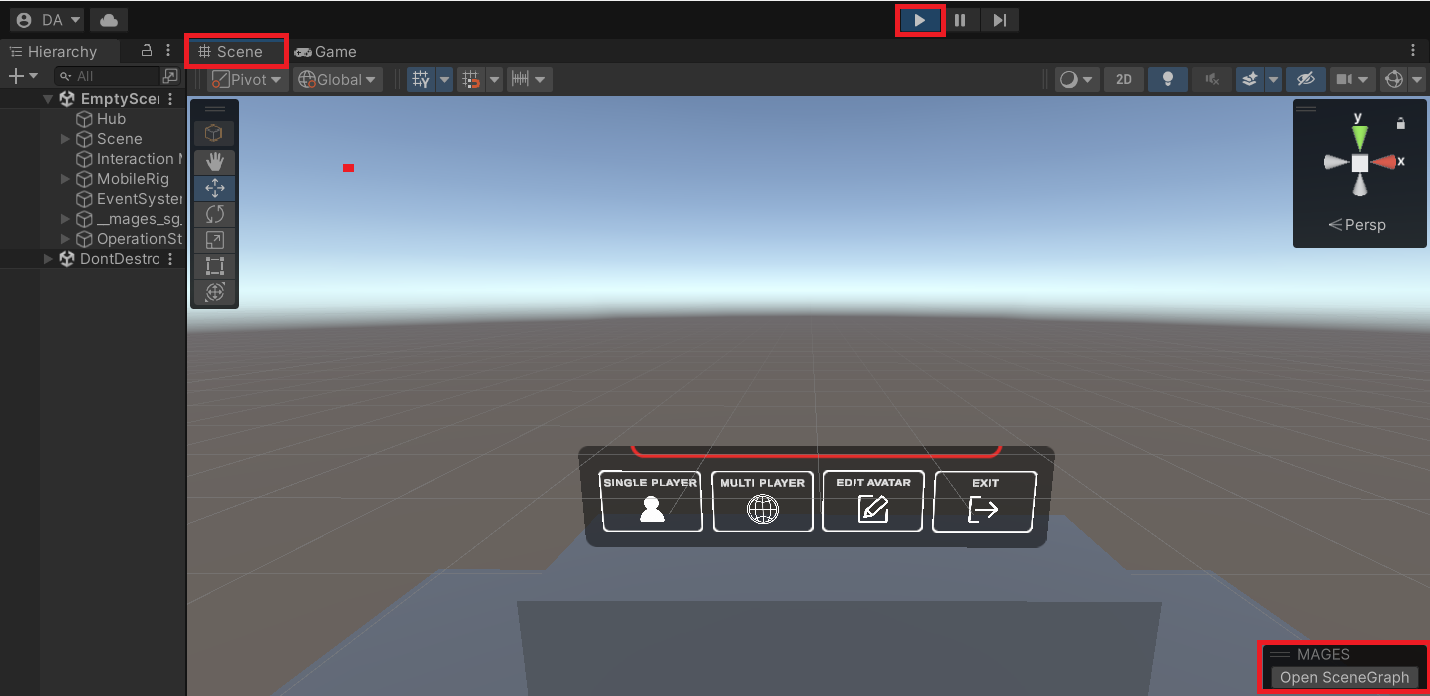
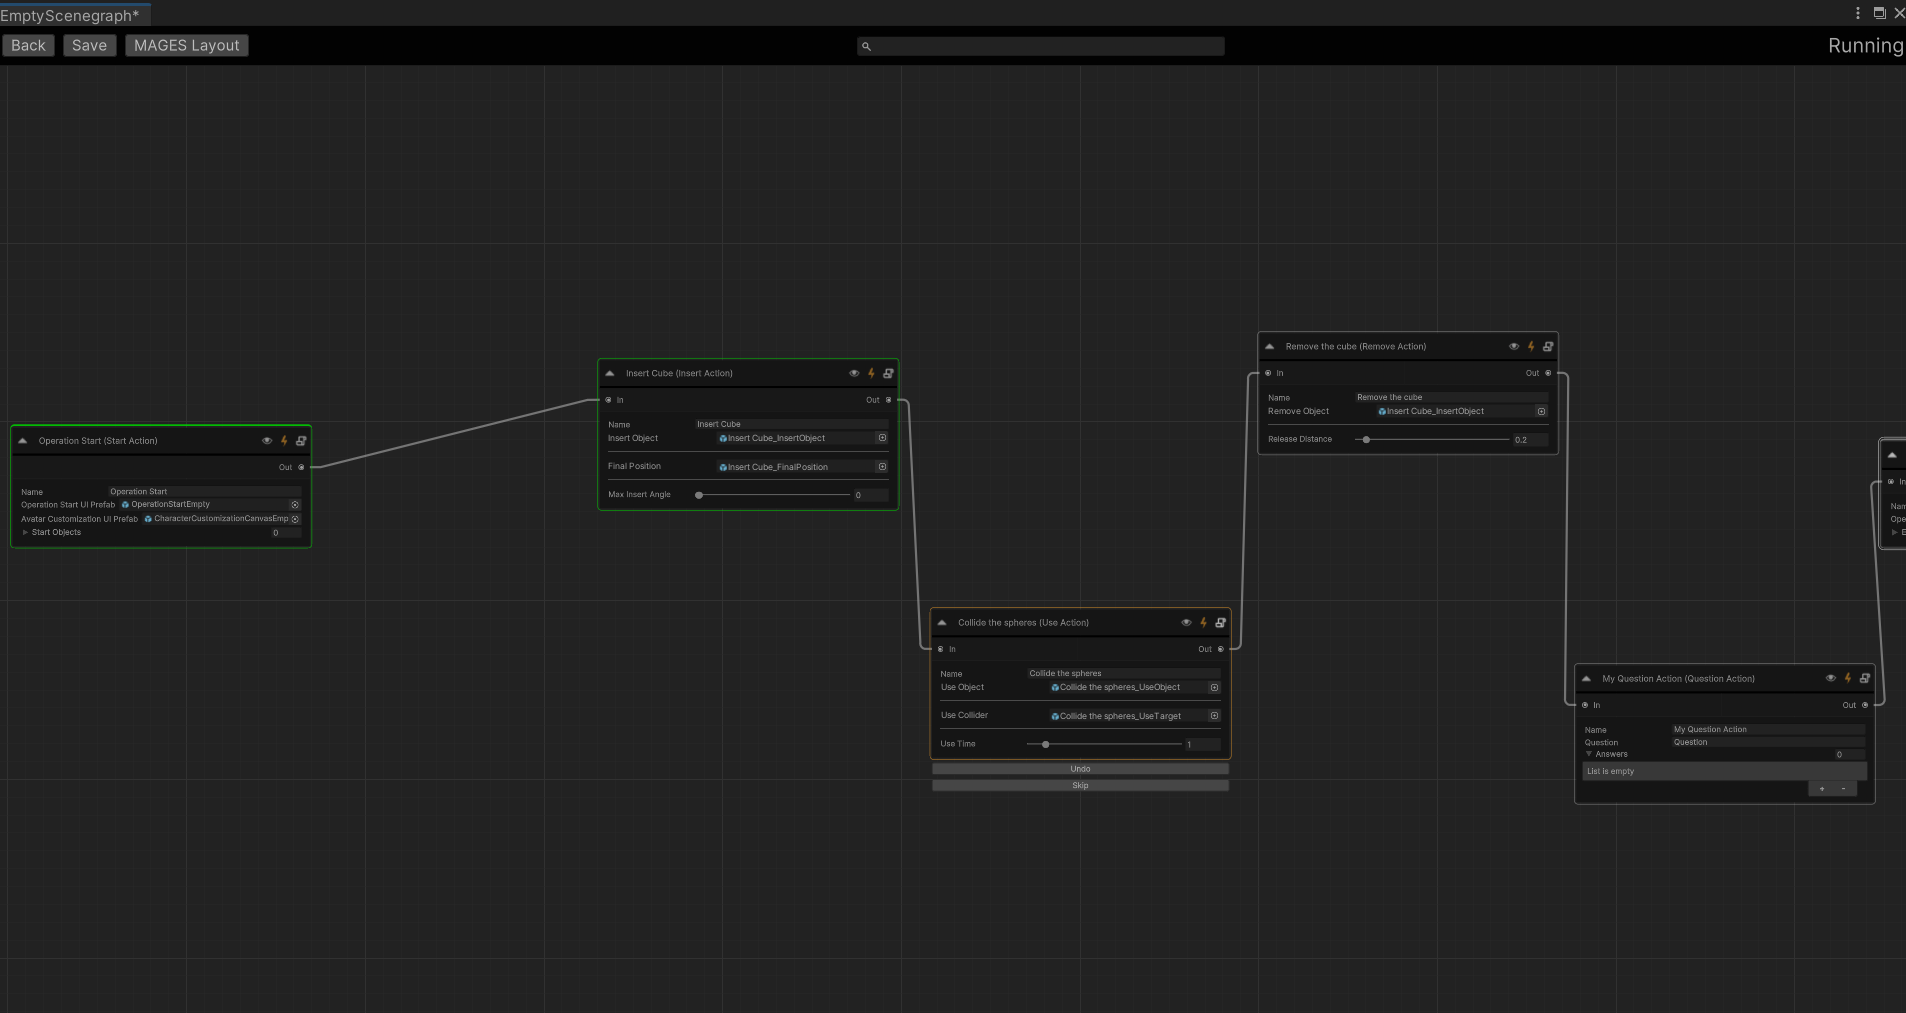
Each node has a different outline color. A green outline means the action has been performed. An orange outline means the action is activated and waiting to be performed, and the grey outline means the action is still locked. Under each active node, there’s a skip and undo button.
Regarding movement, you can find the controls for every supported platform and headset.
Oculus Quest |
VIVE |
Windows Mixed Reality |
Mobile 3D |
|
|---|---|---|---|---|
Grabbing Objects |
Grip Button |
Grip Button |
Grip Button |
|
UI Selection & Usage of Tools |
Trigger Button |
Trigger Button |
Trigger Button |
Left Mouse Button (Works only for UI Selection) |
Toggle Movement |
Press Left Touch Thumbstick |
Left Menu Button |
Right Menu Button |
|
Positional/Rotational Movement |
Left/Right Touch Thumbstick |
Left/Right Trackpad |
Left/Right Thumbstick |
Left/Right On Screen Joystick |
Toggle In-game Options |
Press Right Touch Thumbstick |
Right Menu Button |
Right Menu Button |
End of the operation
When you reach the Operation End Action. This menu appears on the screen.
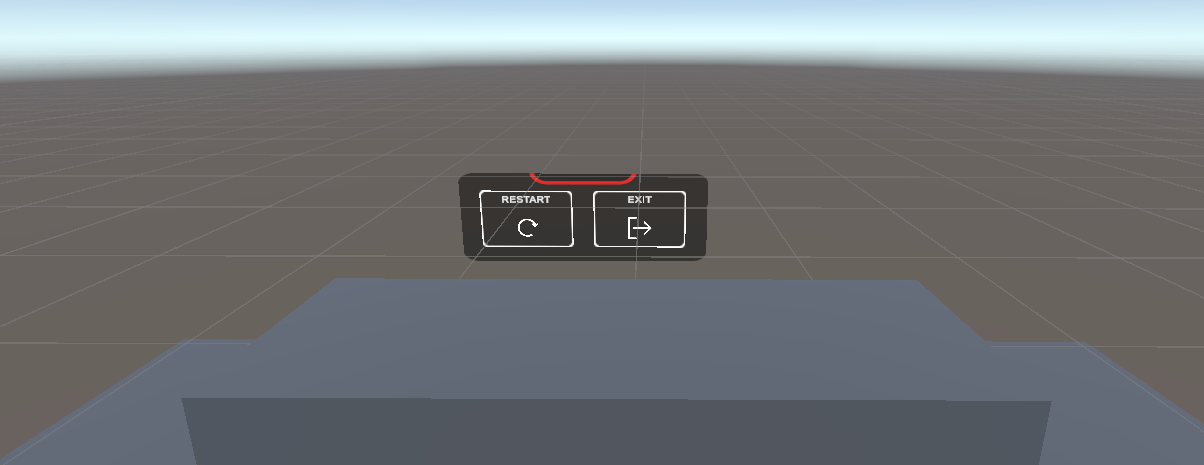
From this menu you can restart or exit the application.
Note
Restarting the application reloads the scene and starts the simulation from the beginning.
If you are hosting a co-op session, restarting the simulation will terminate the session for the other users as well. Thus you have to create a new session.
You can modify the UI shown on the Operation End Action by applying another prefab in the scenegraph editor.
