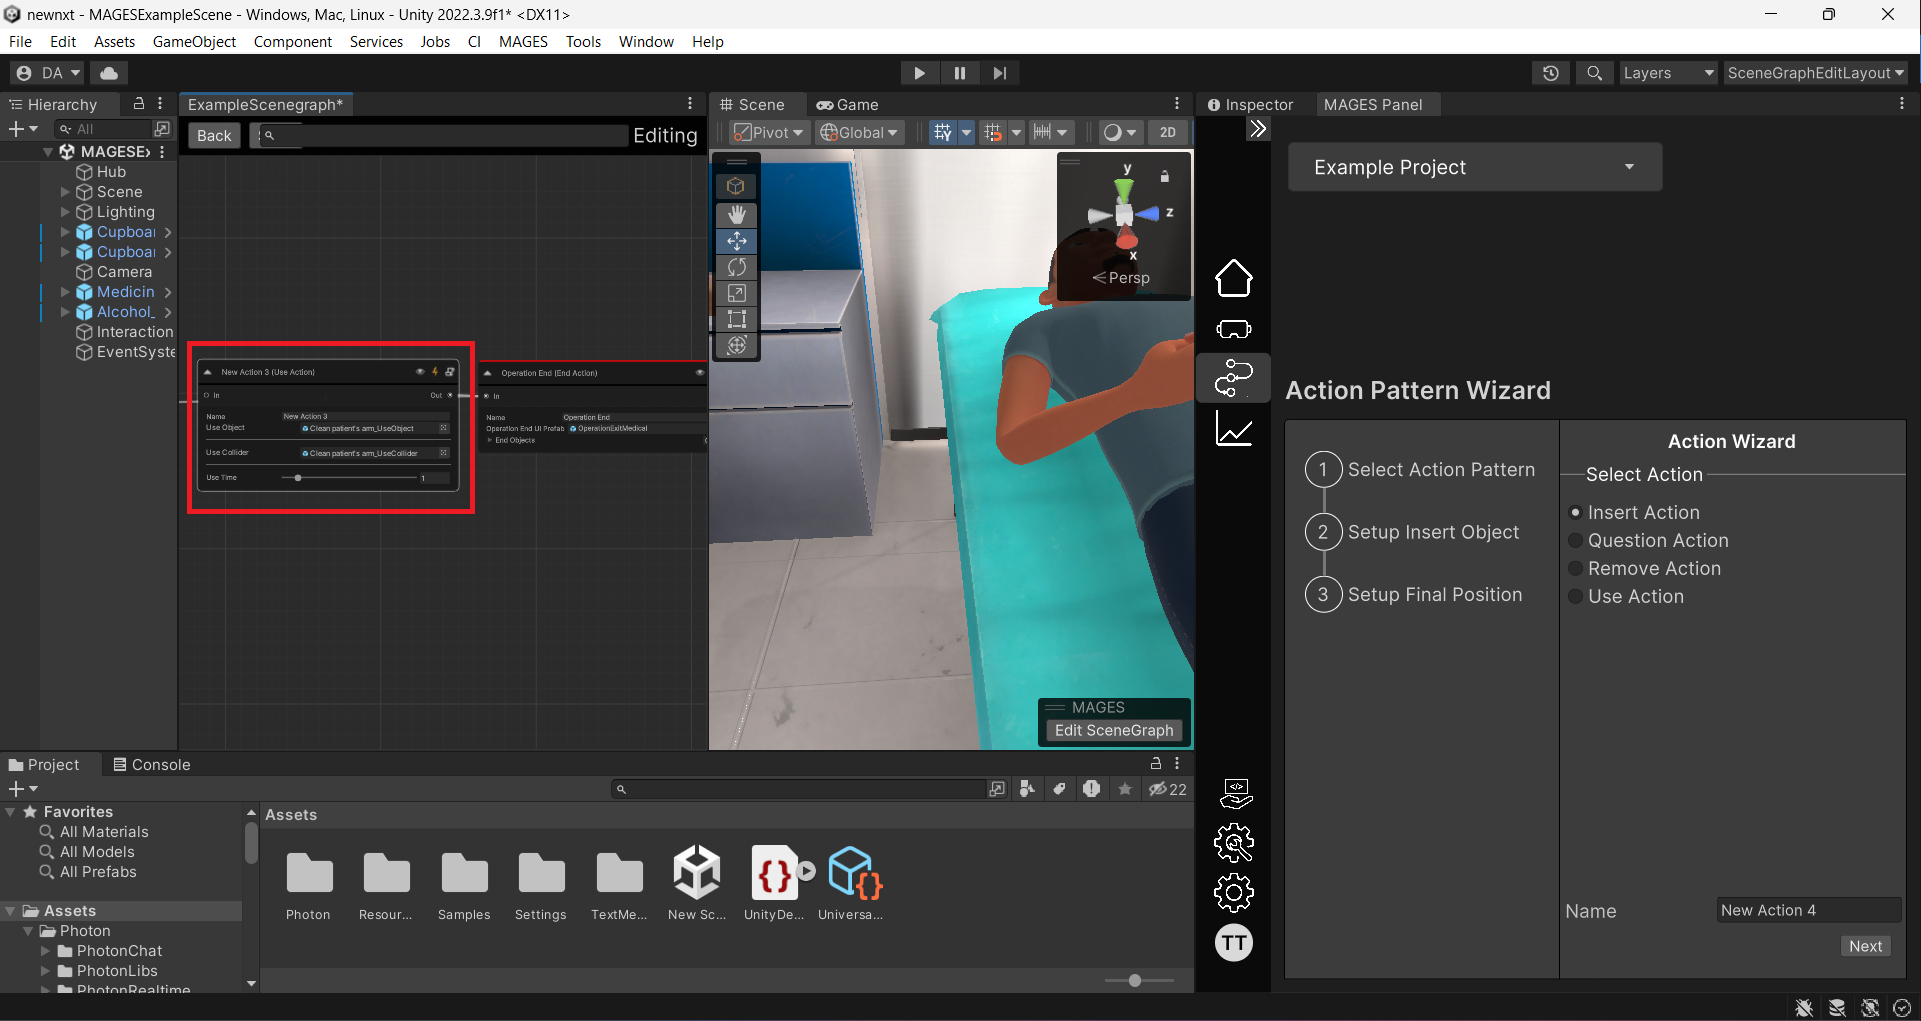
Action Pattern Wizard
The Action Pattern Wizard is a no-code tool that simplifies the creation of various actions in MAGES SDK.
Note
The wizard currently supports the creation of Insert, Remove, Use, and Question actions.
Navigating to the Action Wizard
Note
This tutorial is based on the Example Project from the MAGES Samples. If you haven’t imported it yet, refer to the Create your first MAGES Project page.
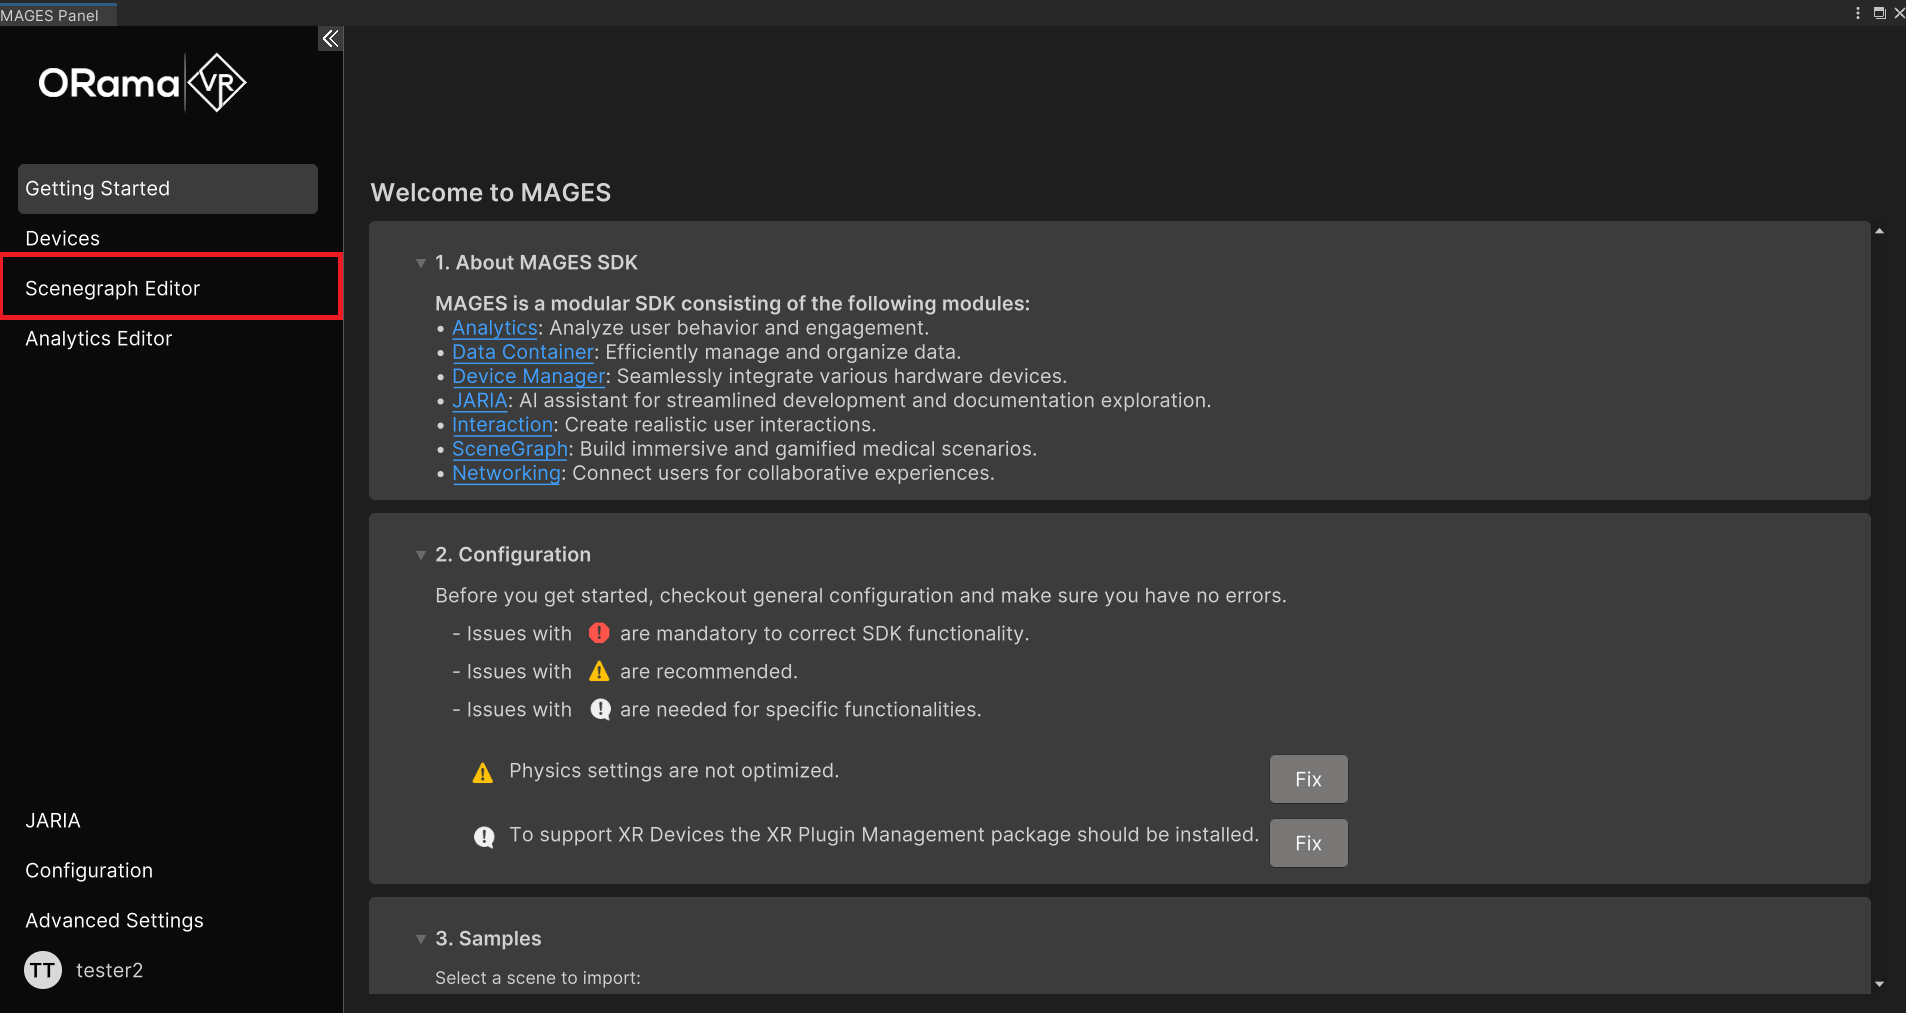
In the Unity Editor, go to
MAGES > MAGES Paneland click on theScenegraph Editortab.
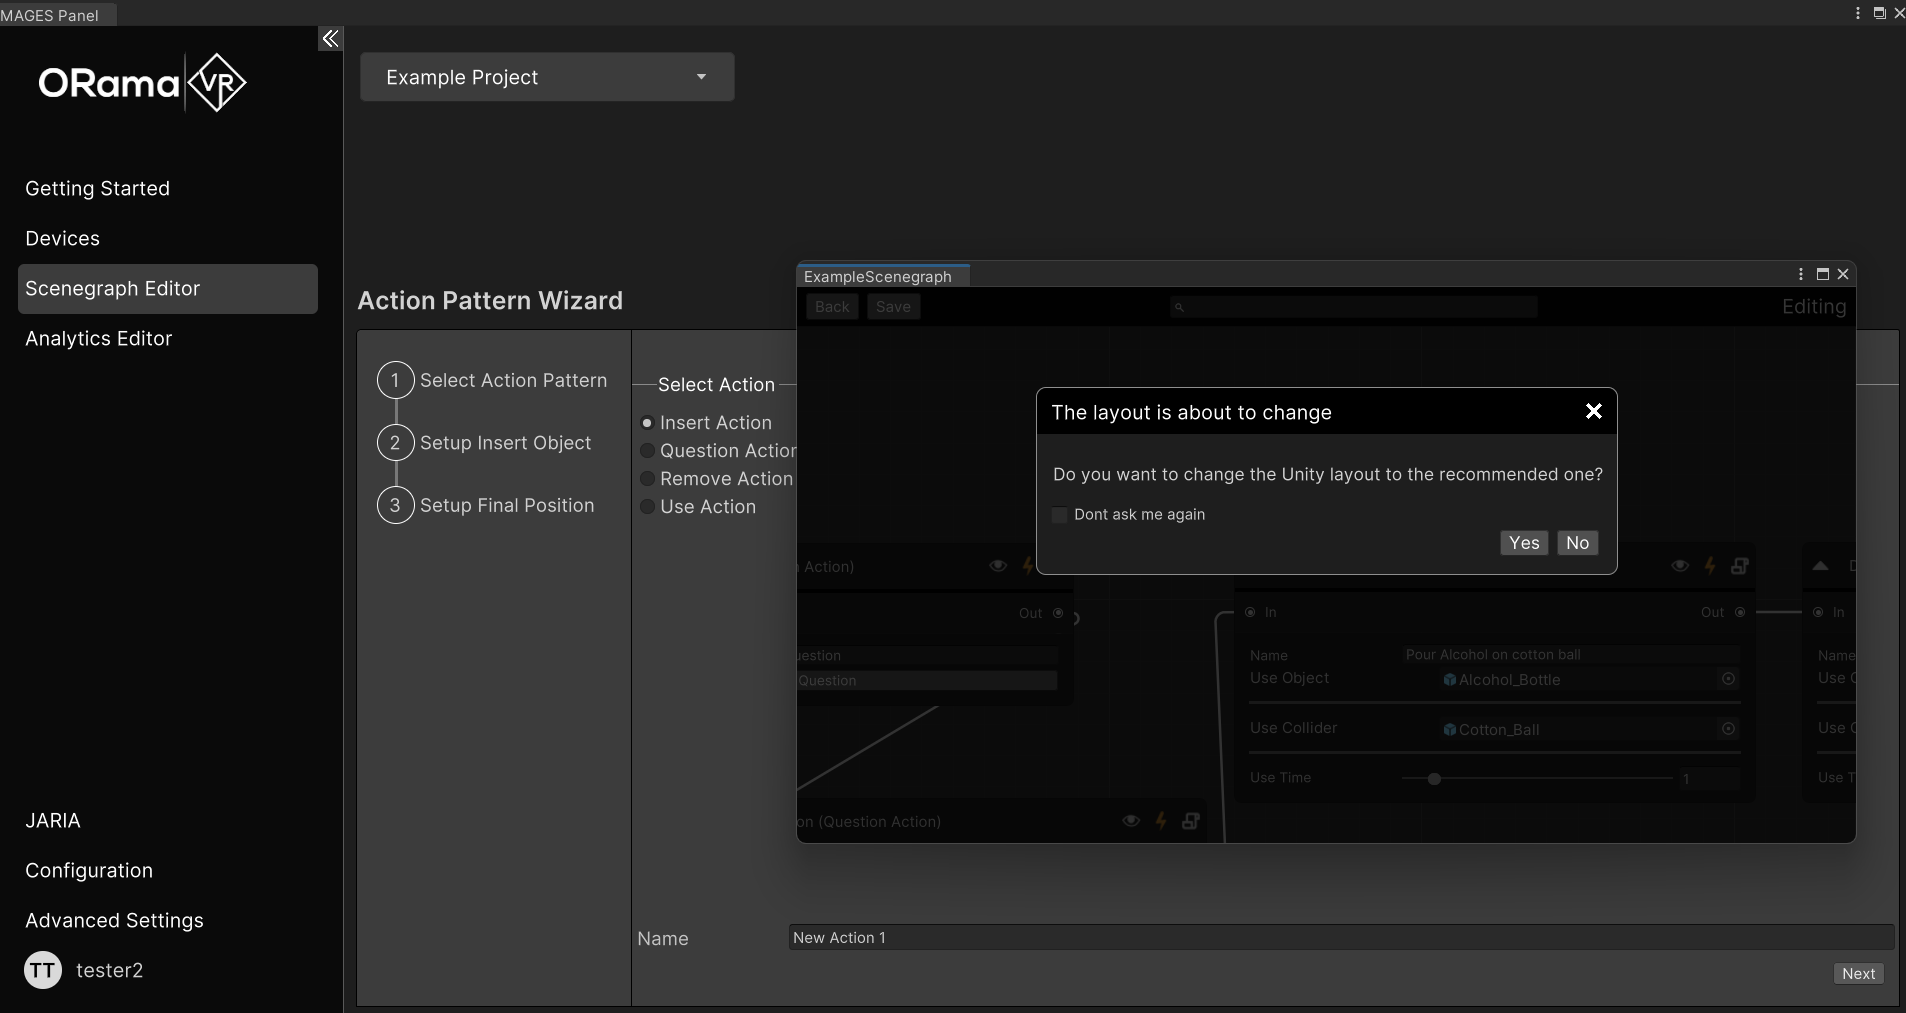
After clicking, you will be redirected to the Action Wizard. Additionally, the scenegraph editor of the active scenegraph will pop up, and you’ll have the option to activate the recommended layout. Choose as you wish.
If you select the recommended layout, your Unity Editor will be set up as follows. Click on the collapse button of the MAGES Panel to better view the wizard.
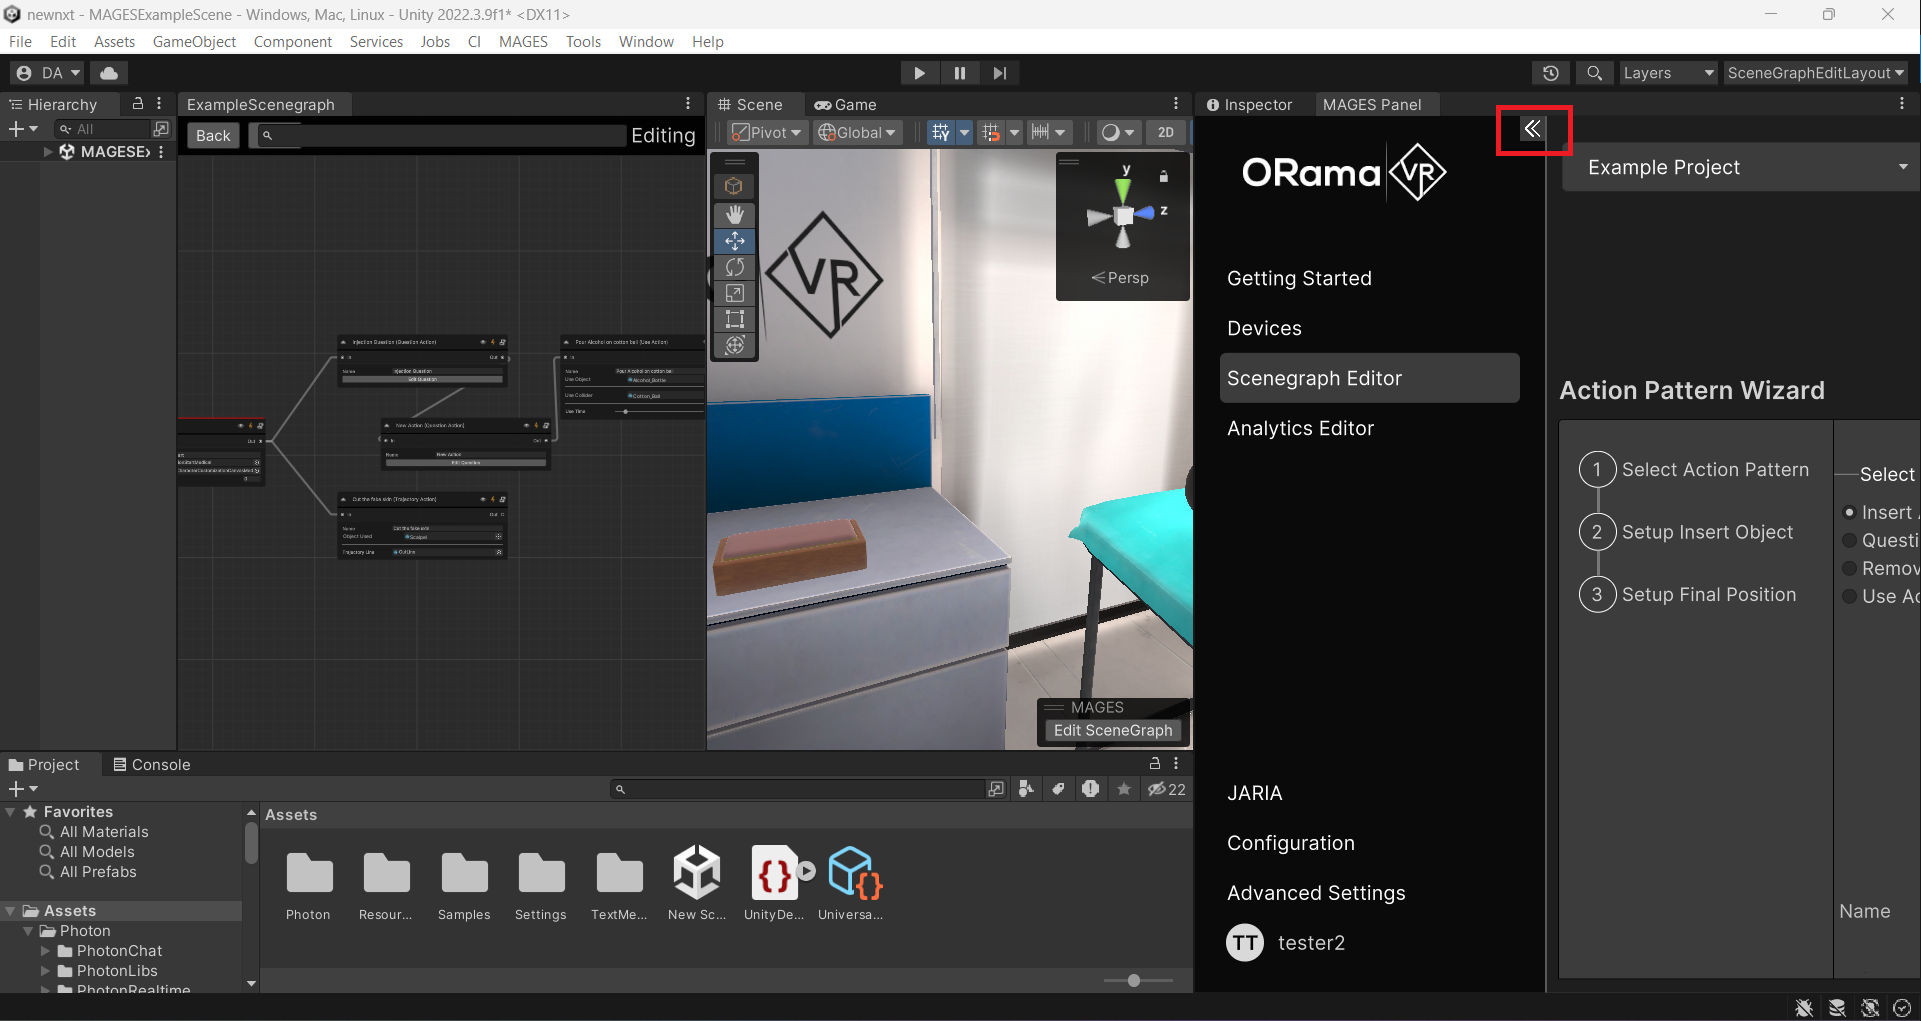
Once done, you can see the available actions, select the one you want to create, the active scene, and the active scenegraph editor. Now, you are ready to create your actions.
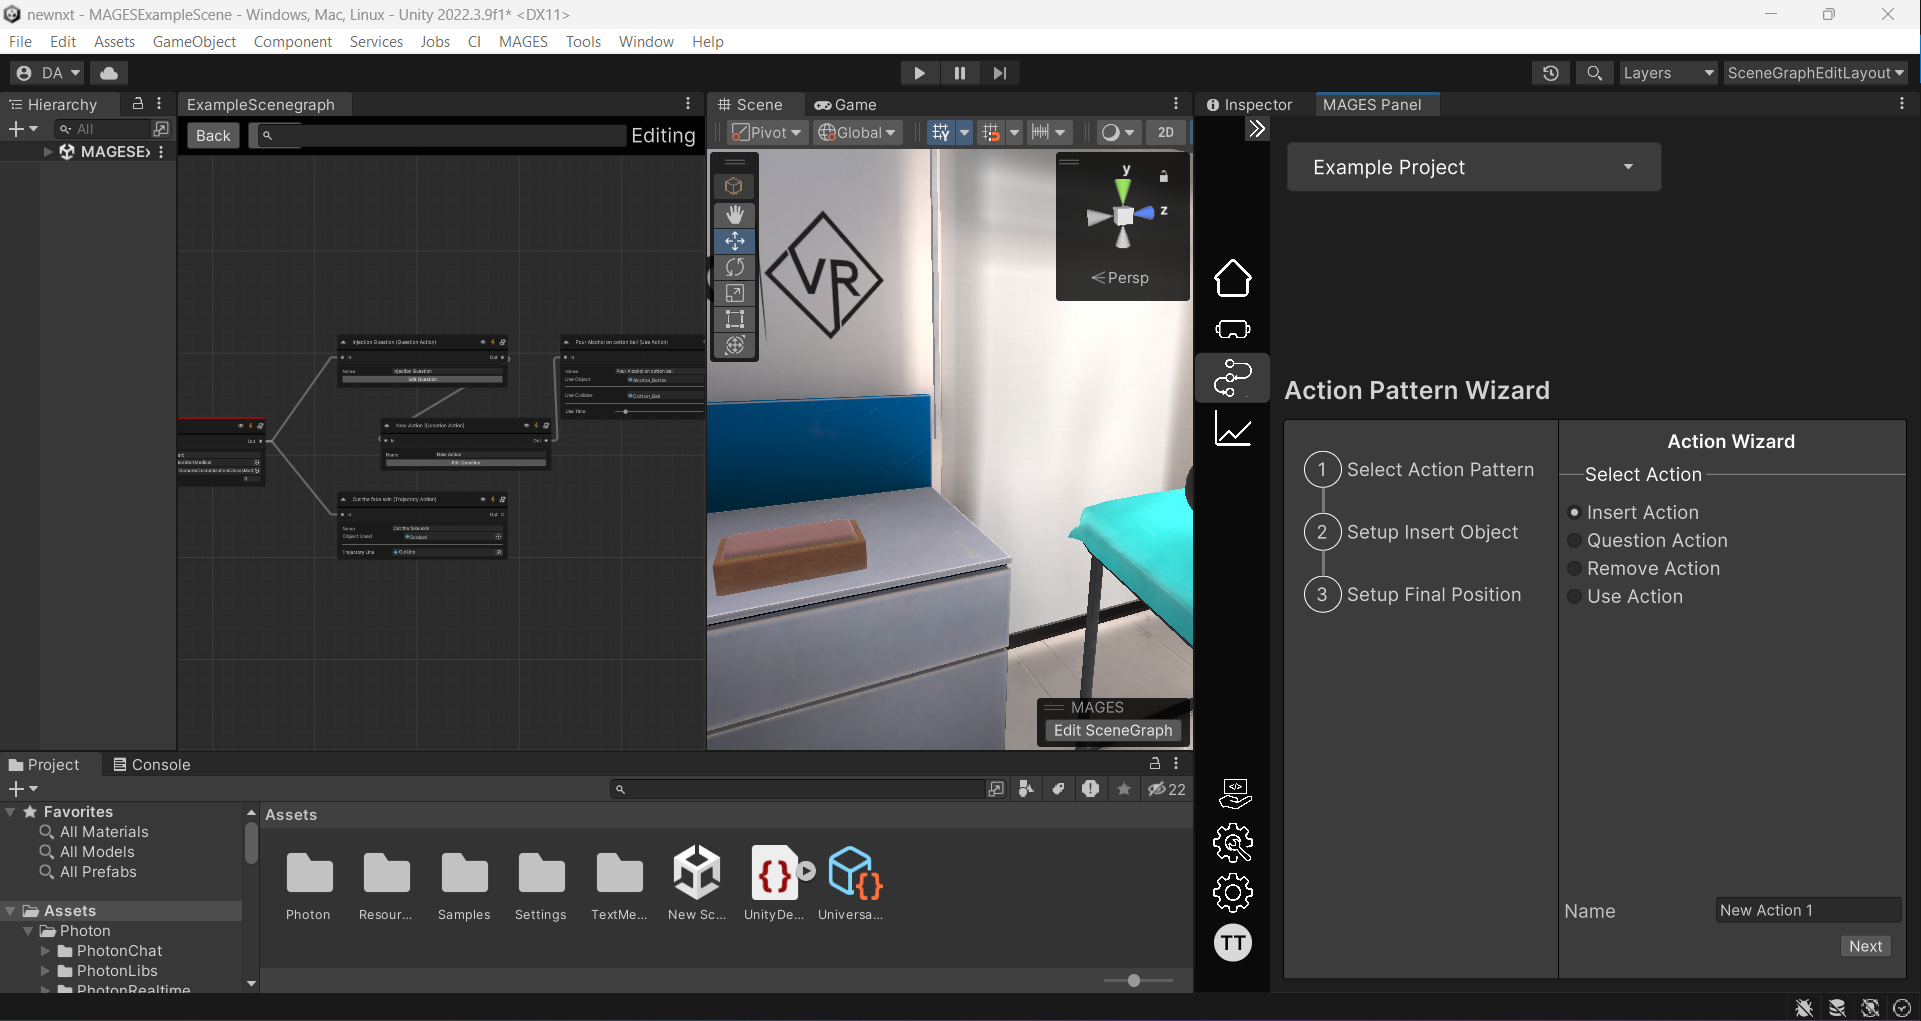
Creating an Insert Action using the Action Wizard
In this tutorial, we will demonstrate how to create an insert action, specifically vaccinating a patient by inserting a syringe into the patient’s arm.
Click on the
Insert Actionbutton among the available actions. The side panel displays the necessary steps to create the action. Enter your action’s name in the name property, then click theNextbutton to proceed.
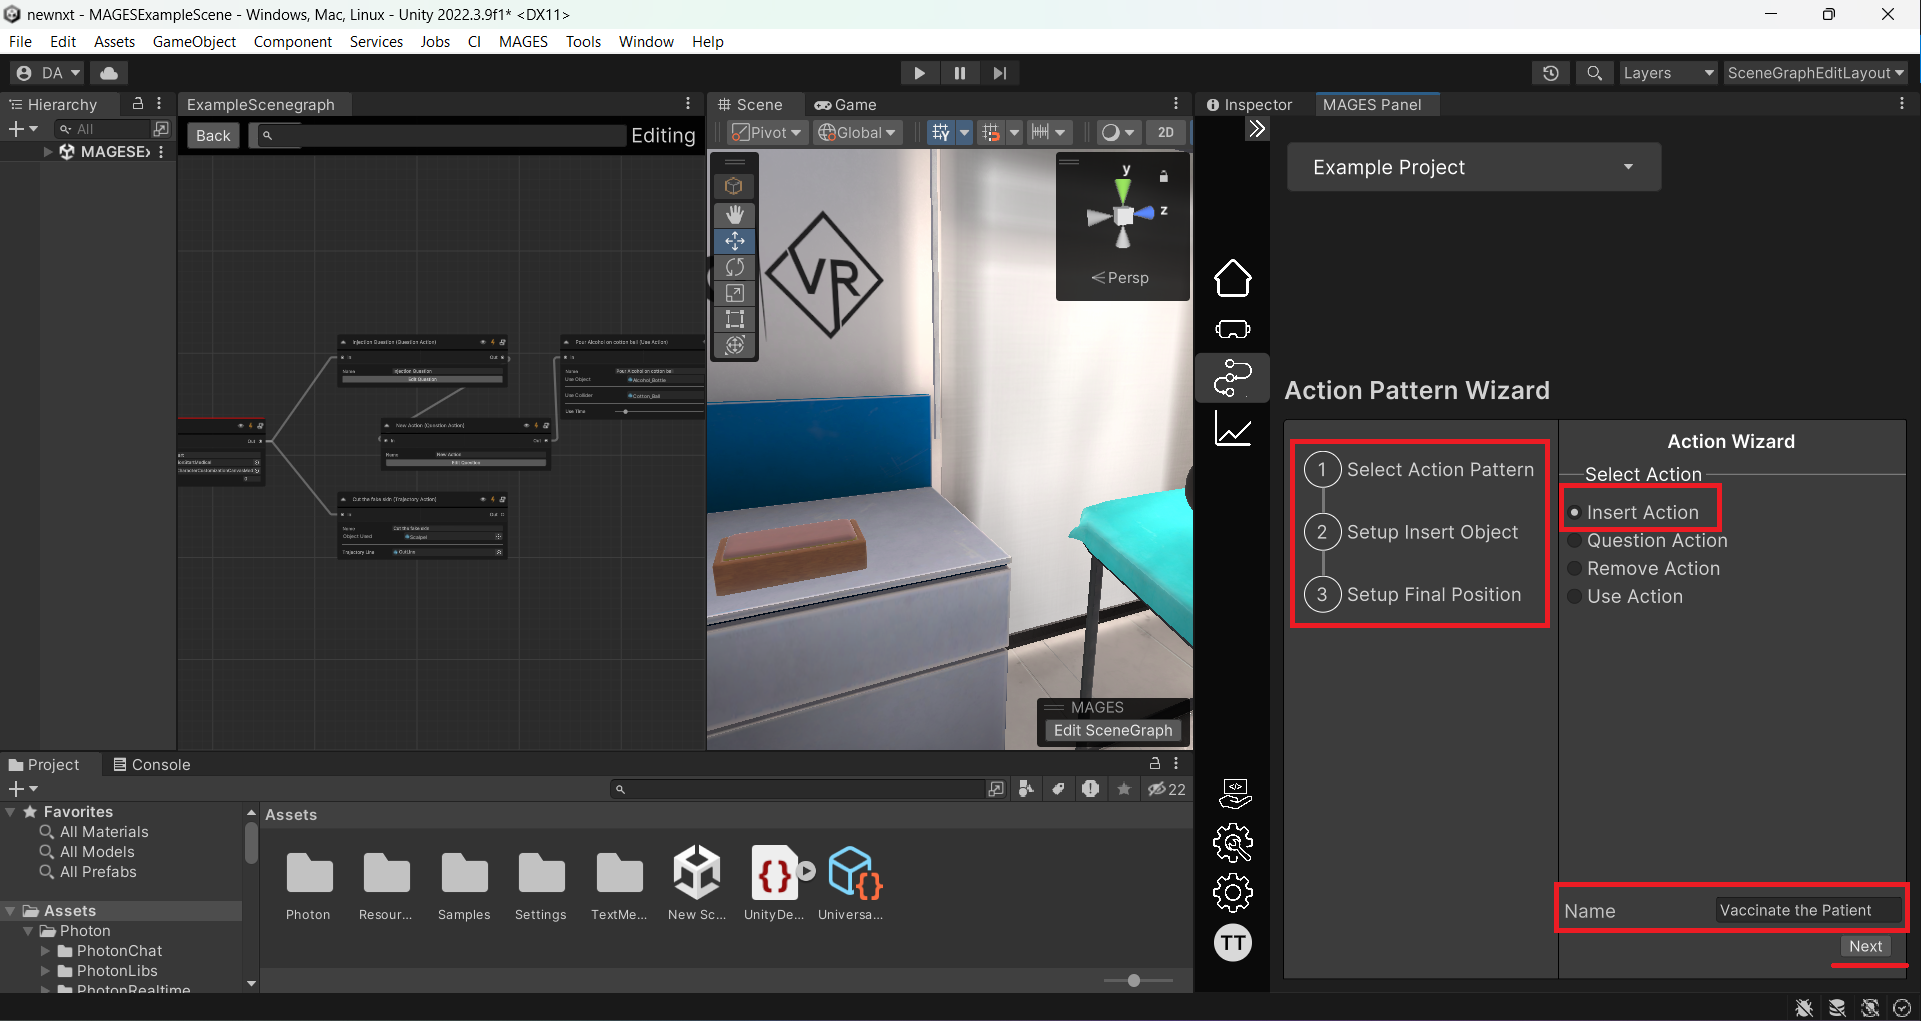
After clicking
Next, you will be redirected to theSetup Insert Objectstep. Here, you can either create a new GameObject from a model in your assets or select an existing GameObject from your assets.
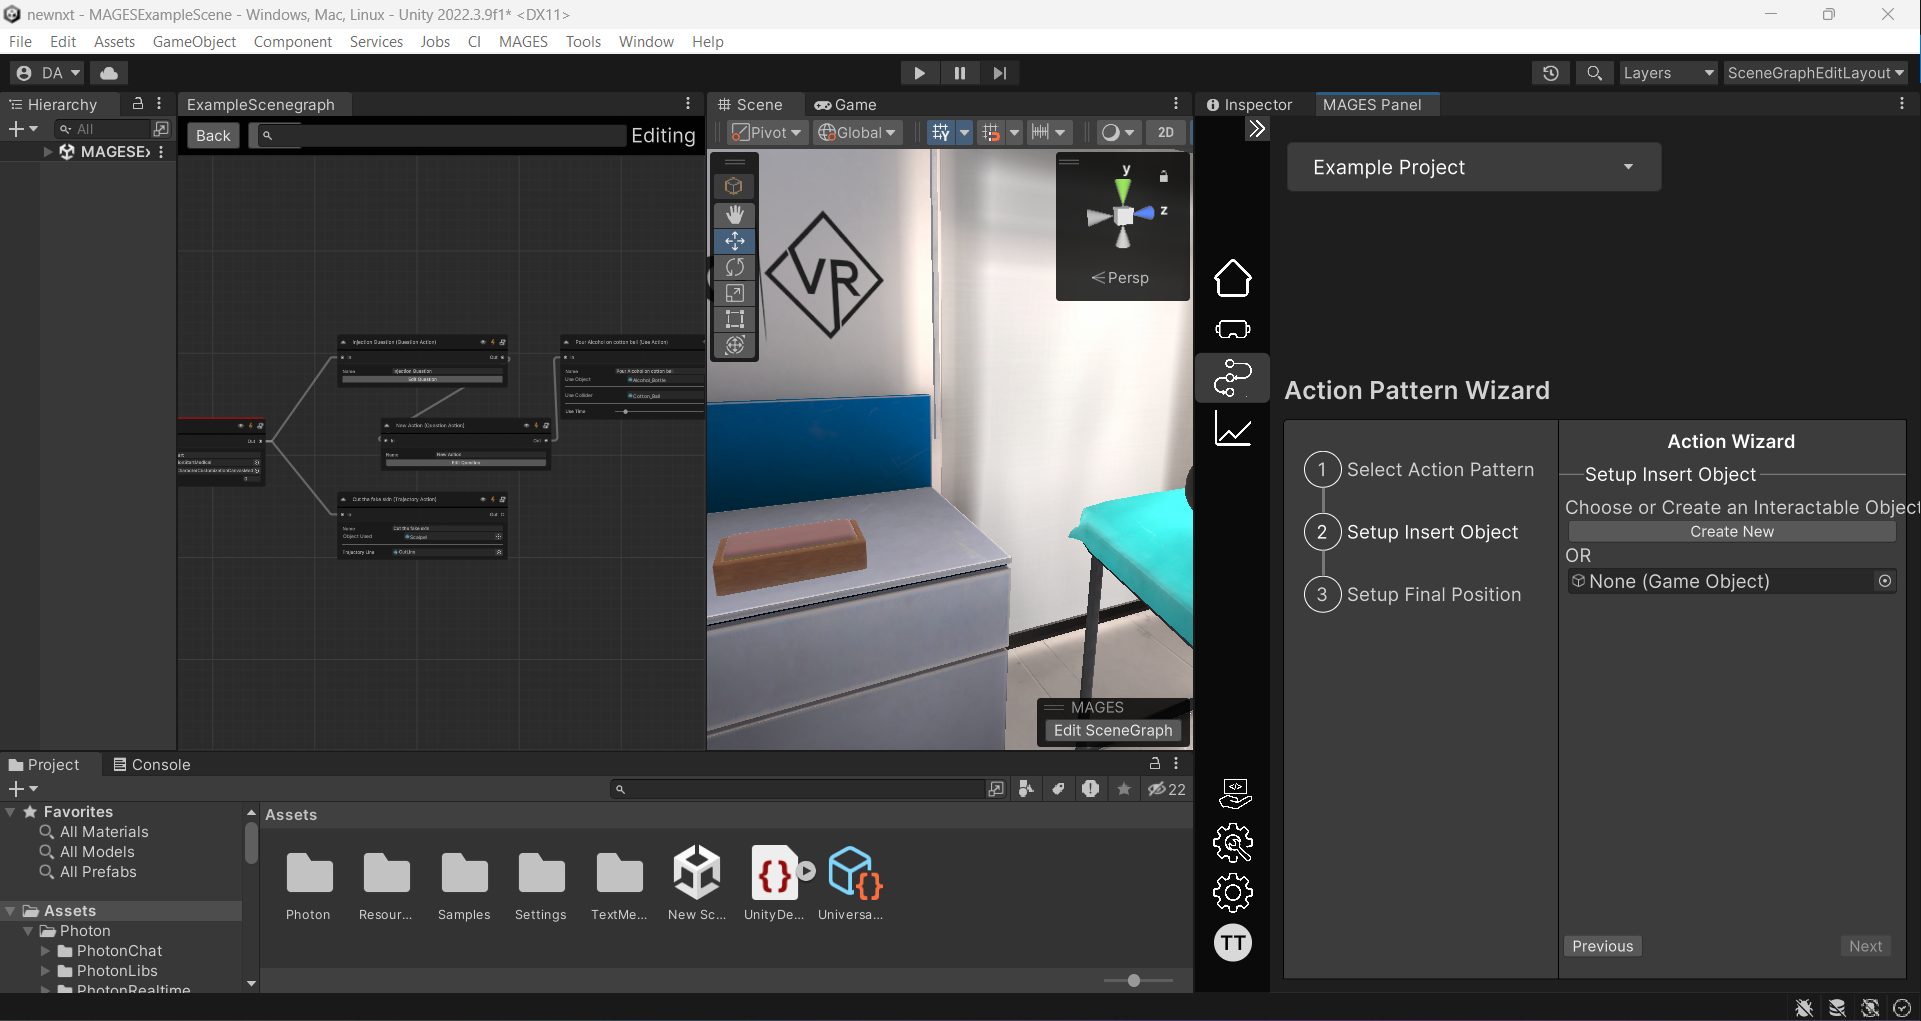
Click the
Create Newbutton, then select theSyringemodel from your assets. This creates a GameObject of the syringe in your scene that you can position as desired. This will be the position that the GameObject will be initially spawned.
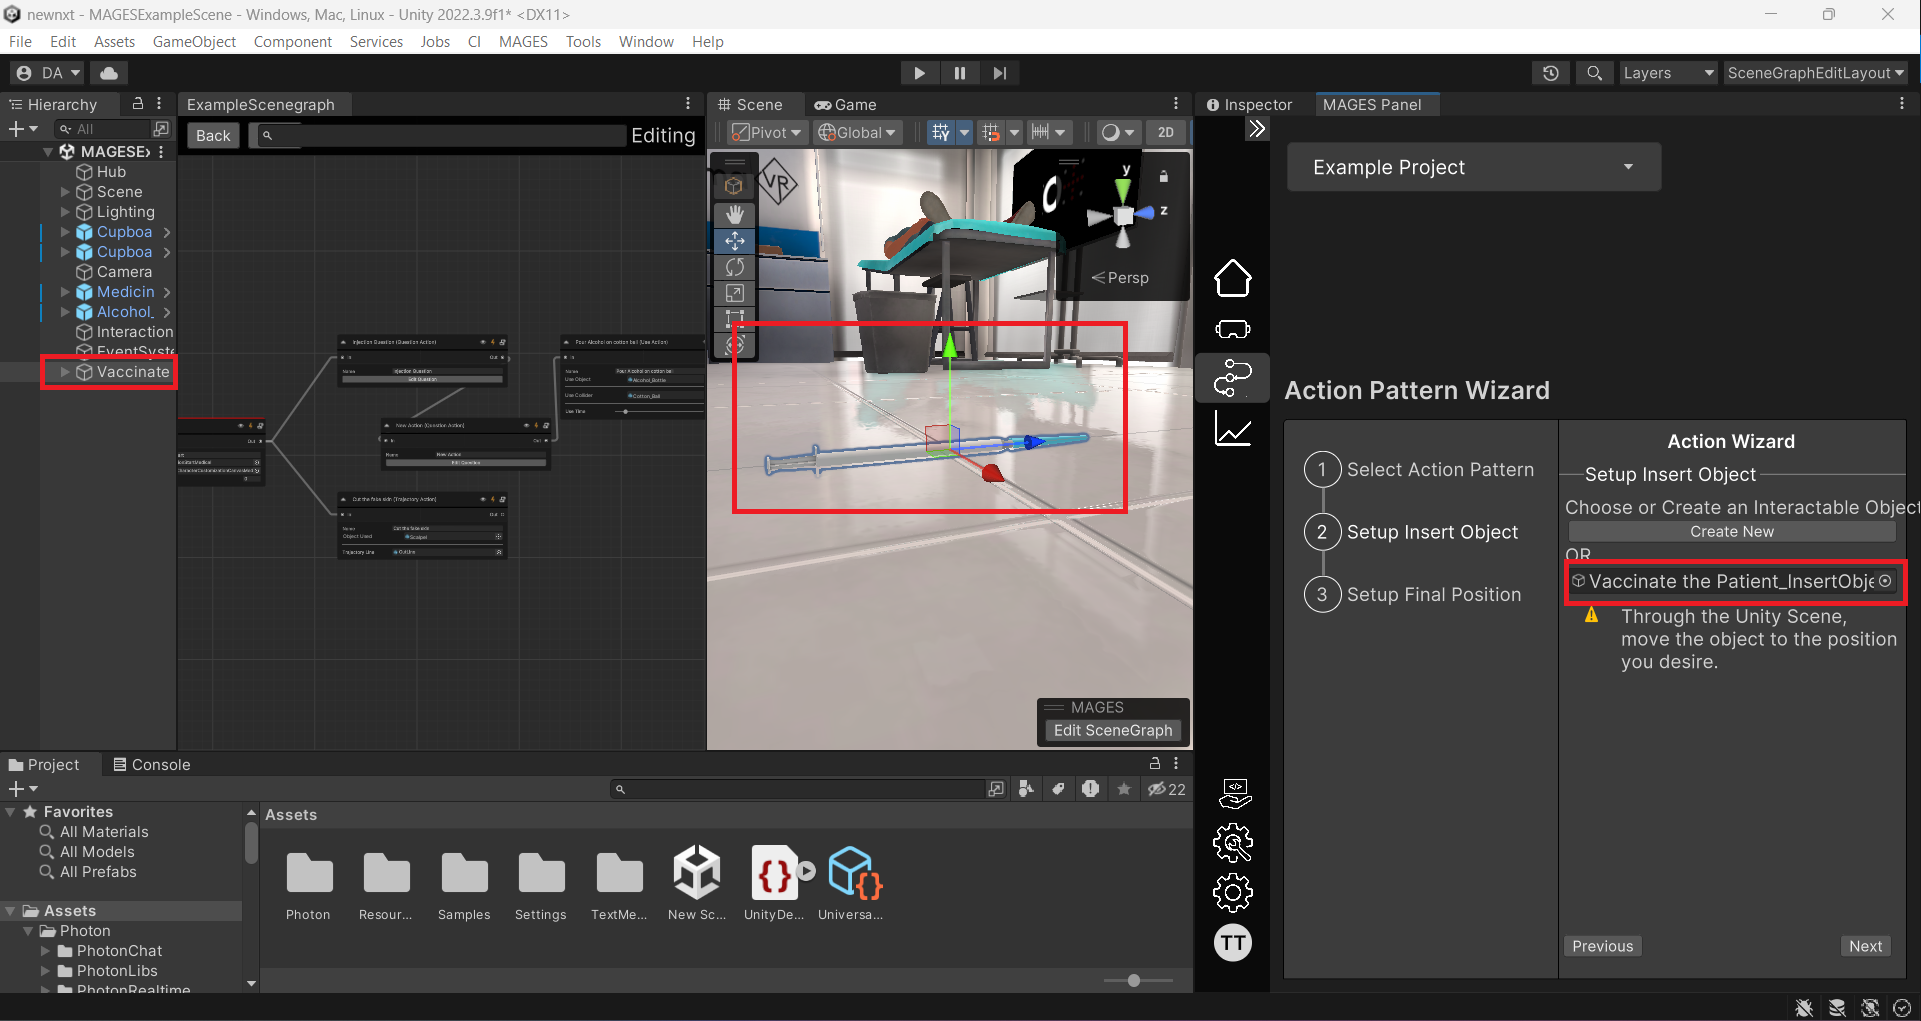
Position the syringe on the table in your scene using the gizmos, and then click the
Nextbutton again.
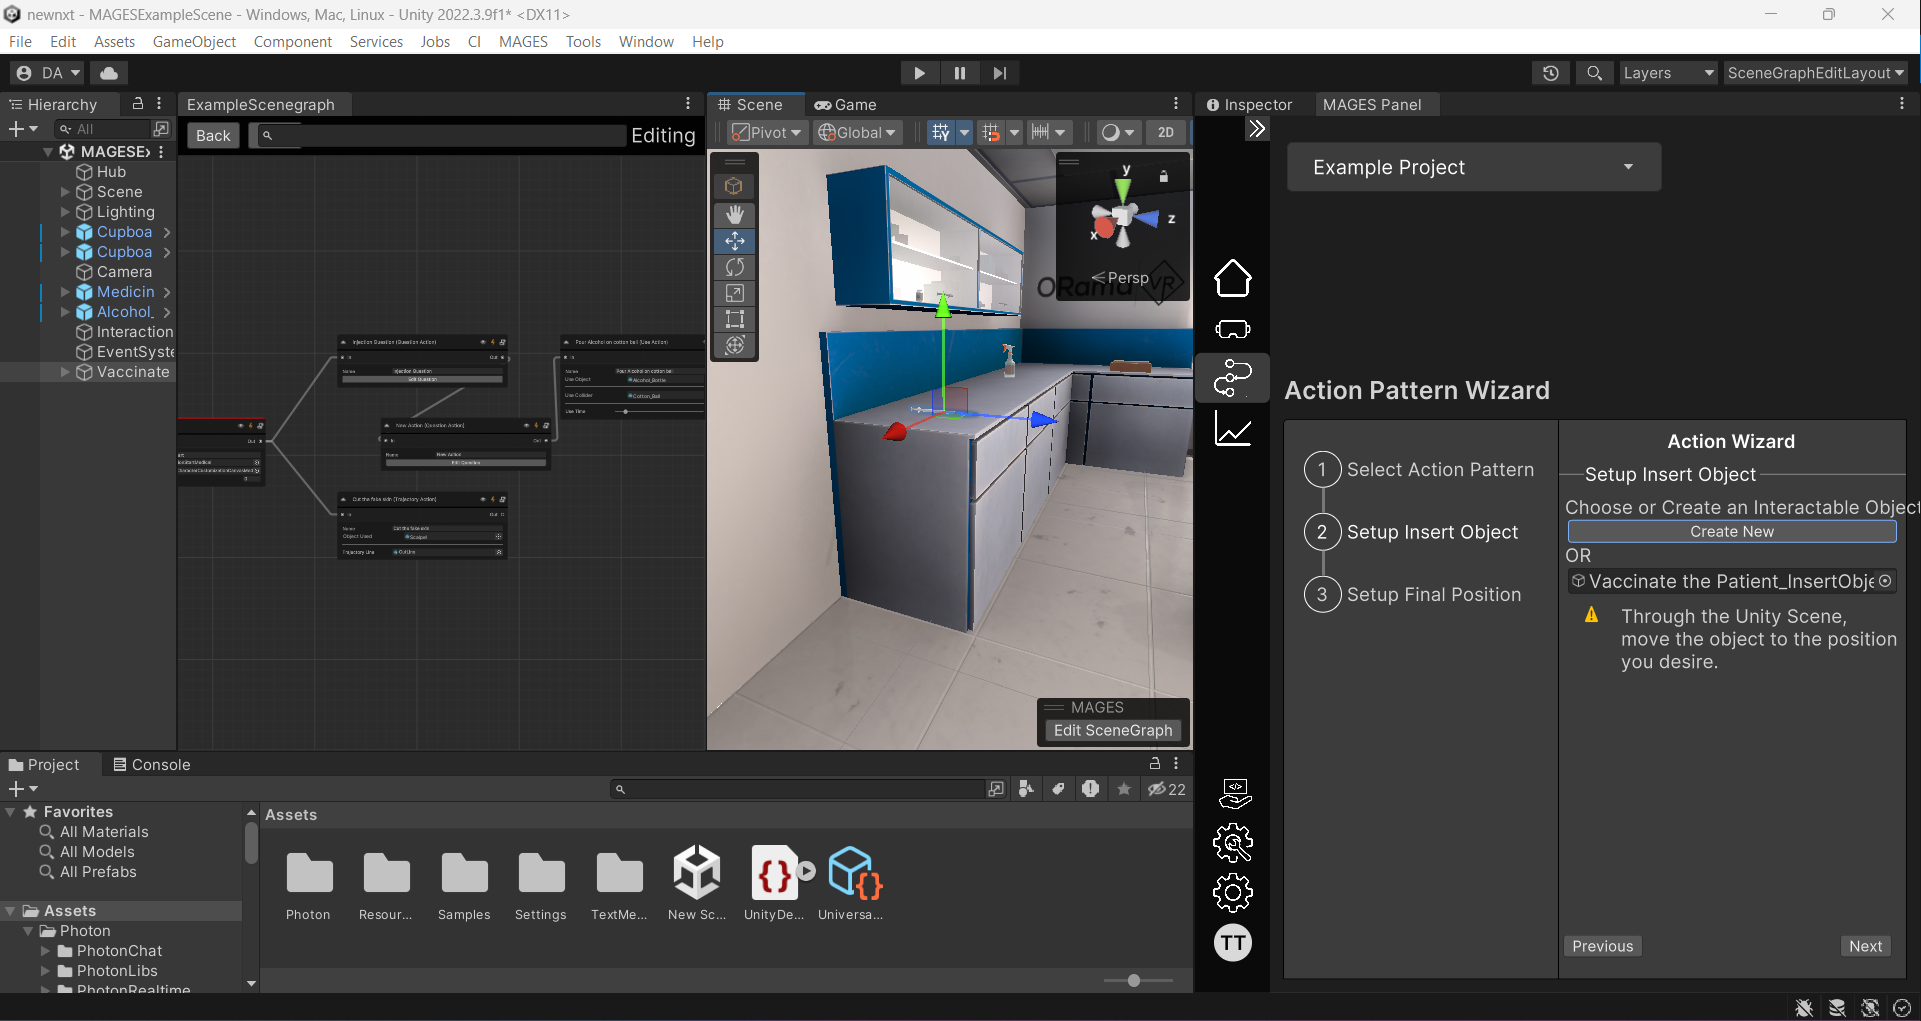
You will be redirected to the final step, where you need to set up the final position of the insert object. In this step, a new GameObject of the syringe will be spawned to represent the final position.
Once again, using the gizmos, move the final GameObject to the patient’s arm, where you want the syringe to be inserted, and then click the
Finishbutton.
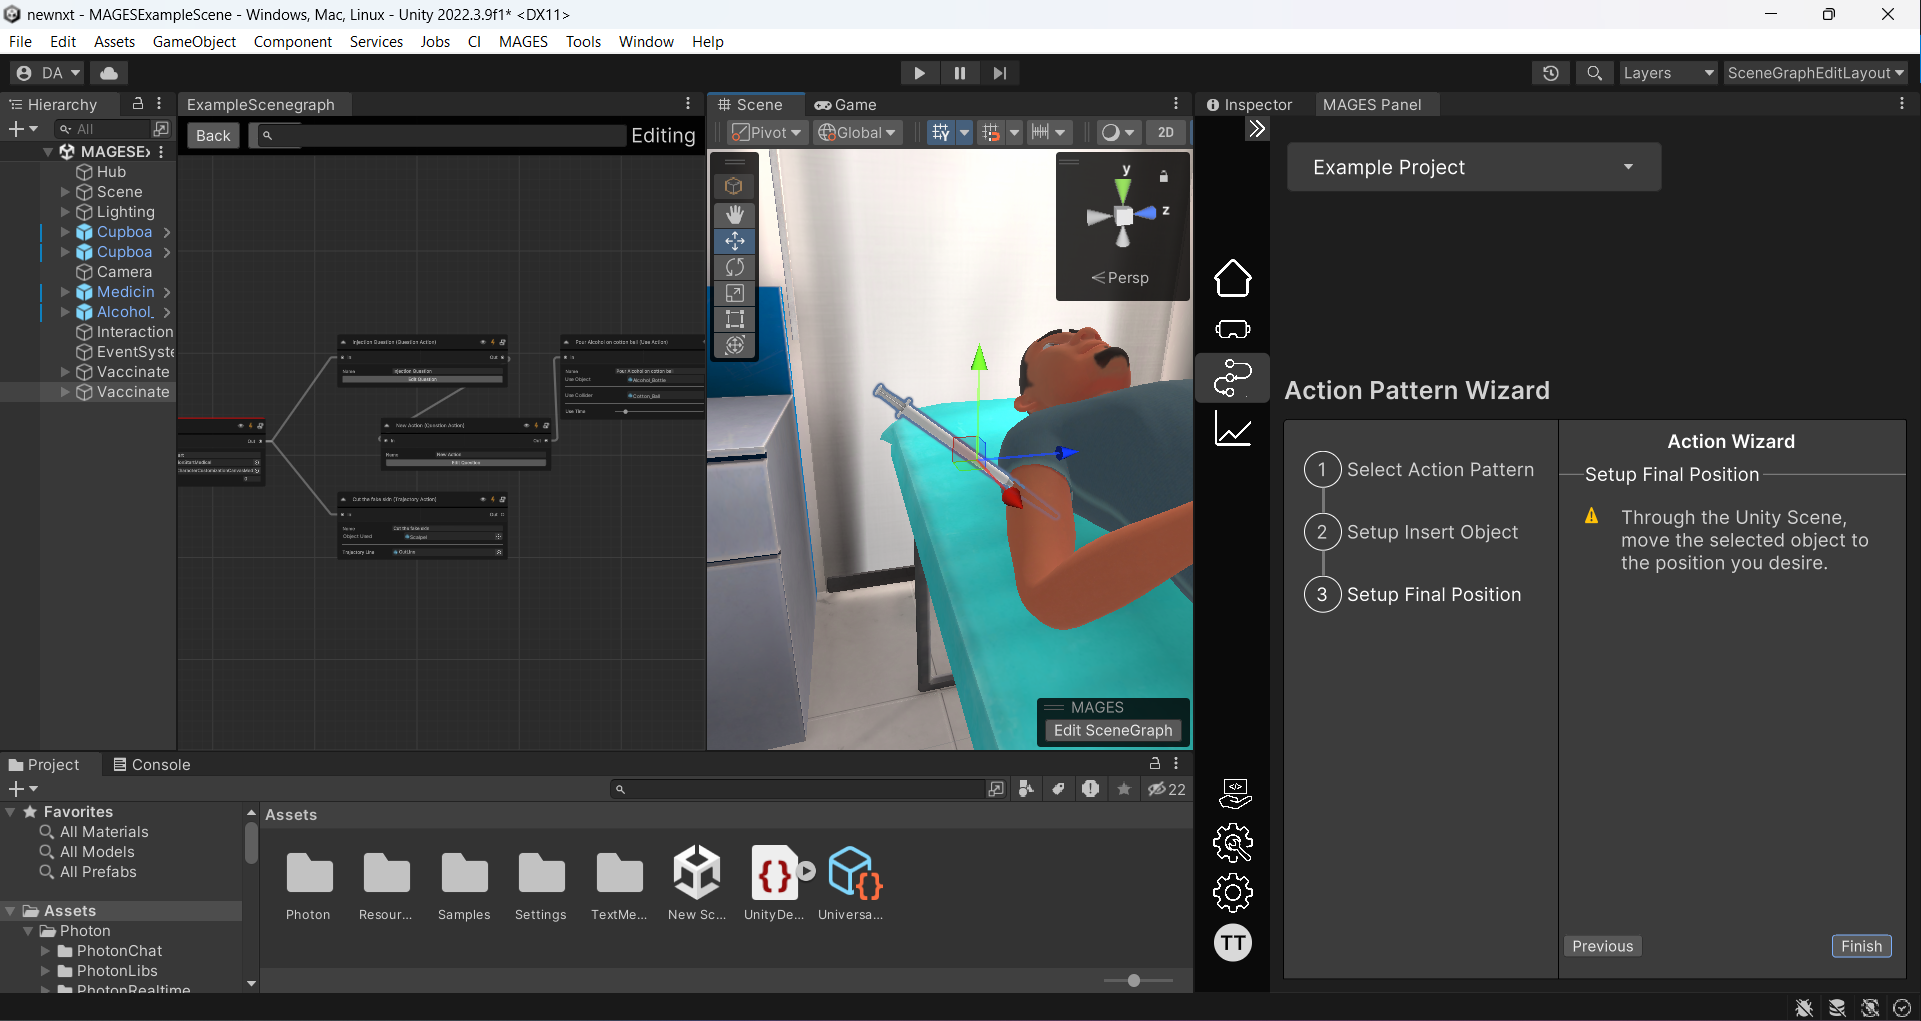
Your insert action has been created and placed in your scenegraph as the last action, ready to be used.
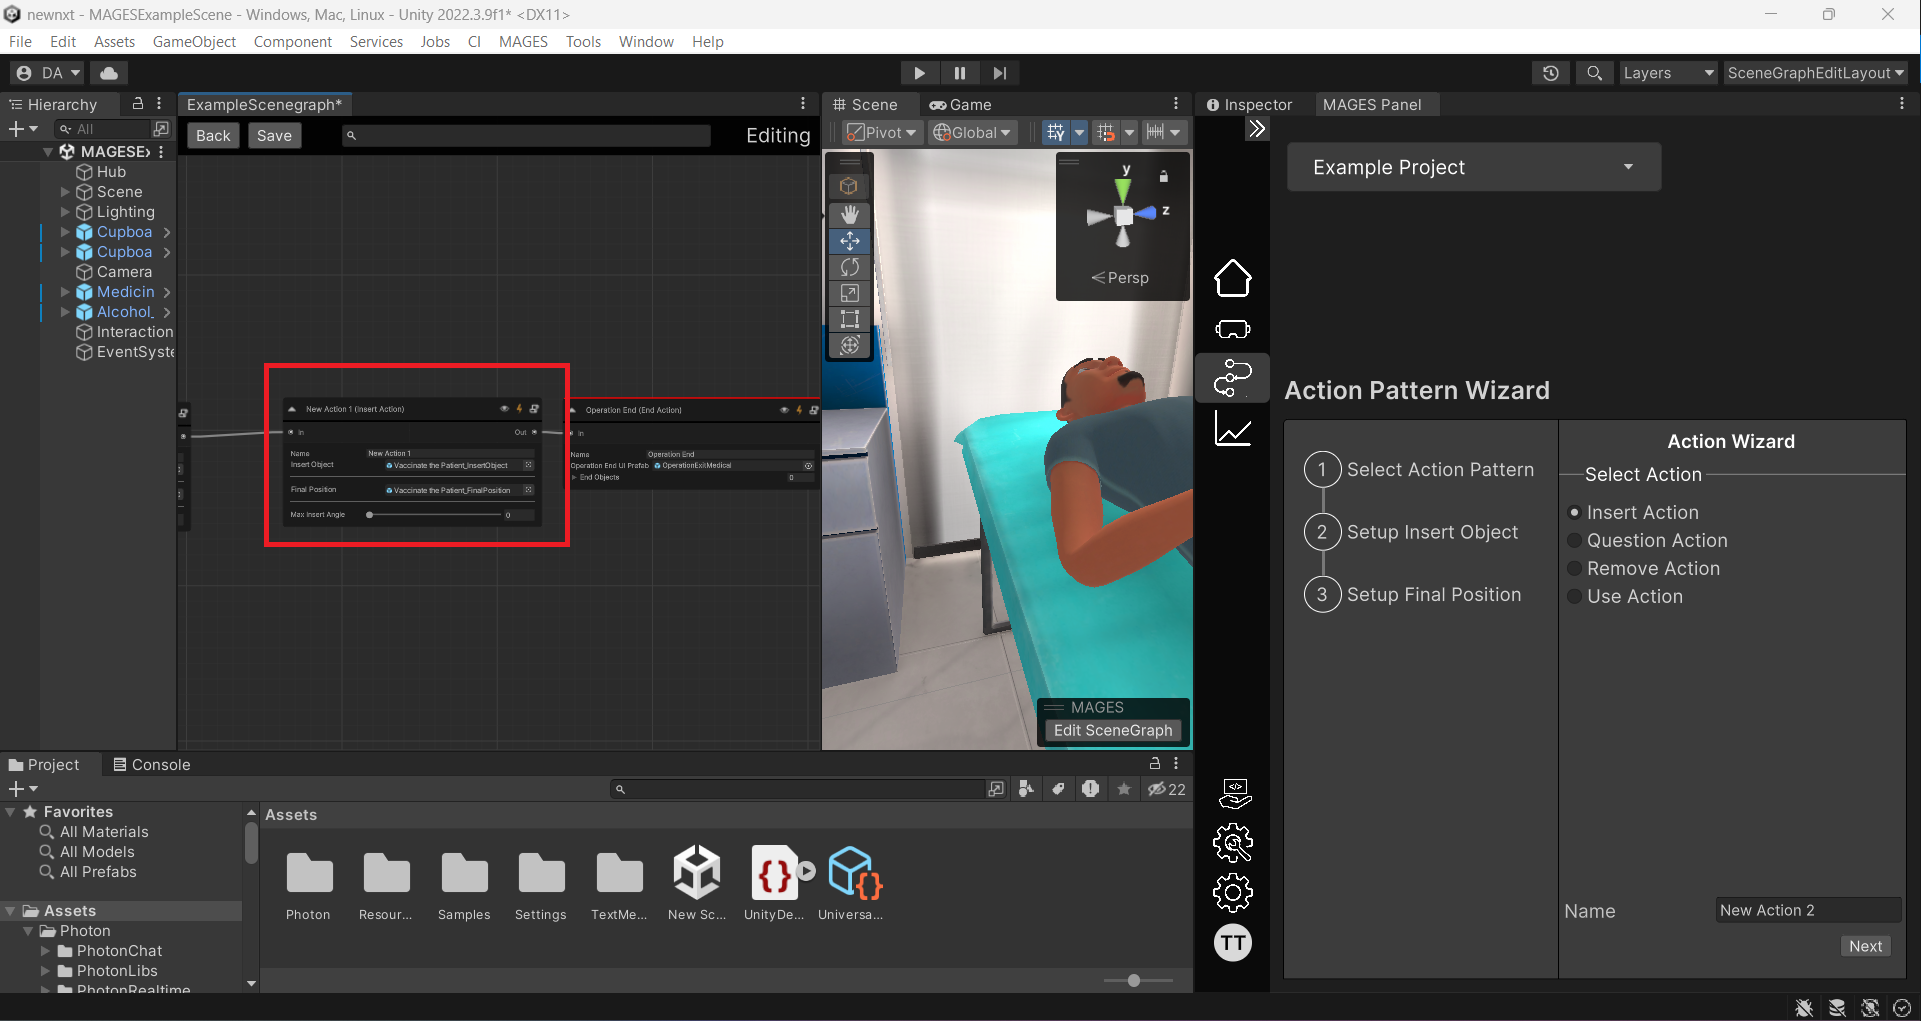
Creating a Question Action using the Action Wizard
In this tutorial, we will demonstrate how to create a question action that prompts the user to specify where the syringe should be inserted to vaccinate a patient.
Click on the
Question Actionbutton among the available actions. The side panel provides the necessary steps to create the action. Enter your action’s name in the name property, then click theNextbutton to proceed.
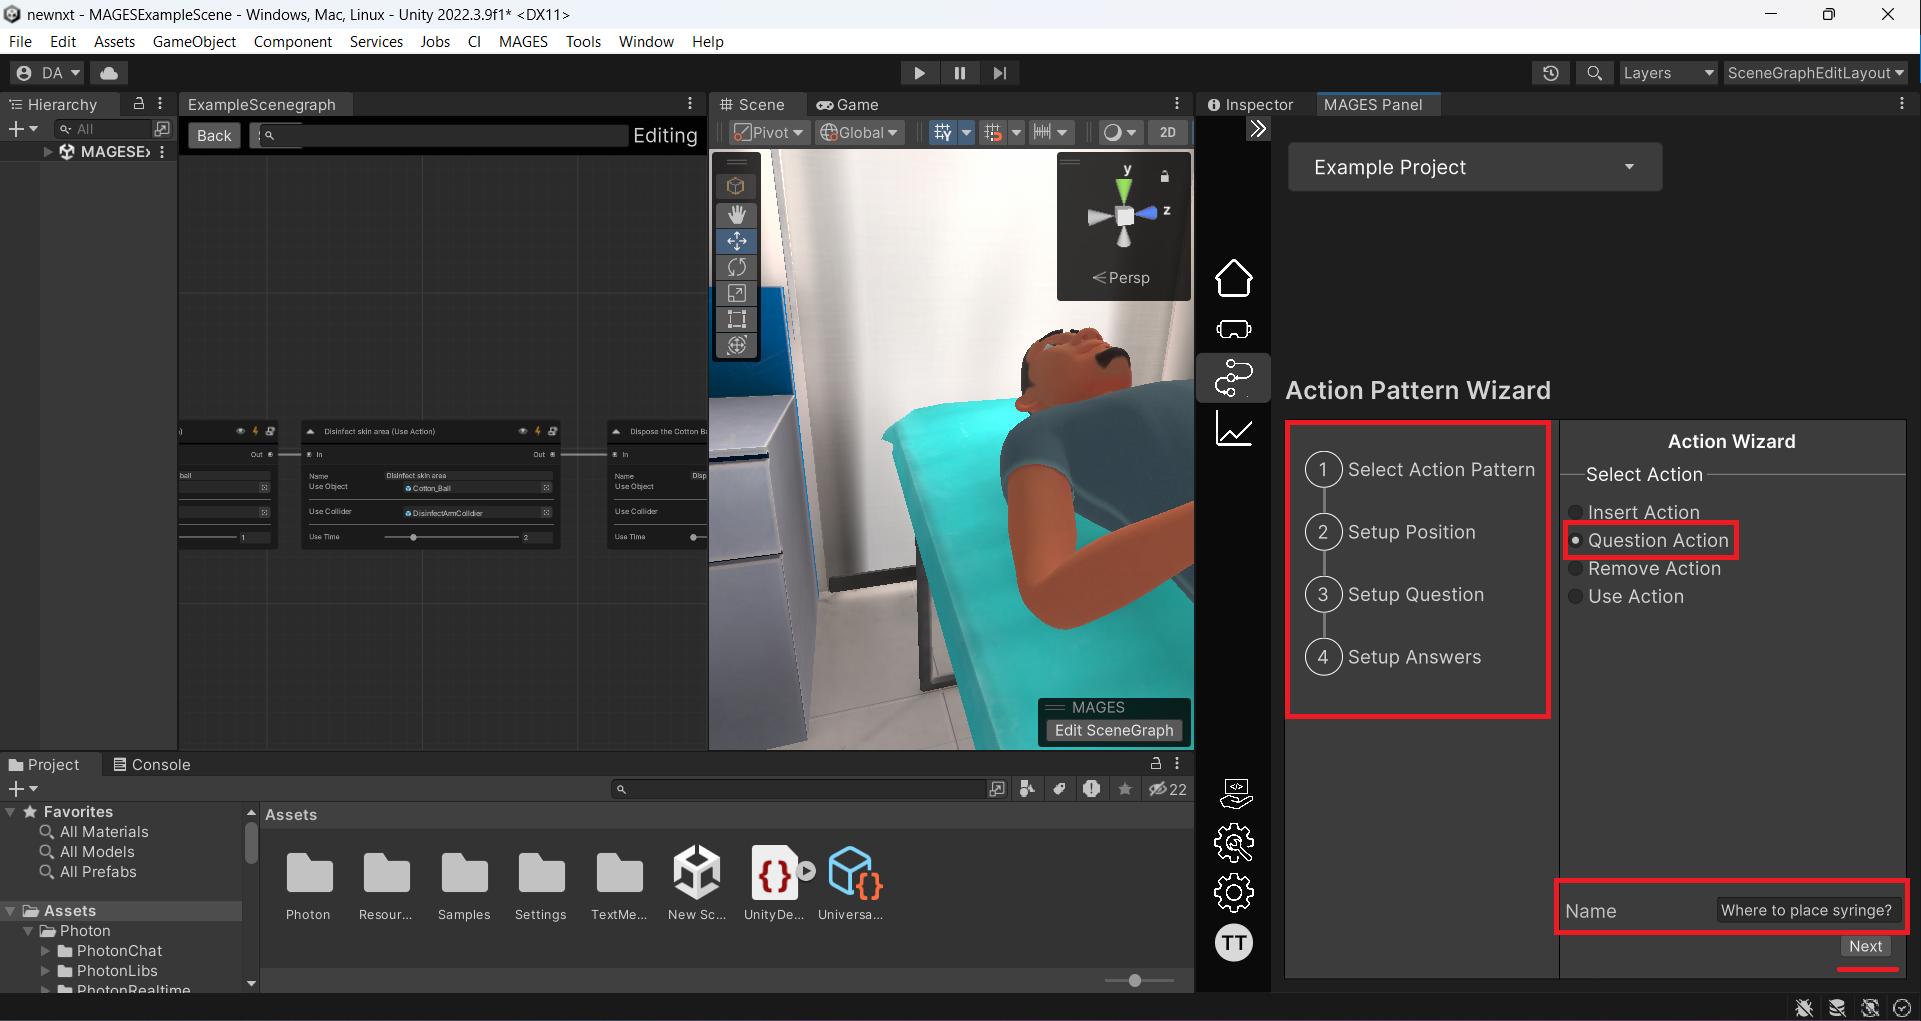
After clicking
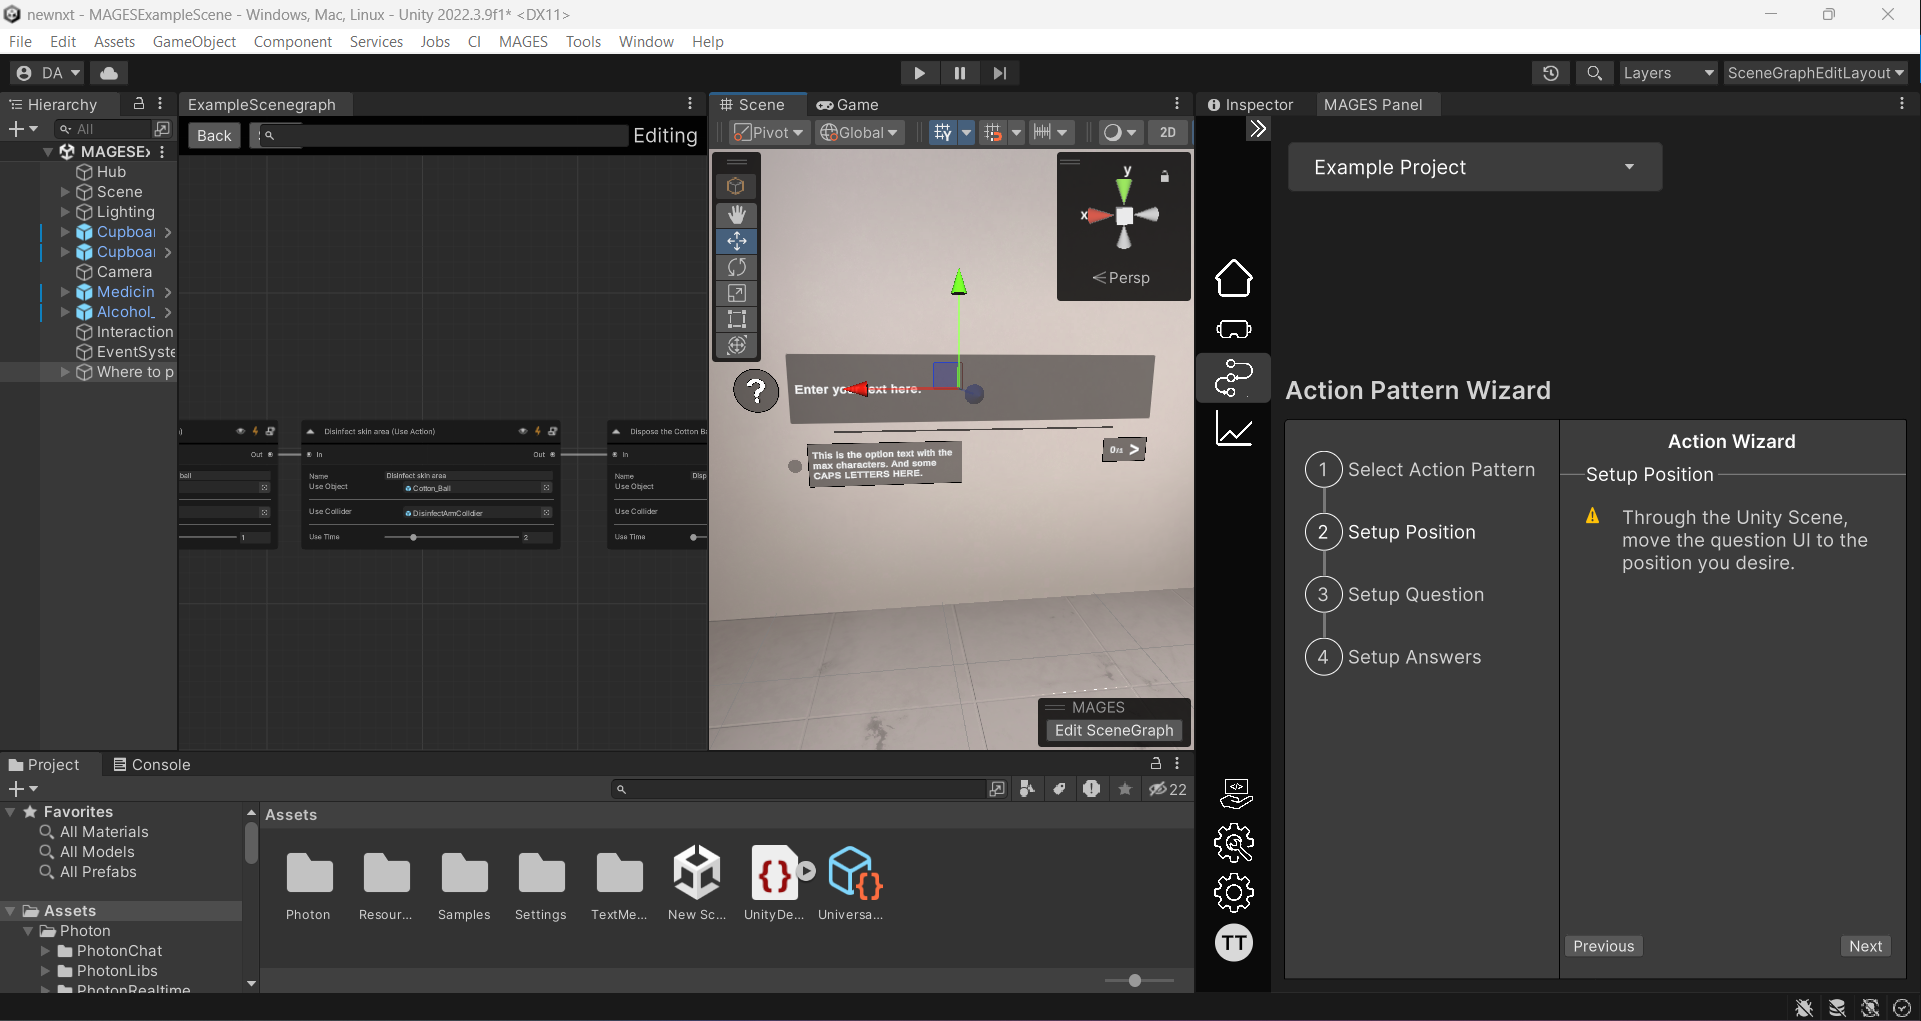
Next, a question template GameObject will be spawned in your scene. Move it to the desired position using the gizmos, where you want it to be spawned during playmode, and then clickNext.
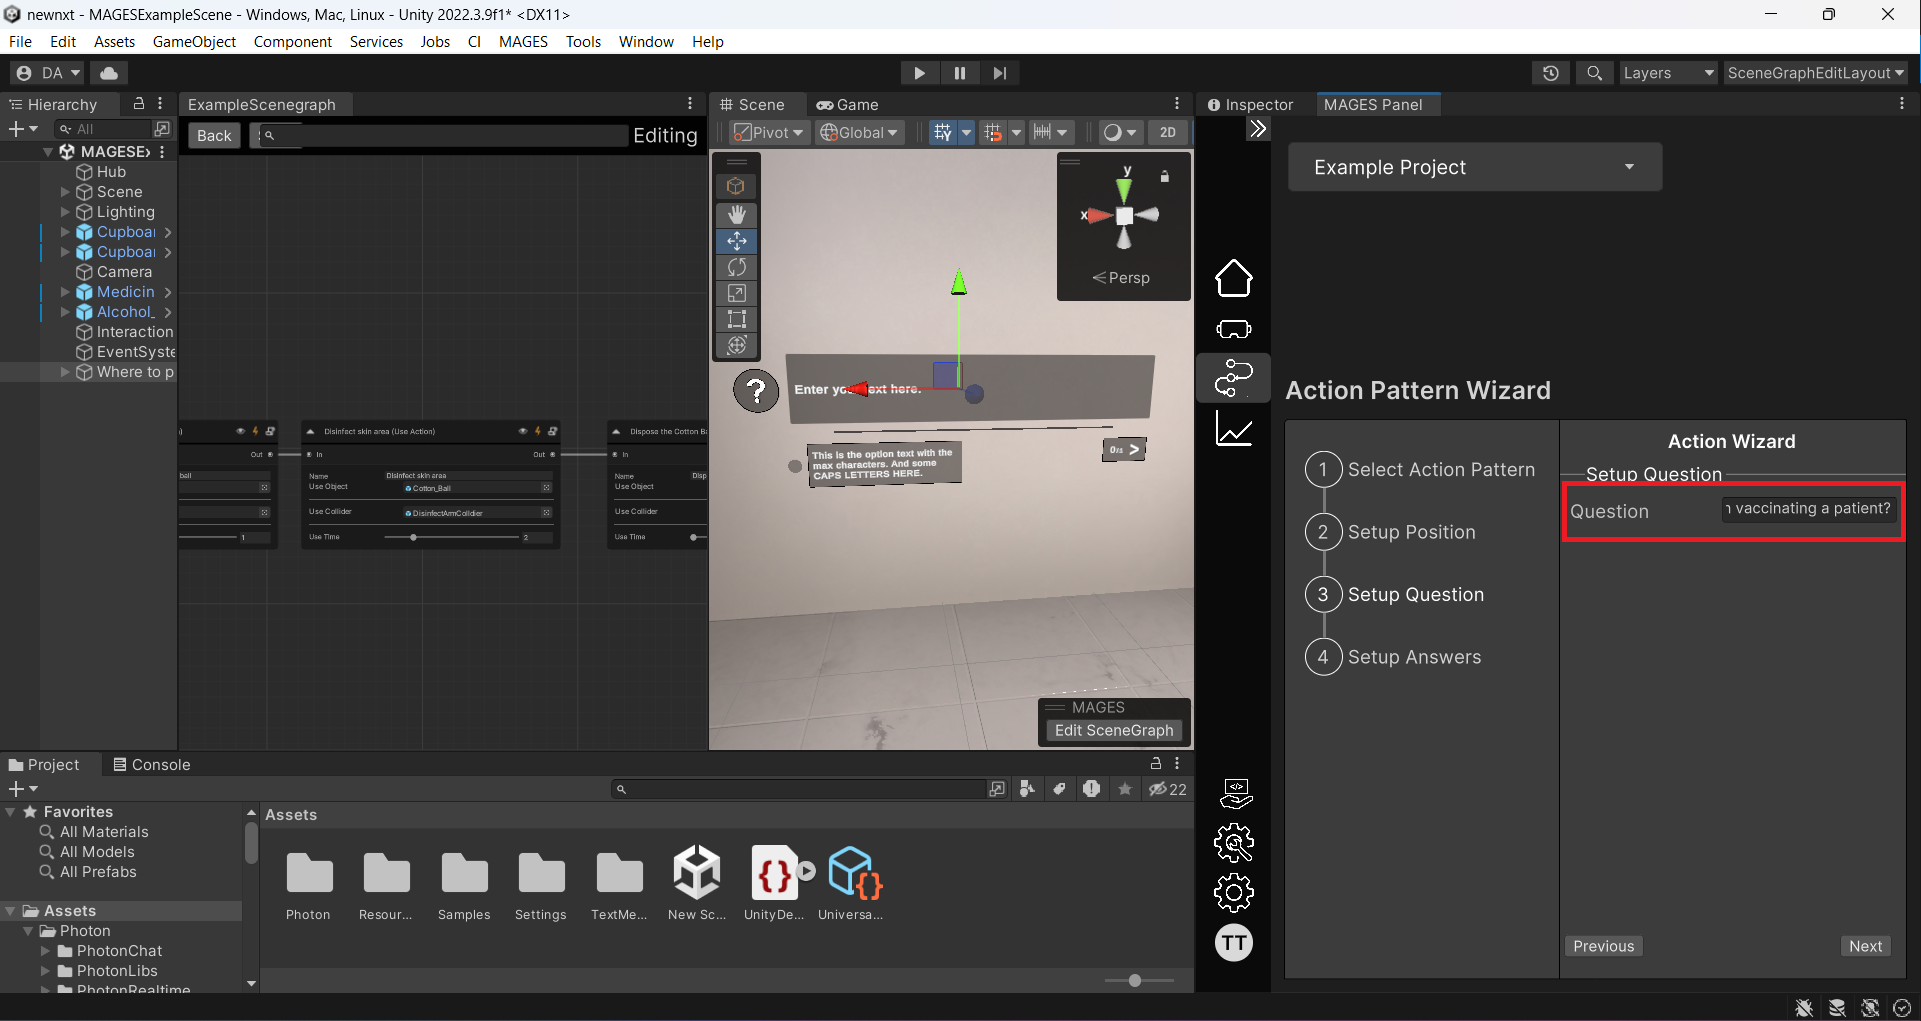
Set up the question by typing into the
Questionfield. This text will be presented to the user during play mode. For example, you can set it to “Where should you place the syringe when vaccinating a patient?”. Then clickNext.
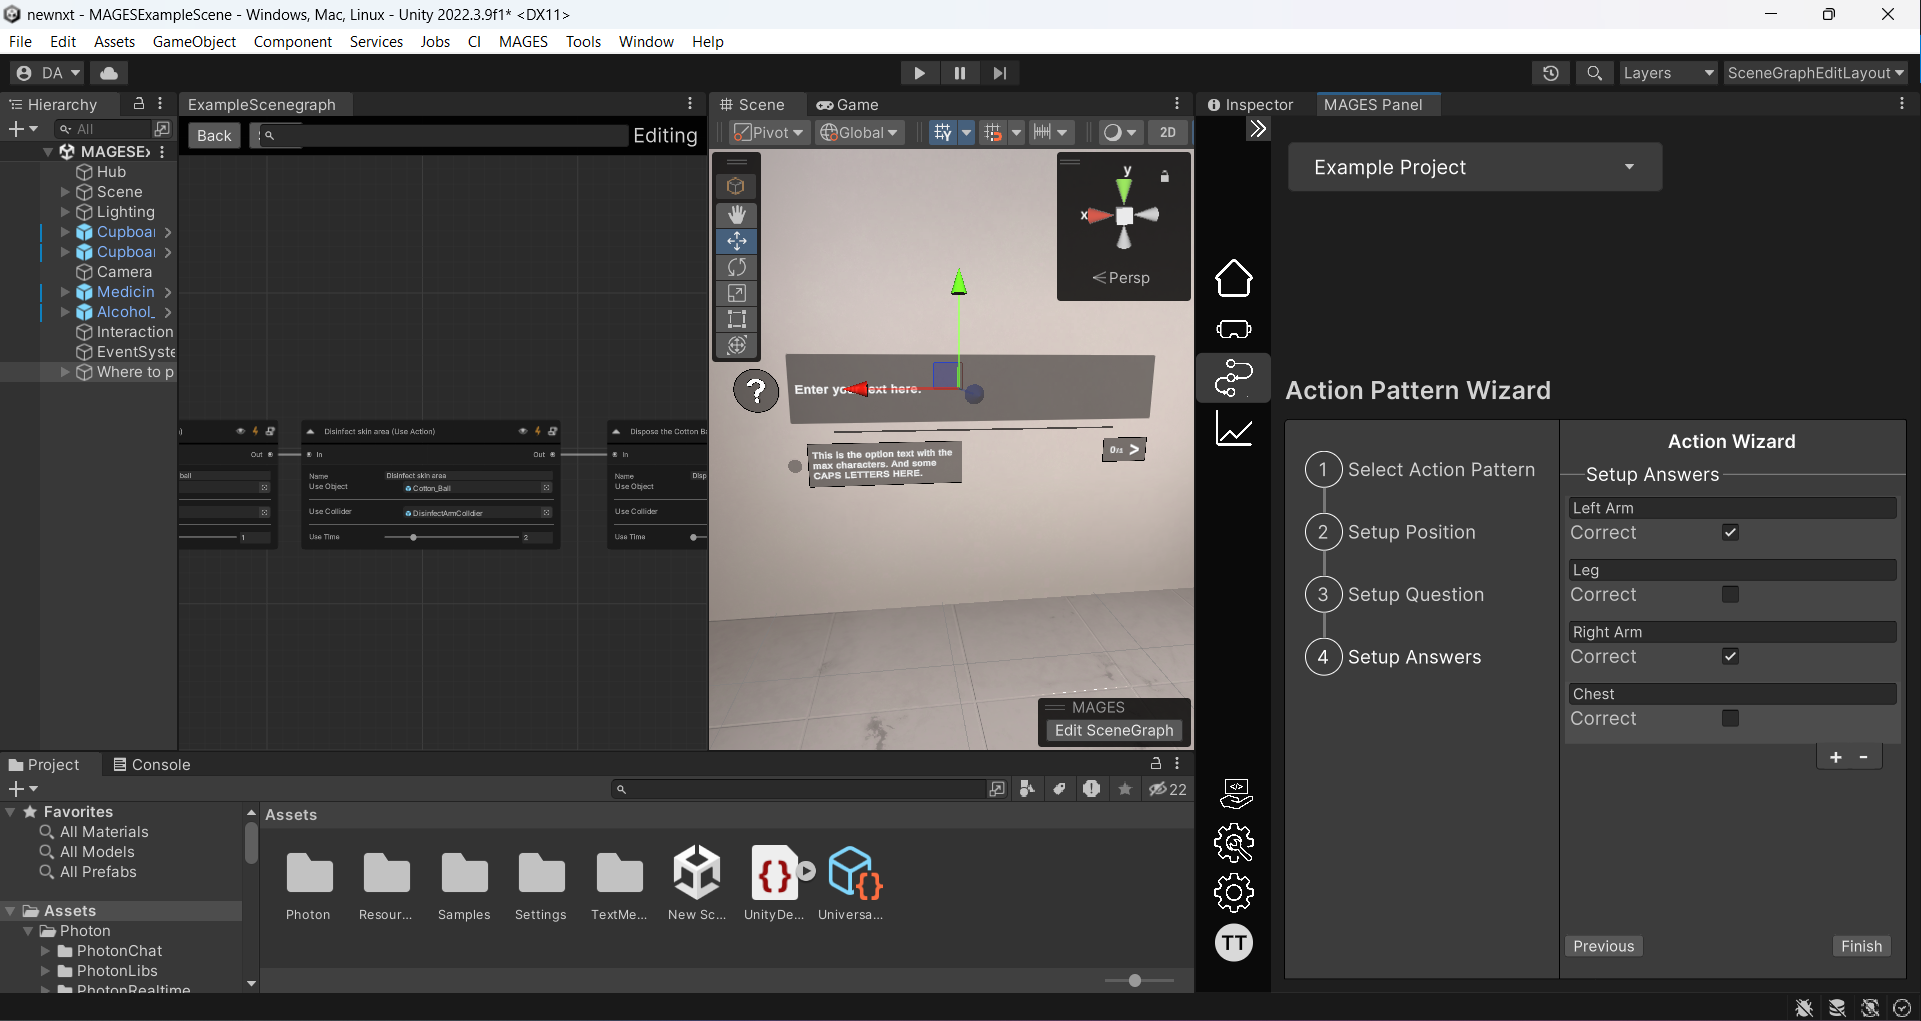
Populate a list with possible answers to this question by clicking the
+button. You can also select which answer is considered to be correct, and you can have more than one correct answer.
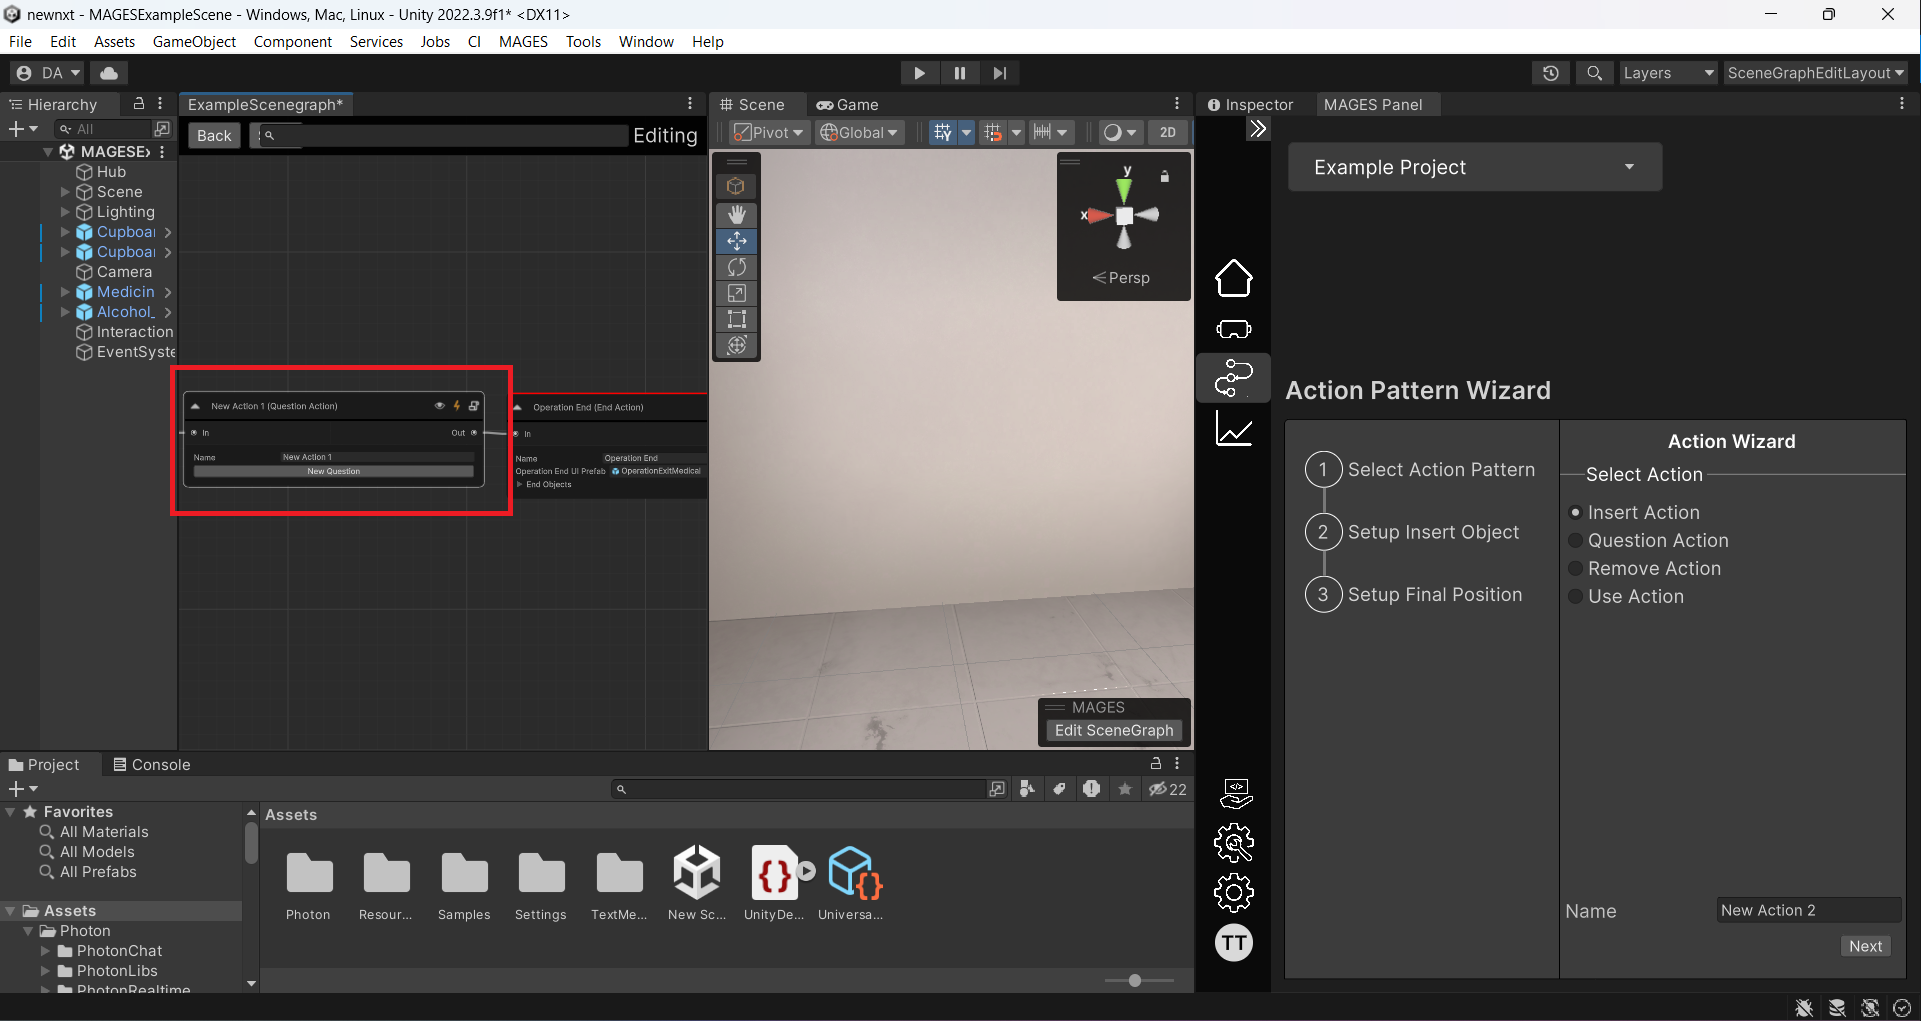
After clicking the
Finishbutton, the question action will be created in your scenegraph as the last action.
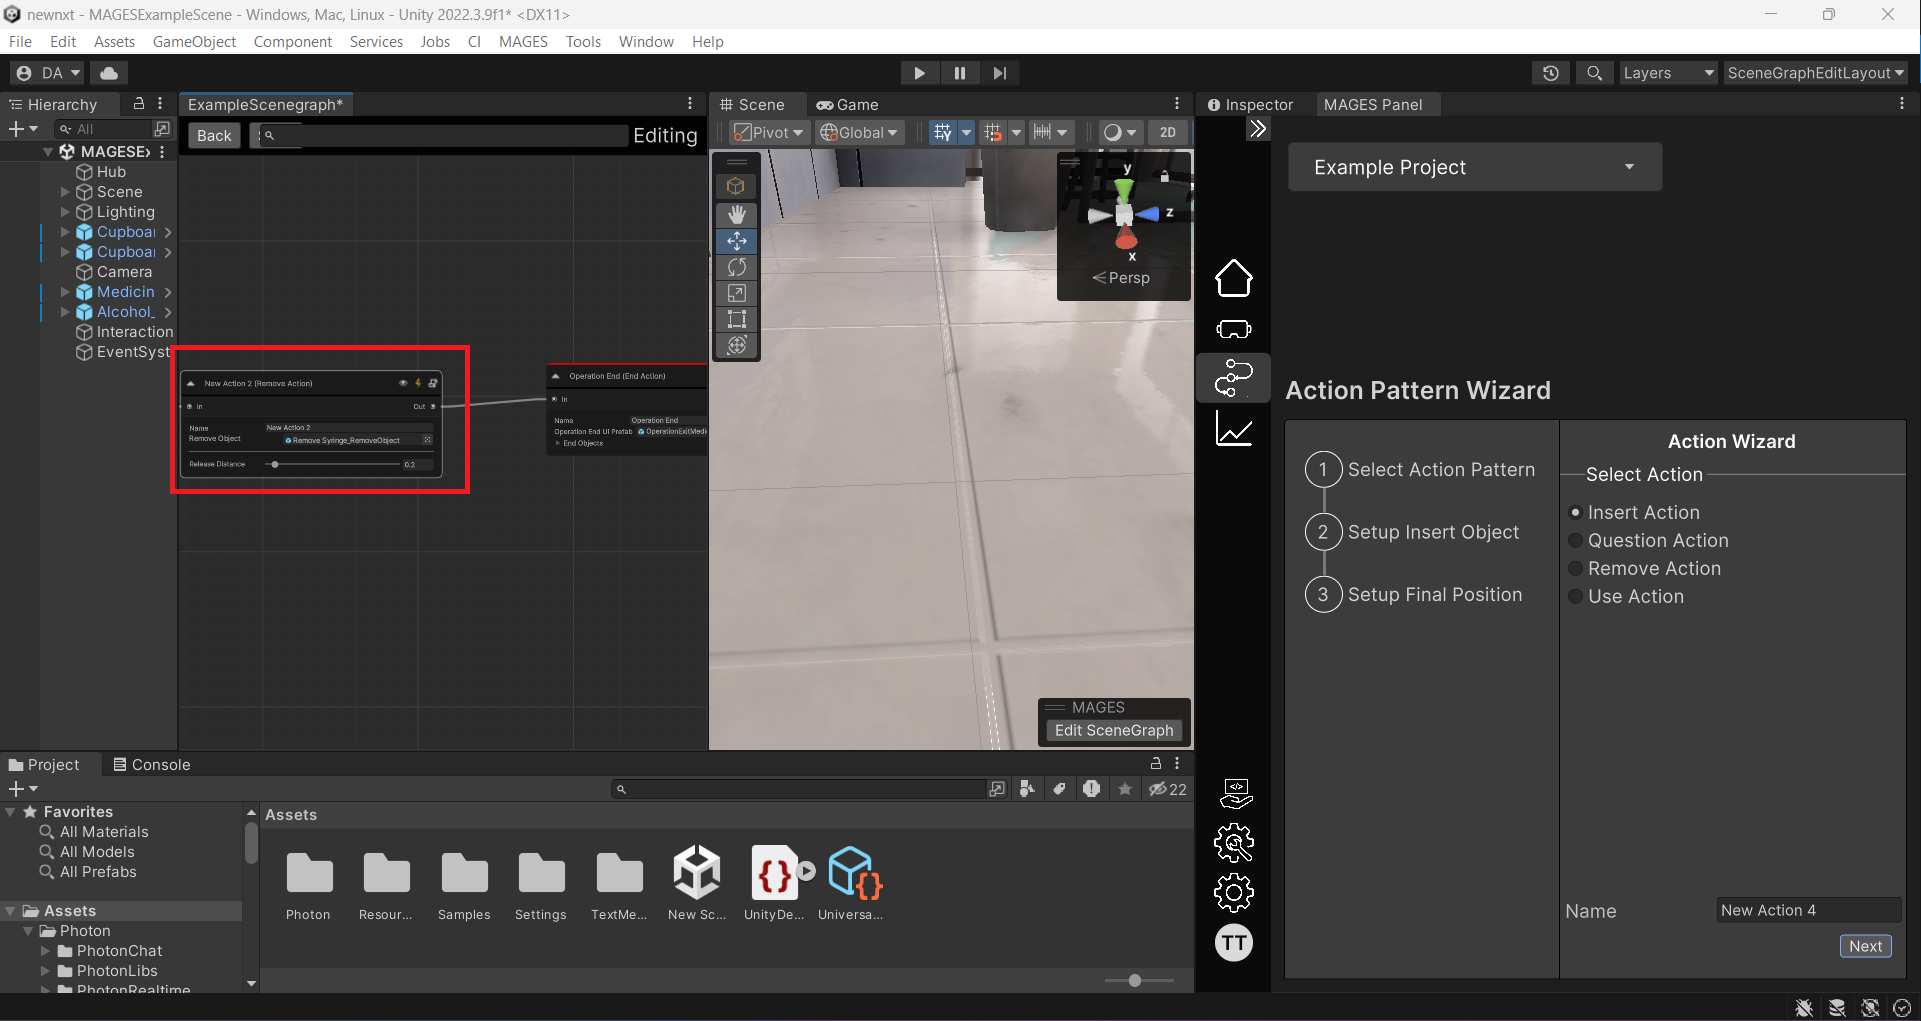
Creating a Remove Action using the Action Wizard
In this tutorial, we will demonstrate how to create a remove action that removes the syringe from the patient’s arm.
Click on the
Remove Actionbutton among the available actions. The side panel provides the necessary steps to create the action. Enter your action’s name in the name property, then click theNextbutton to proceed.
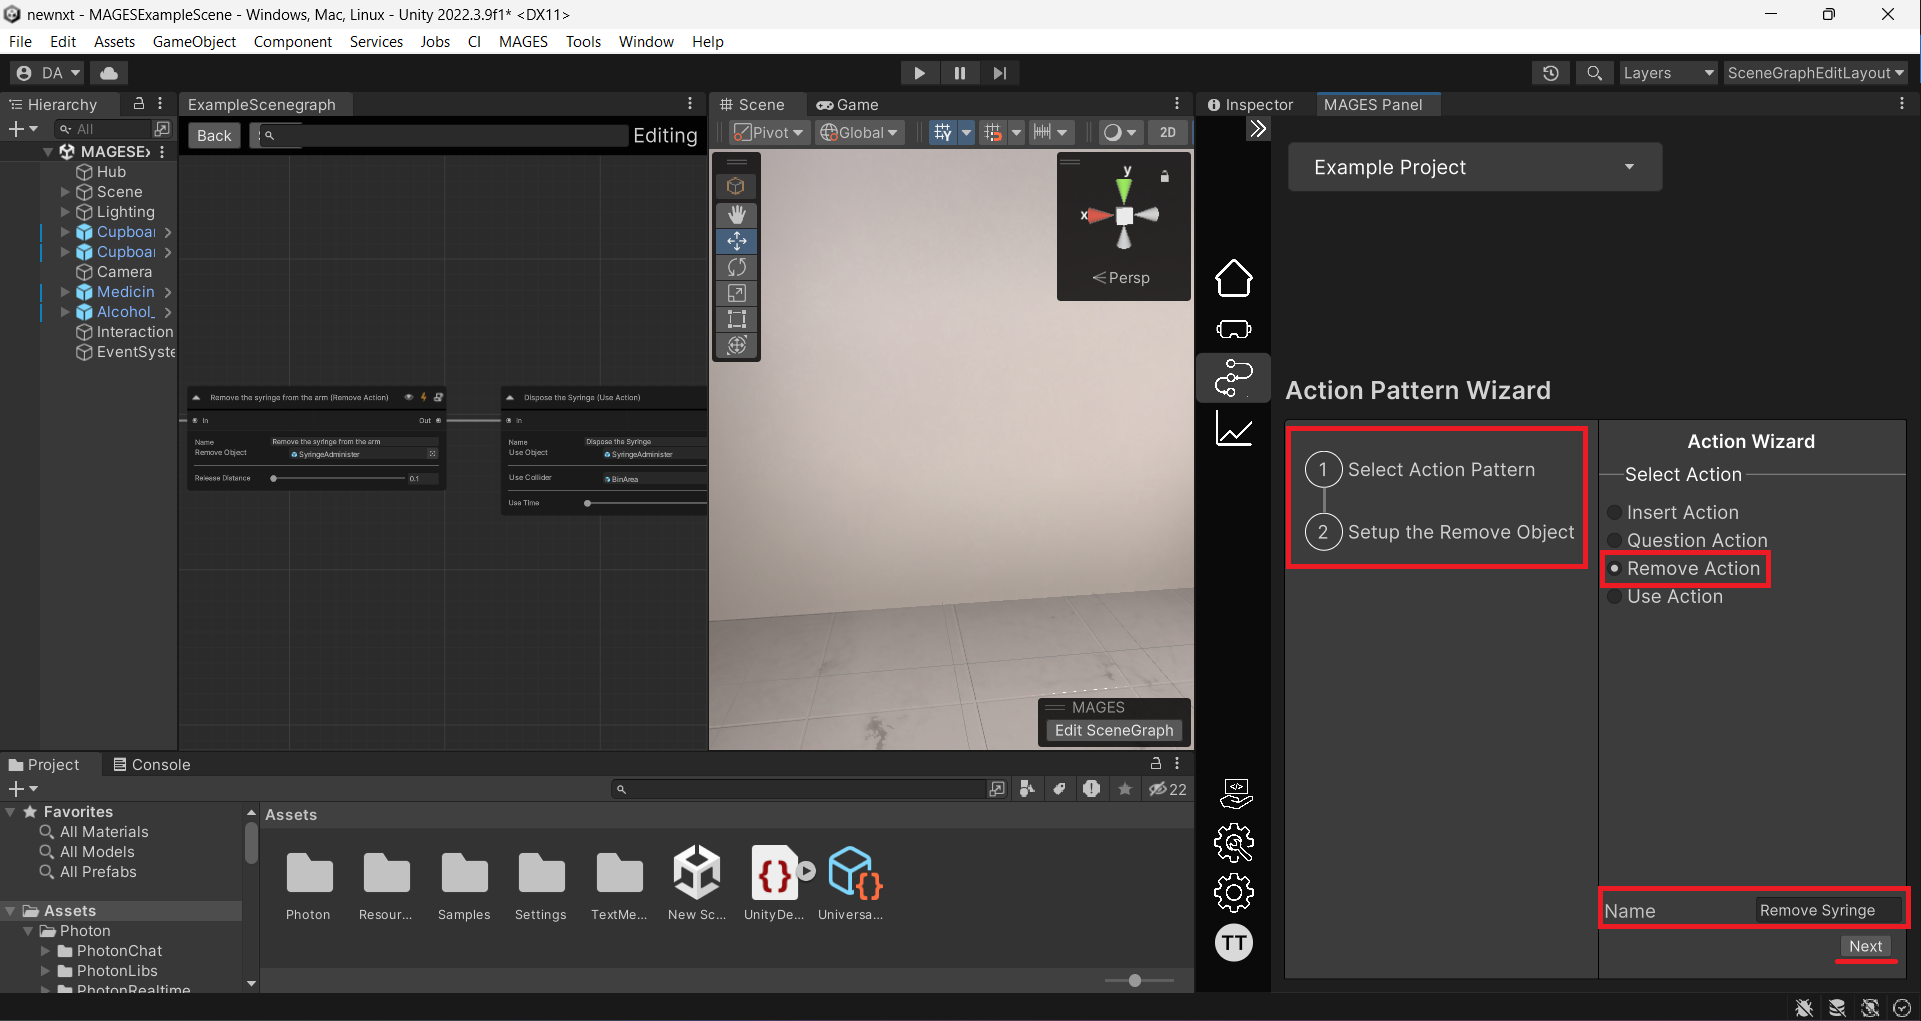
After clicking
Next, you will be redirected to theSetup the Remove Objectstep. Here, you can either create a new GameObject from a model in your assets or select an existing GameObject from your assets.
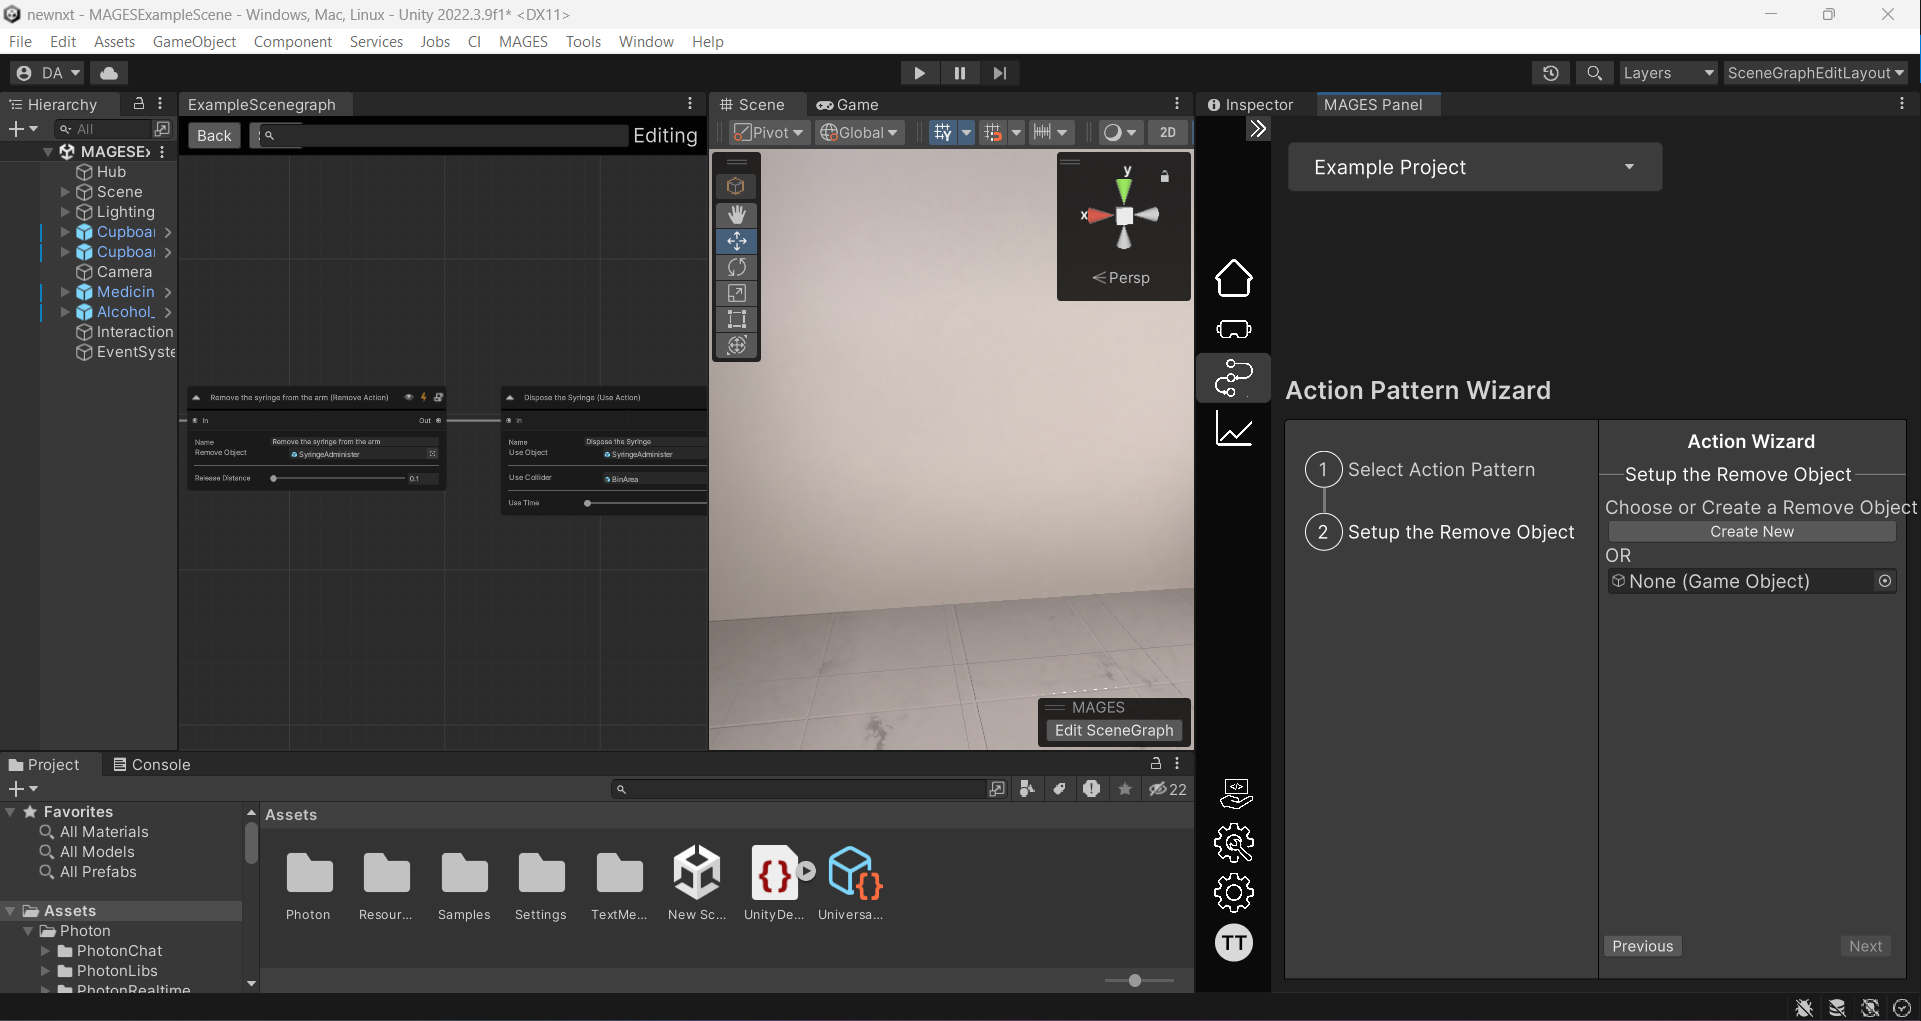
Click the
Create Newbutton, then select theSyringemodel from your assets. This creates a GameObject of the syringe in your scene that you can position as desired. This will be the position that the GameObject will be initially spawned.
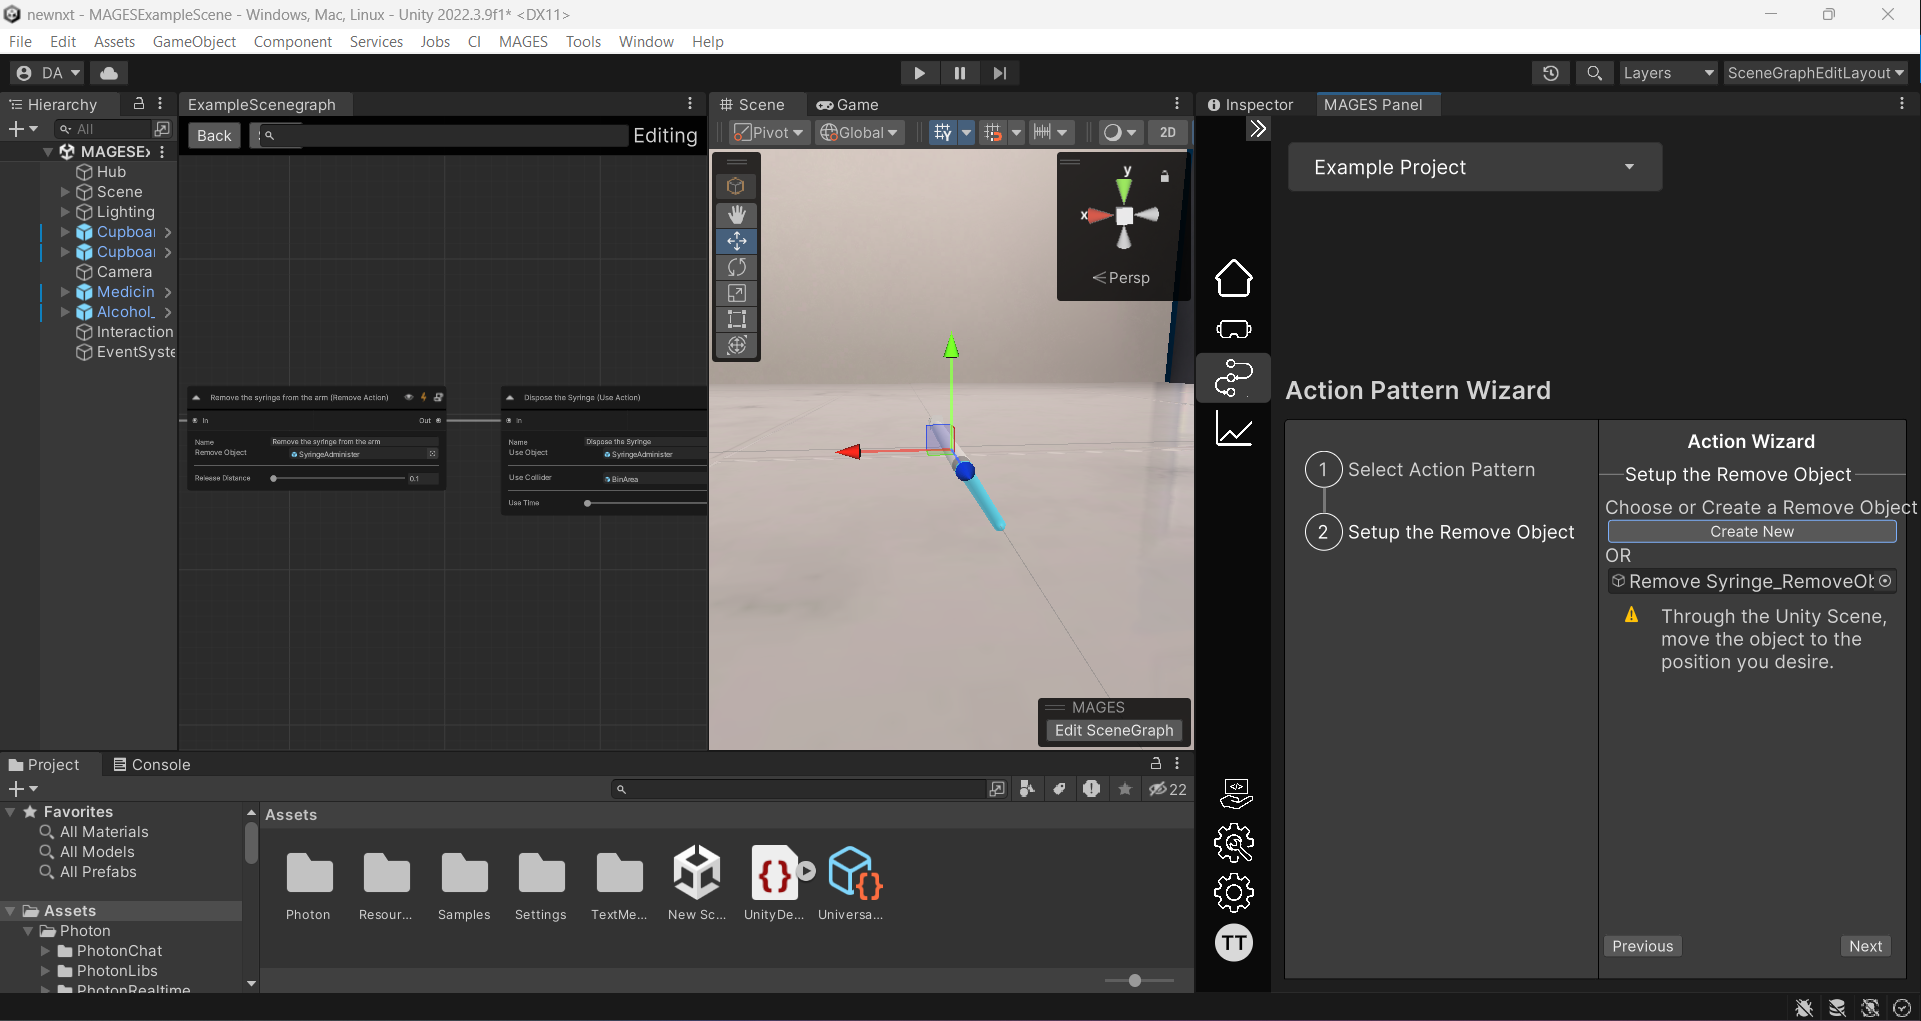
Position the syringe on the patient’s arm in your scene using the gizmos, and then click the
Nextbutton again.
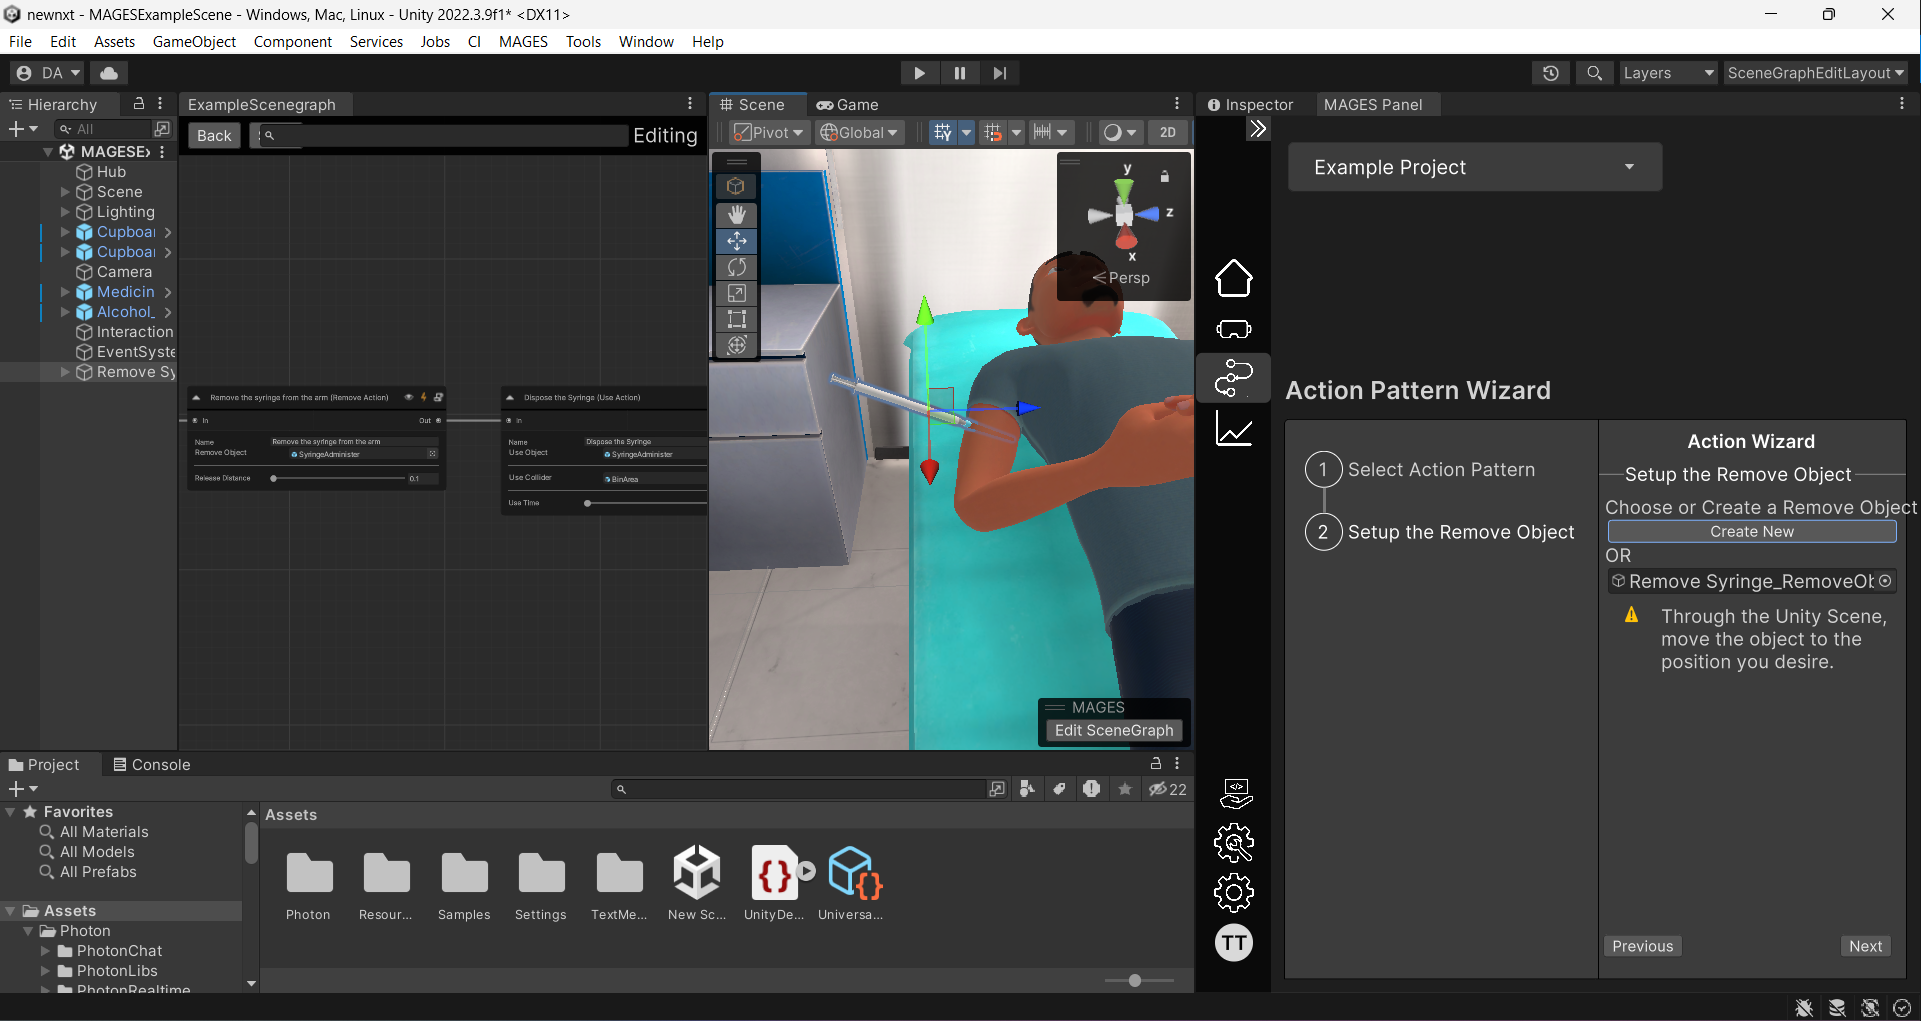
After clicking the
Nextbutton, the remove action will be created in your scenegraph as the last action.
Creating a Use Action using the Action Wizard
In this tutorial, we will demonstrate how to create a use action that involves using a cotton ball to clean the patient’s arm before vaccination.
Click on the
Use Actionbutton among the available actions. The side panel provides the necessary steps to create the action. Enter your action’s name in the name property, then click theNextbutton to proceed.
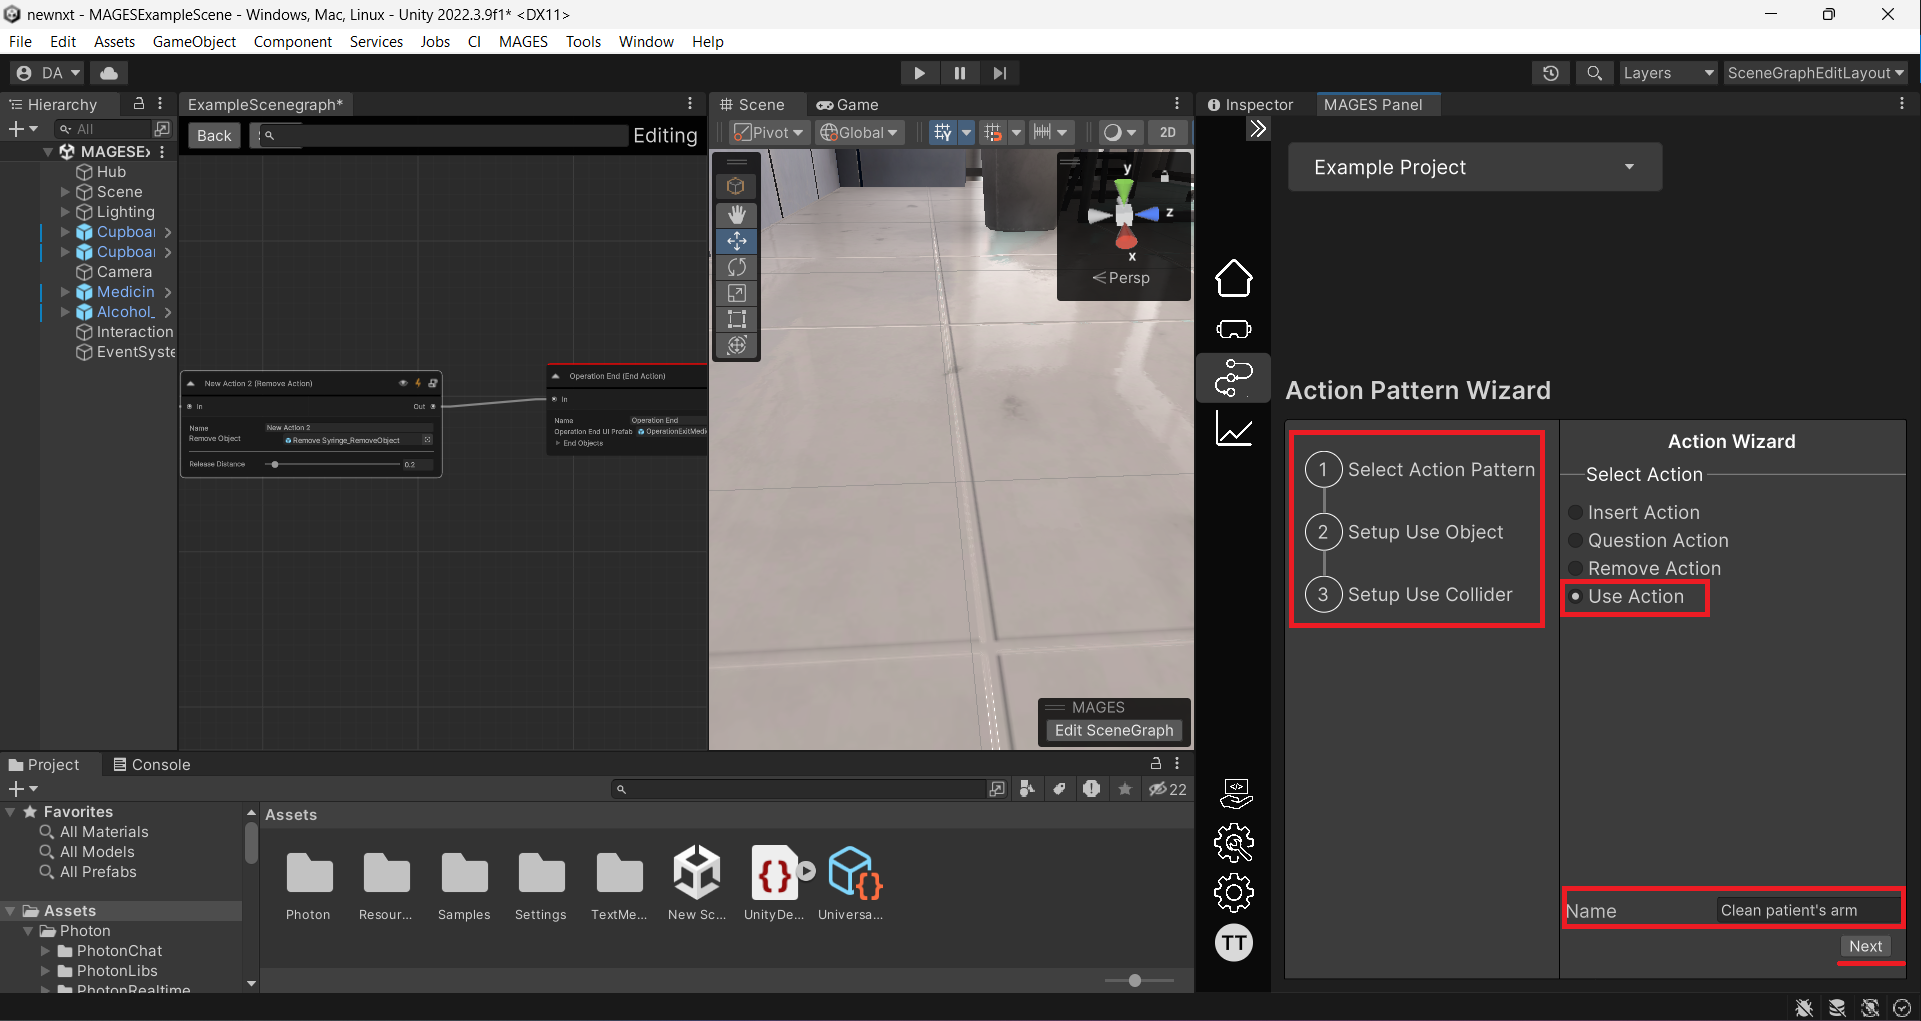
After clicking
Next, you will be redirected to theSetup Use Objectstep. Here, you can either create a new GameObject from a model in your assets or select an existing GameObject from your assets.
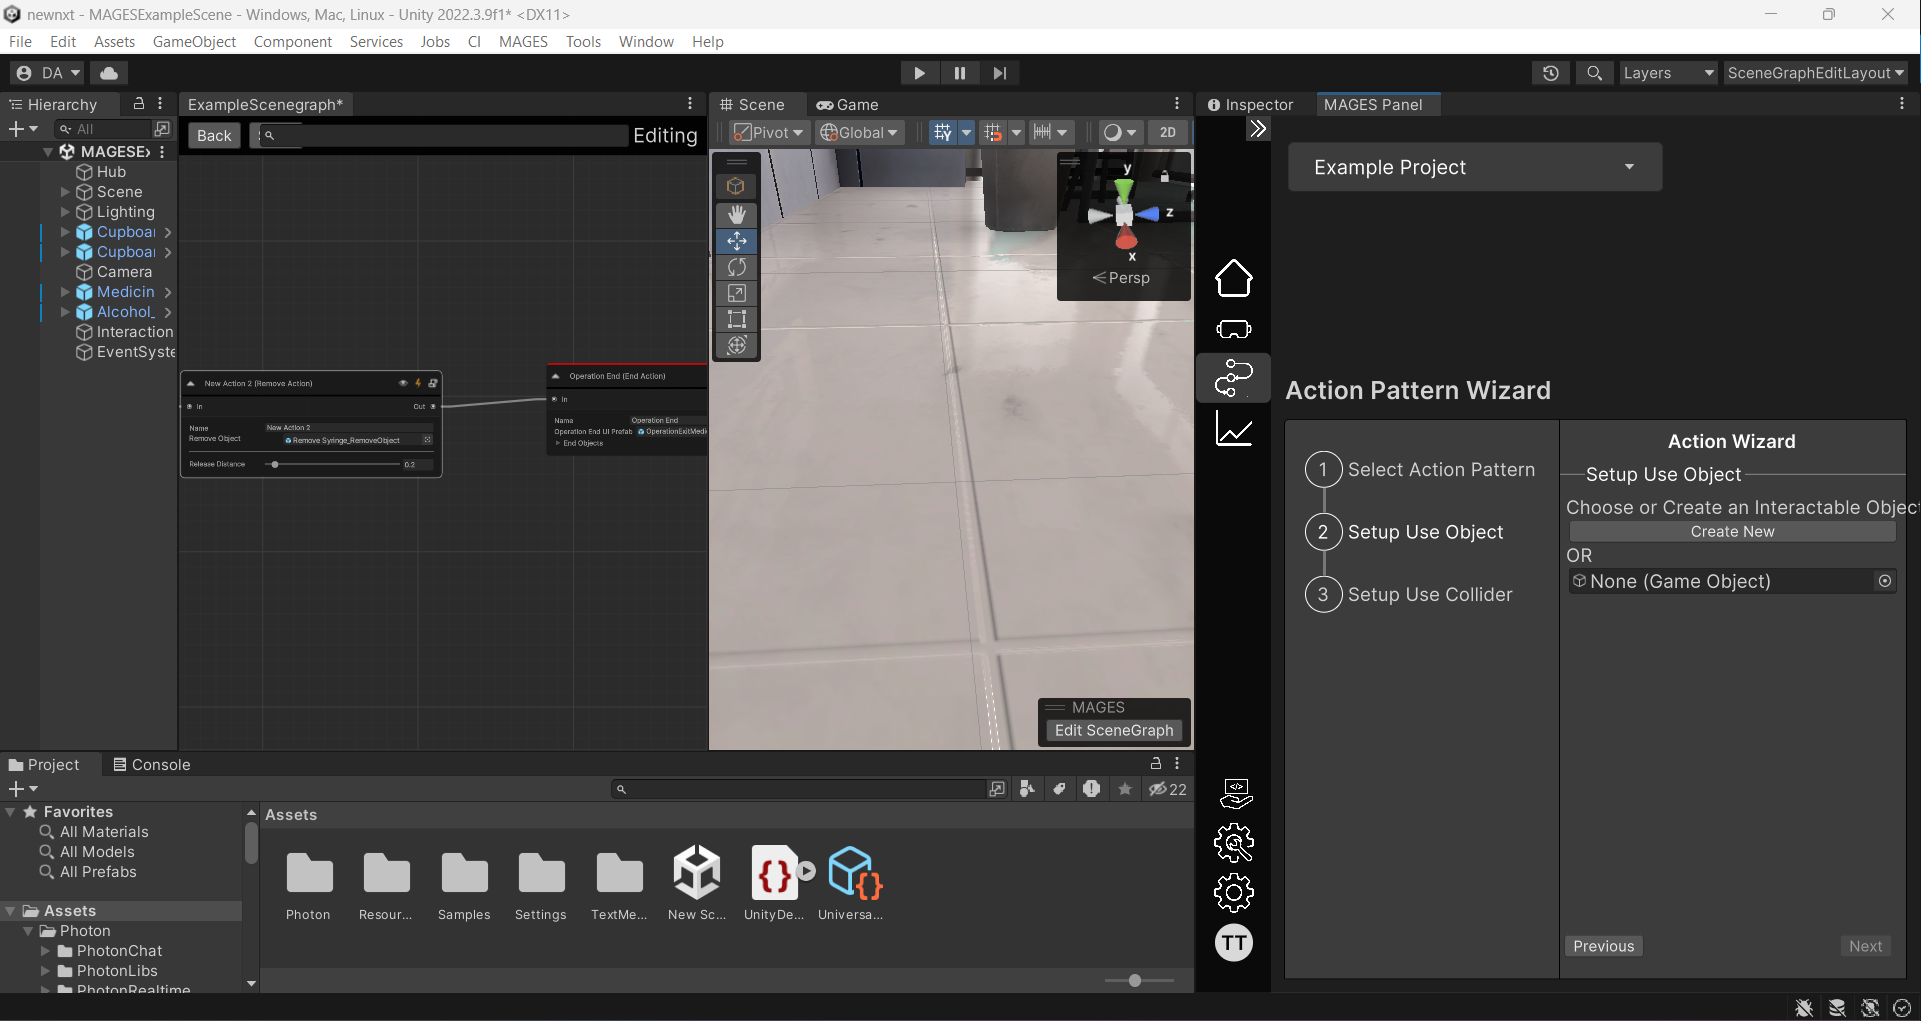
Click the
Create Newbutton, then select theCotton_Ballmodel from your assets. This creates a GameObject of the cotton ball in your scene that you can position as desired. This will be the position that the GameObject will be initially spawned.
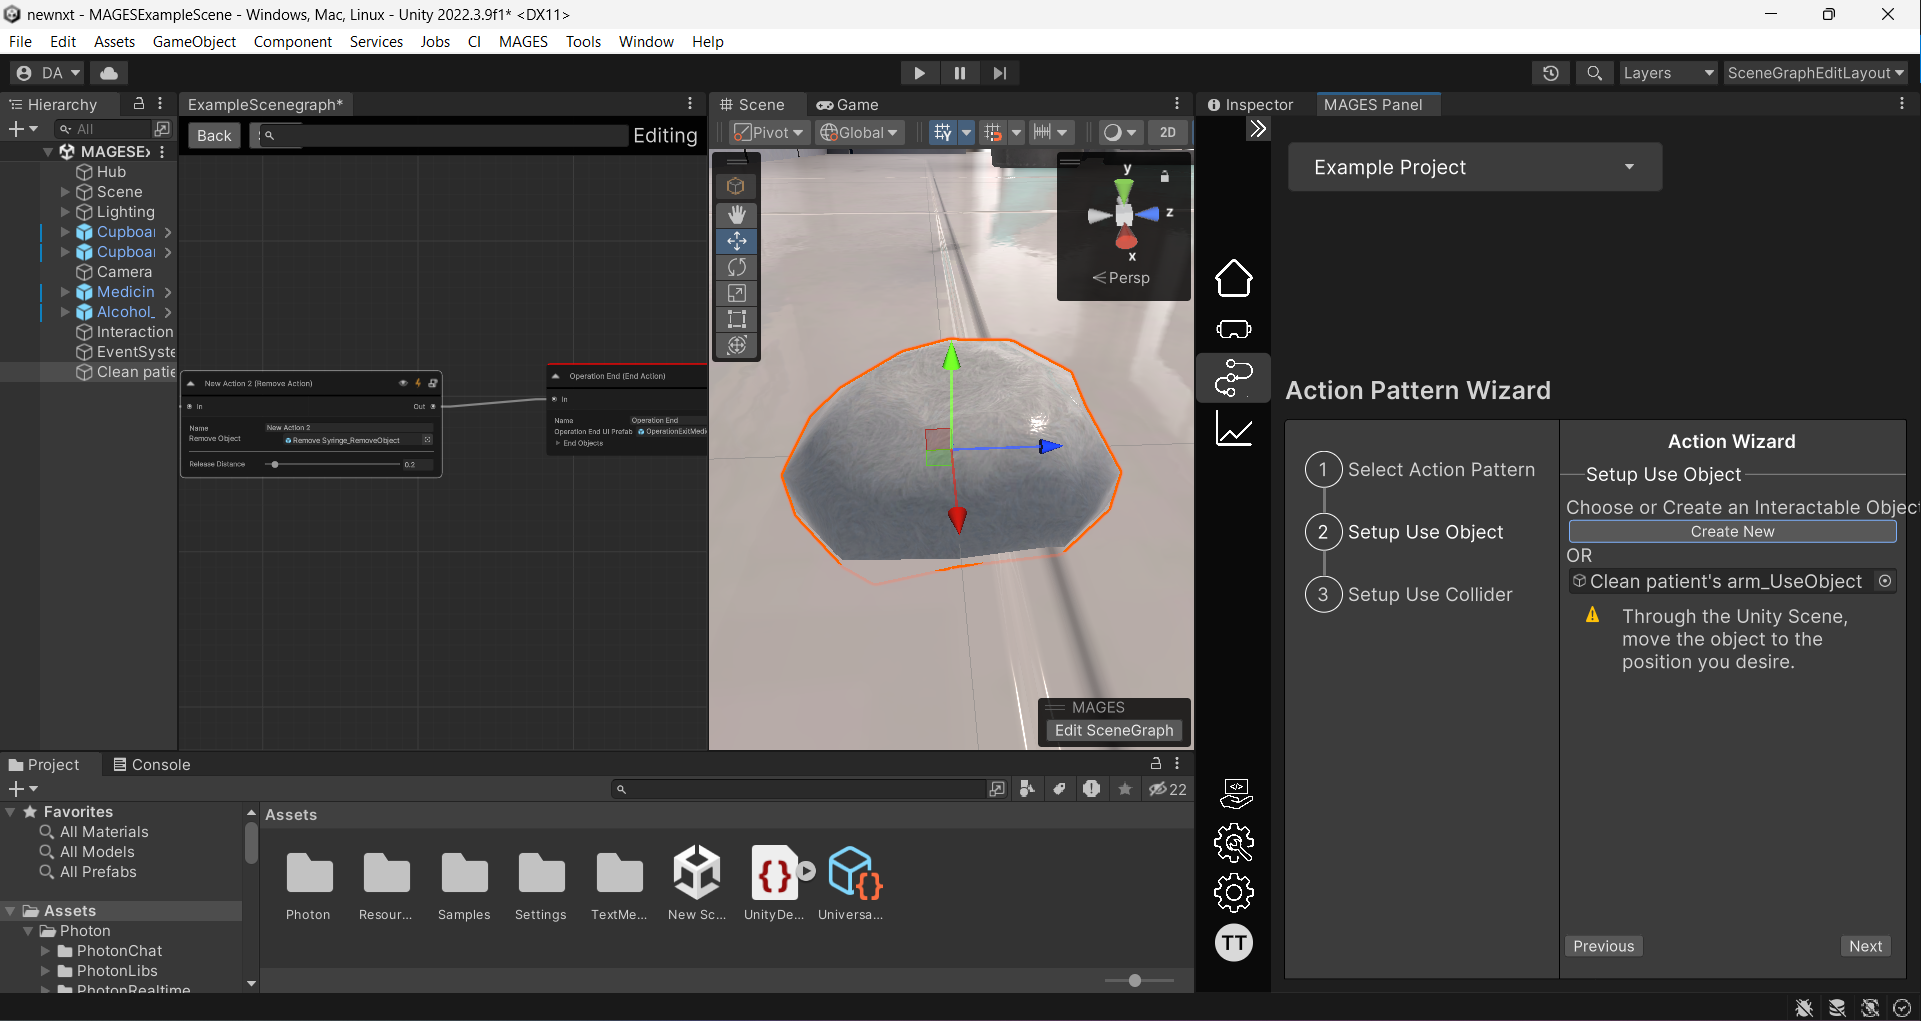
Position the cotton ball on the table in your scene using the gizmos, and then click the
Nextbutton again.
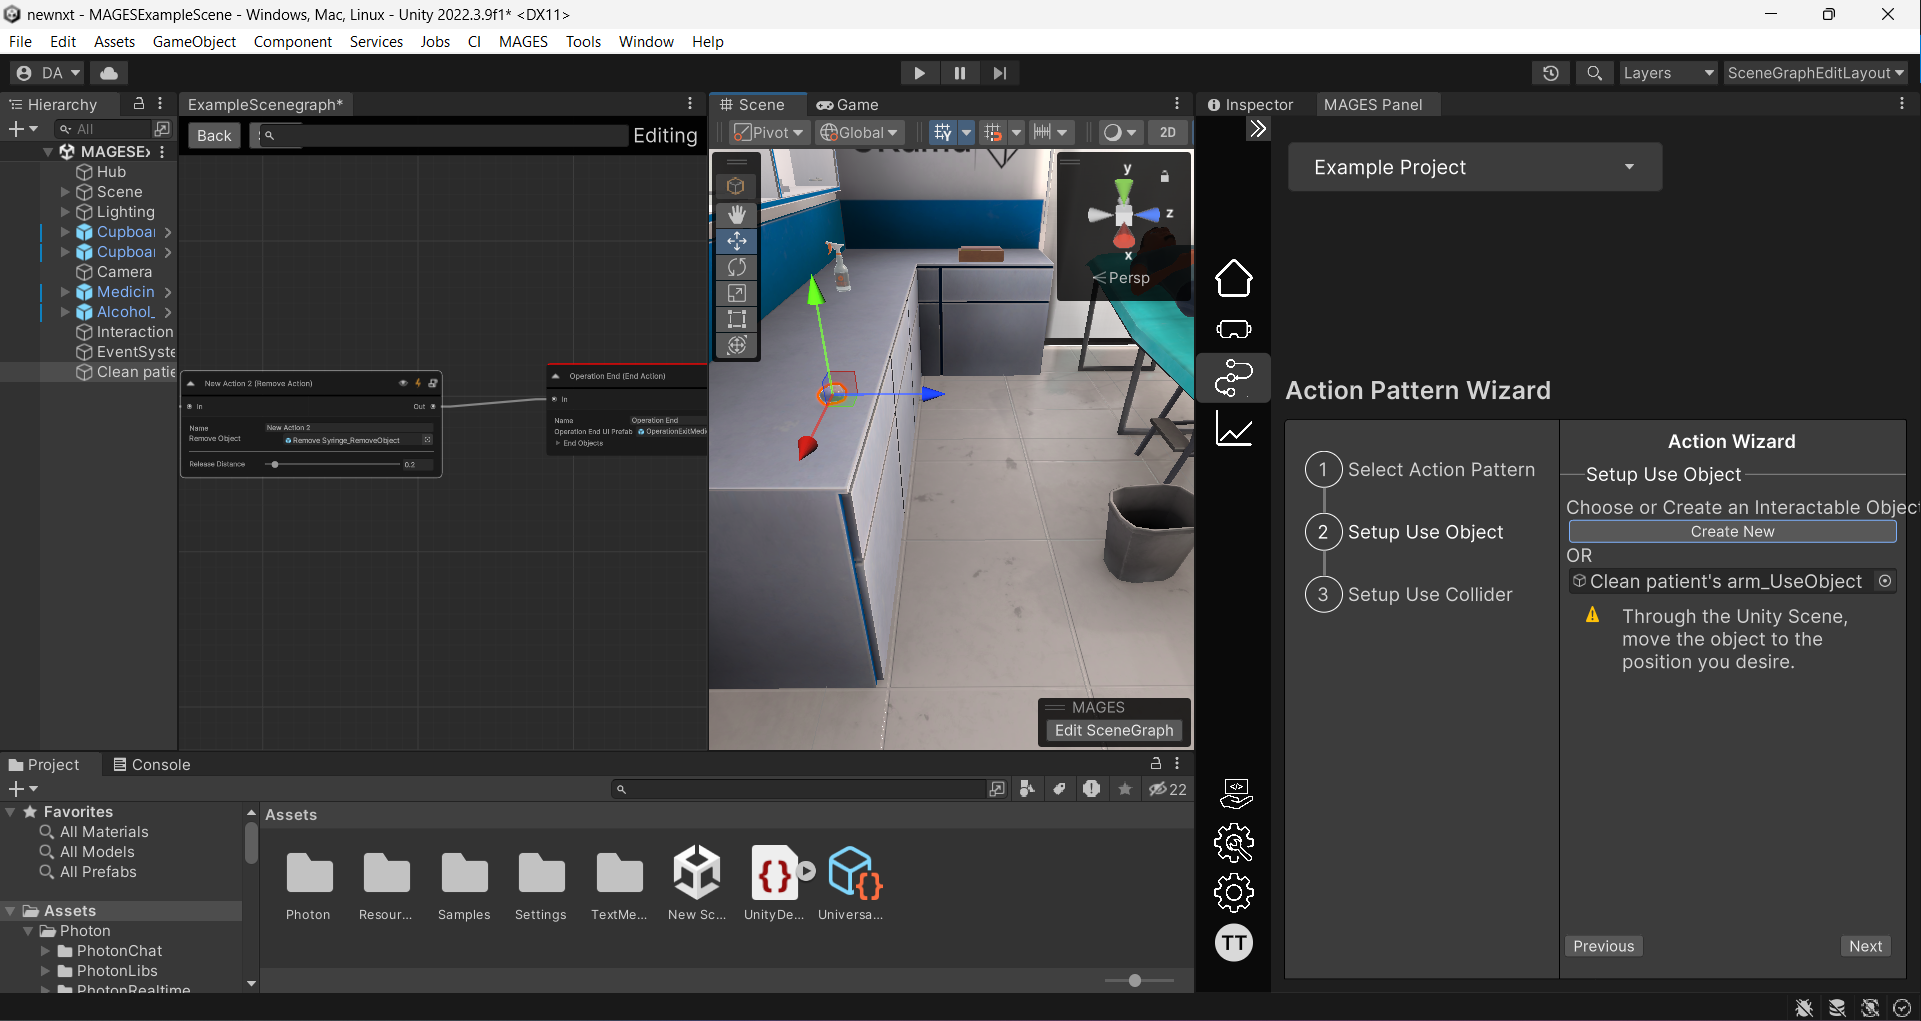
You will be redirected to the final step of the setup, where you need to set up the use collider of the use object. In this step, a new GameObject of the Cotton Ball will be spawned to resemble the use collider.
Once again, using the gizmos, move the use collider GameObject to the patient’s arm, where you want the Cotton Ball to be used, and then click the
Finishbutton.
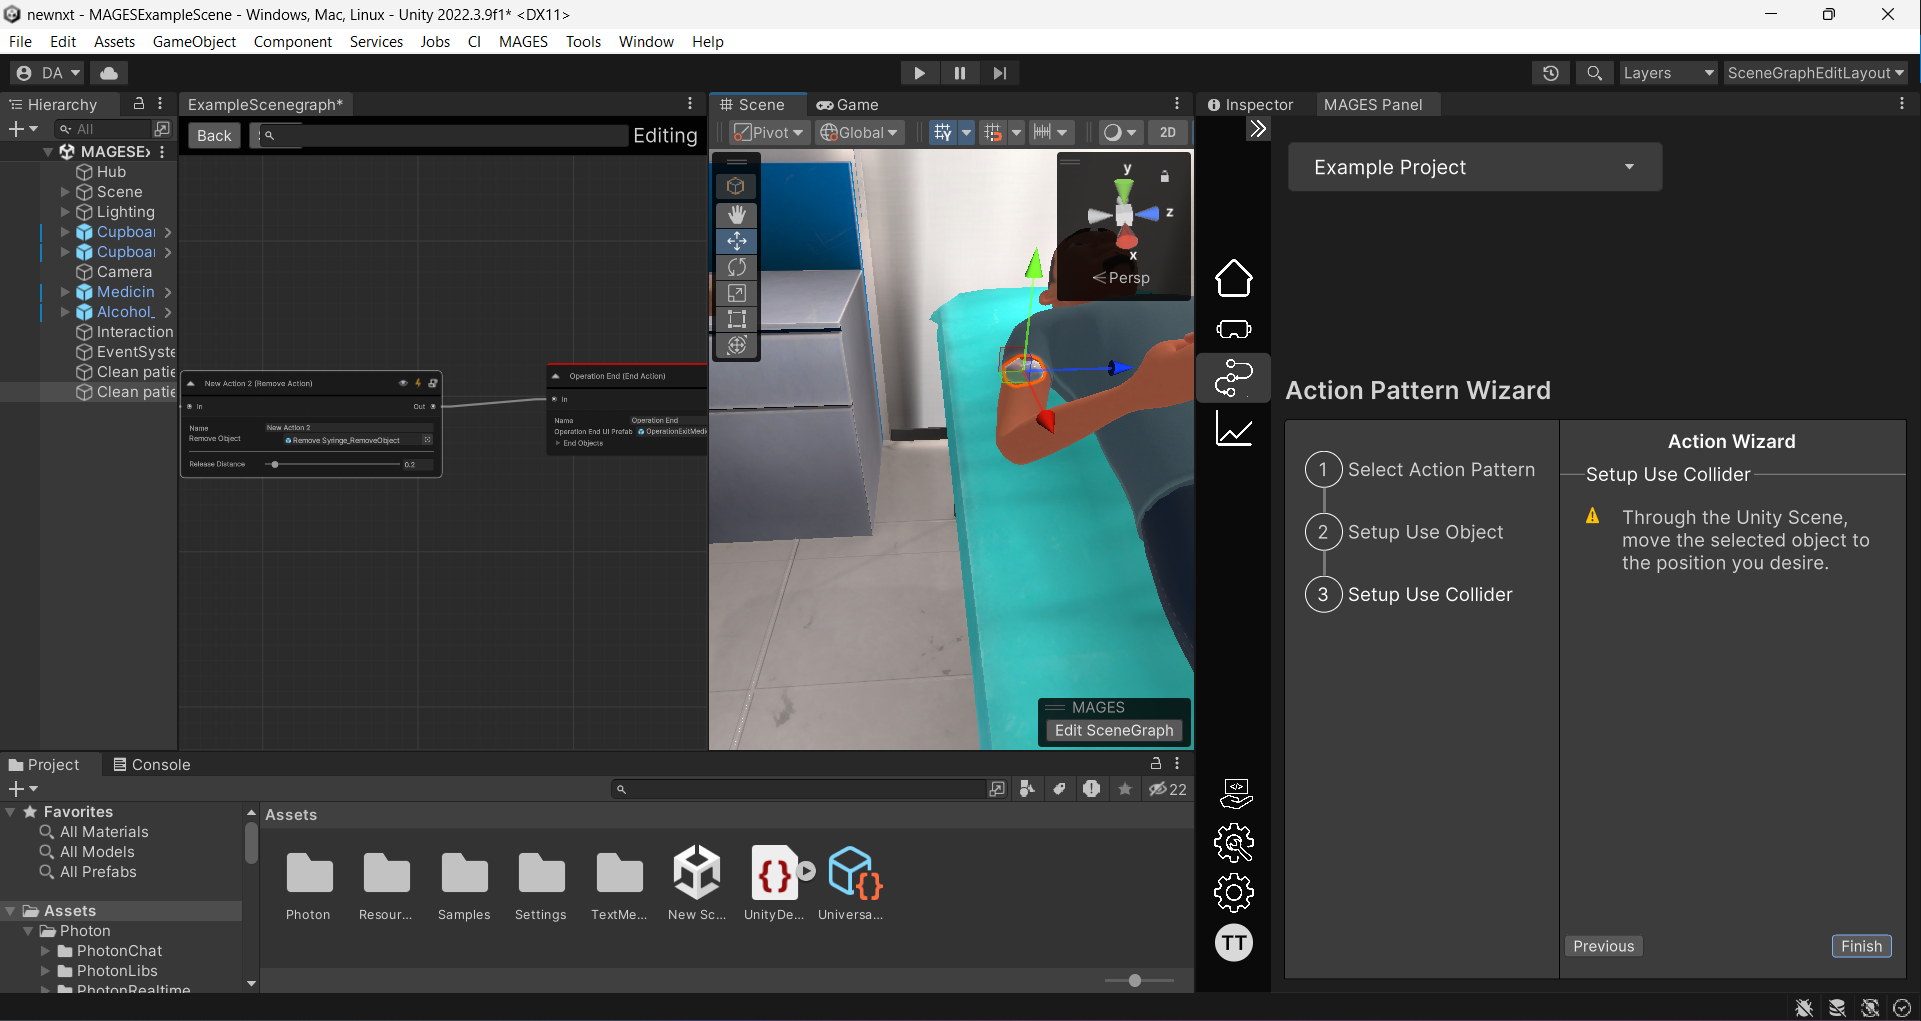
After clicking the
Finishbutton, the use action will be created in your scenegraph as the last action.
