Editing Your First MAGES Project
After creating your First MAGES Project using the action wizard, let’s explore how to modify the actions within the scenegraph editor.
Modifying your Action’s prefabs
An essential customization for each action involves adjusting and positioning the action’s prefabs according to your requirements. Let’s explore an example by modifying the position of the prefabs in our initial Insert action.
To adjust the position of your Insert Object, follow these steps:
Open the scenegraph editor and navigate to your Insert Action.
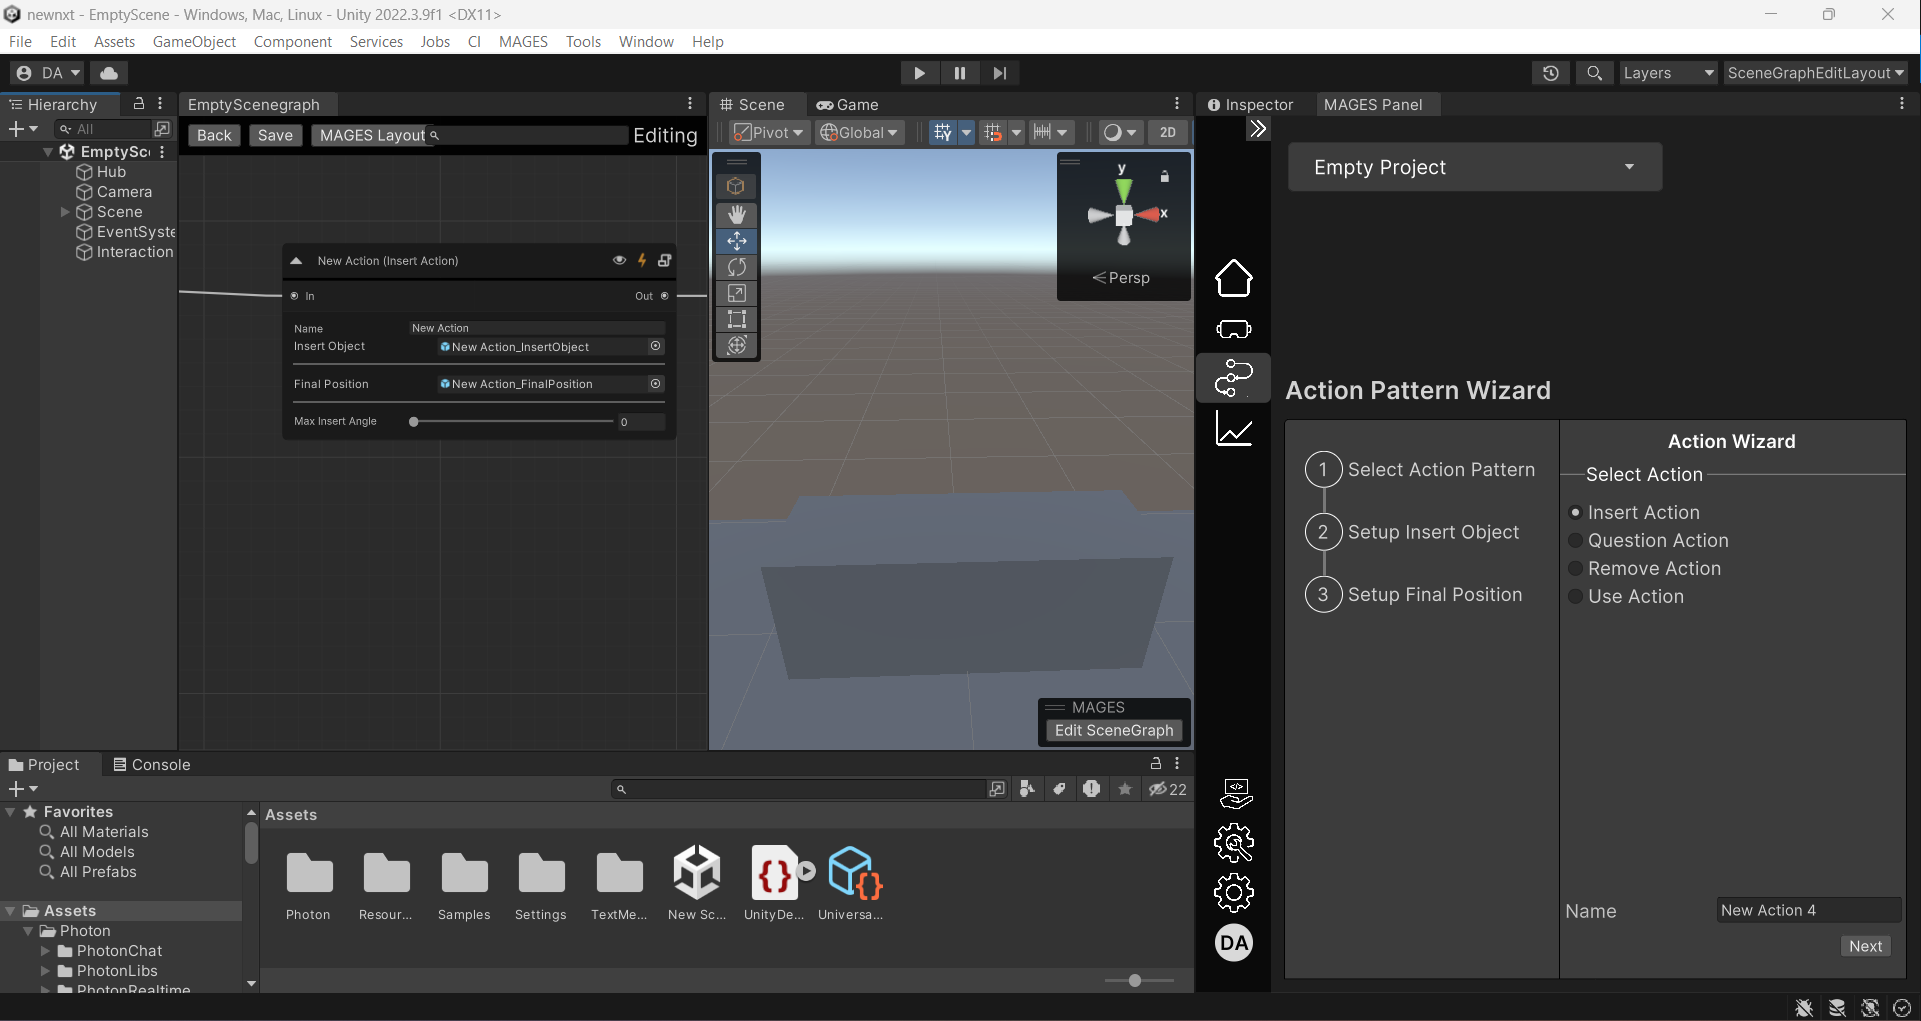
Click on the field of the Insert Object to reveal the prefab path in your project.
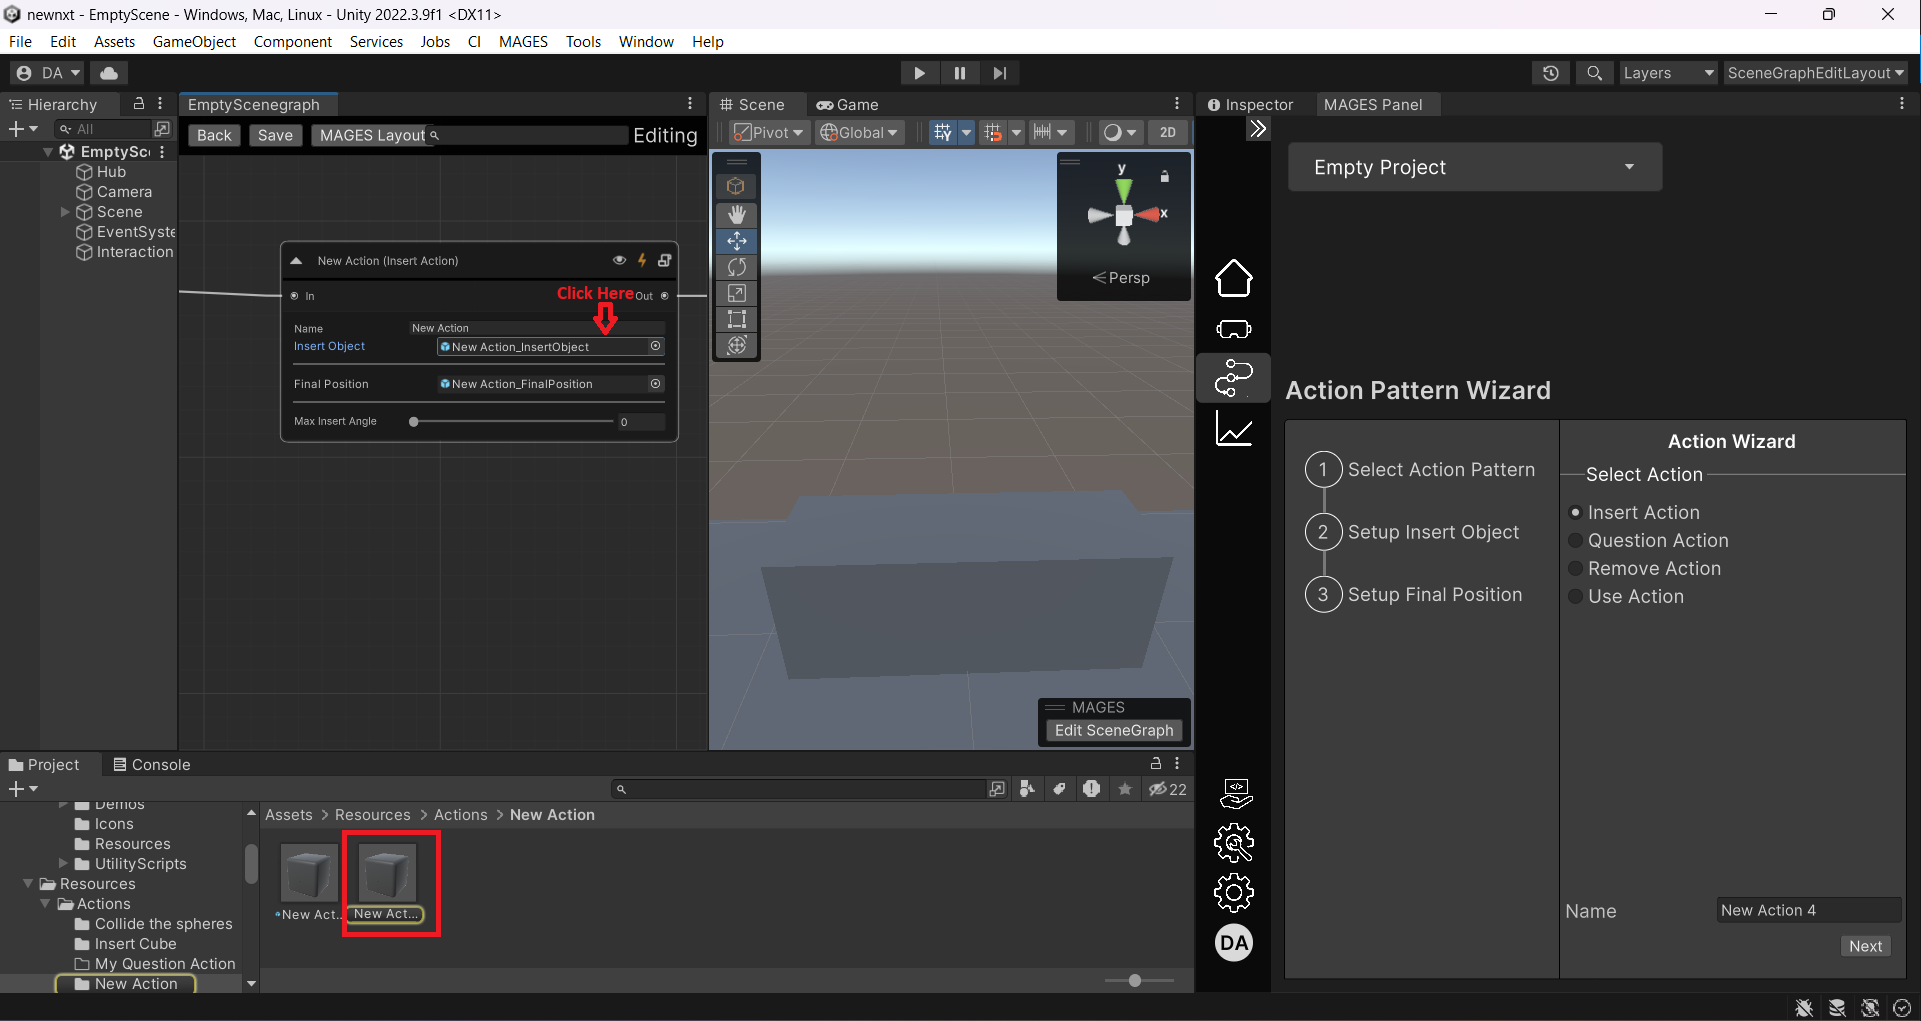
Drag and drop the prefab into your scene hierarchy to spawn it in your active scene. Inspect the spawned GameObject using the Inspector on the right.
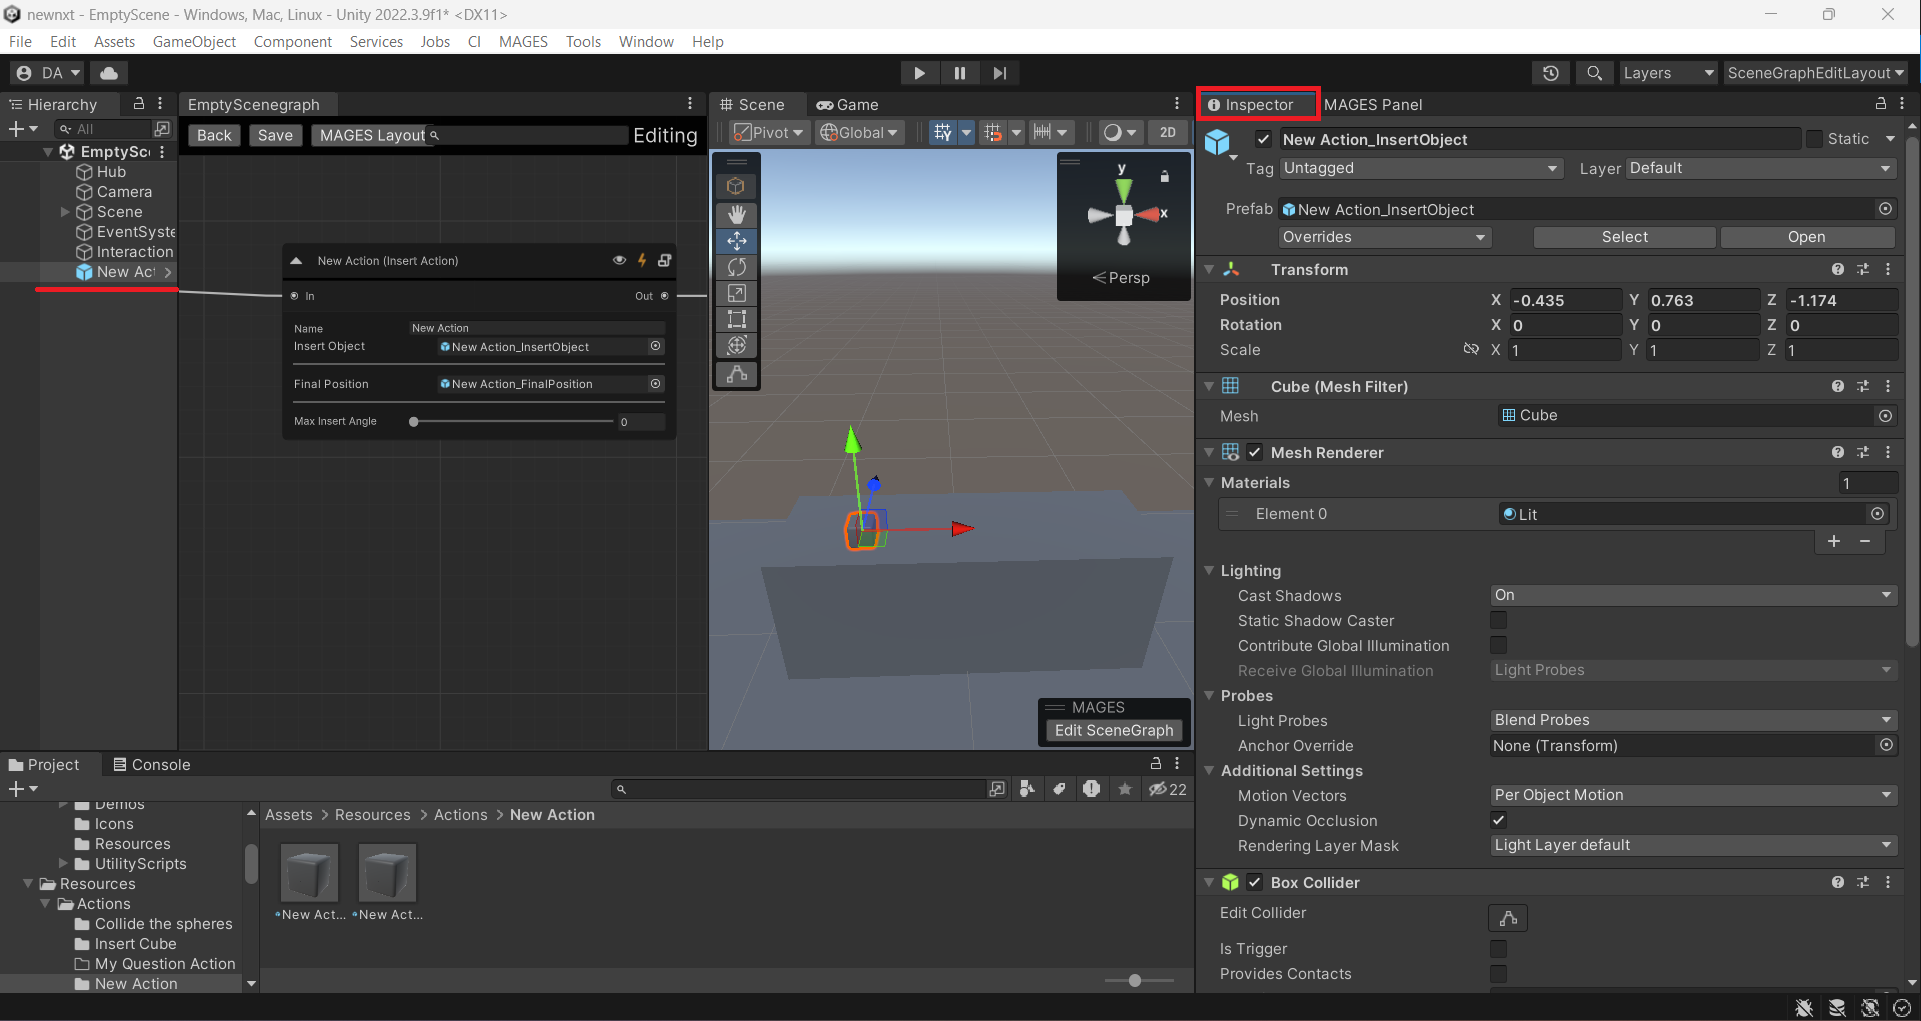
Reposition the Insert Object using the gizmos to your desired location.
Afterward, right-click on the modified Transform value and select Apply to prefab to update your prefab. The modified properties are in bold.
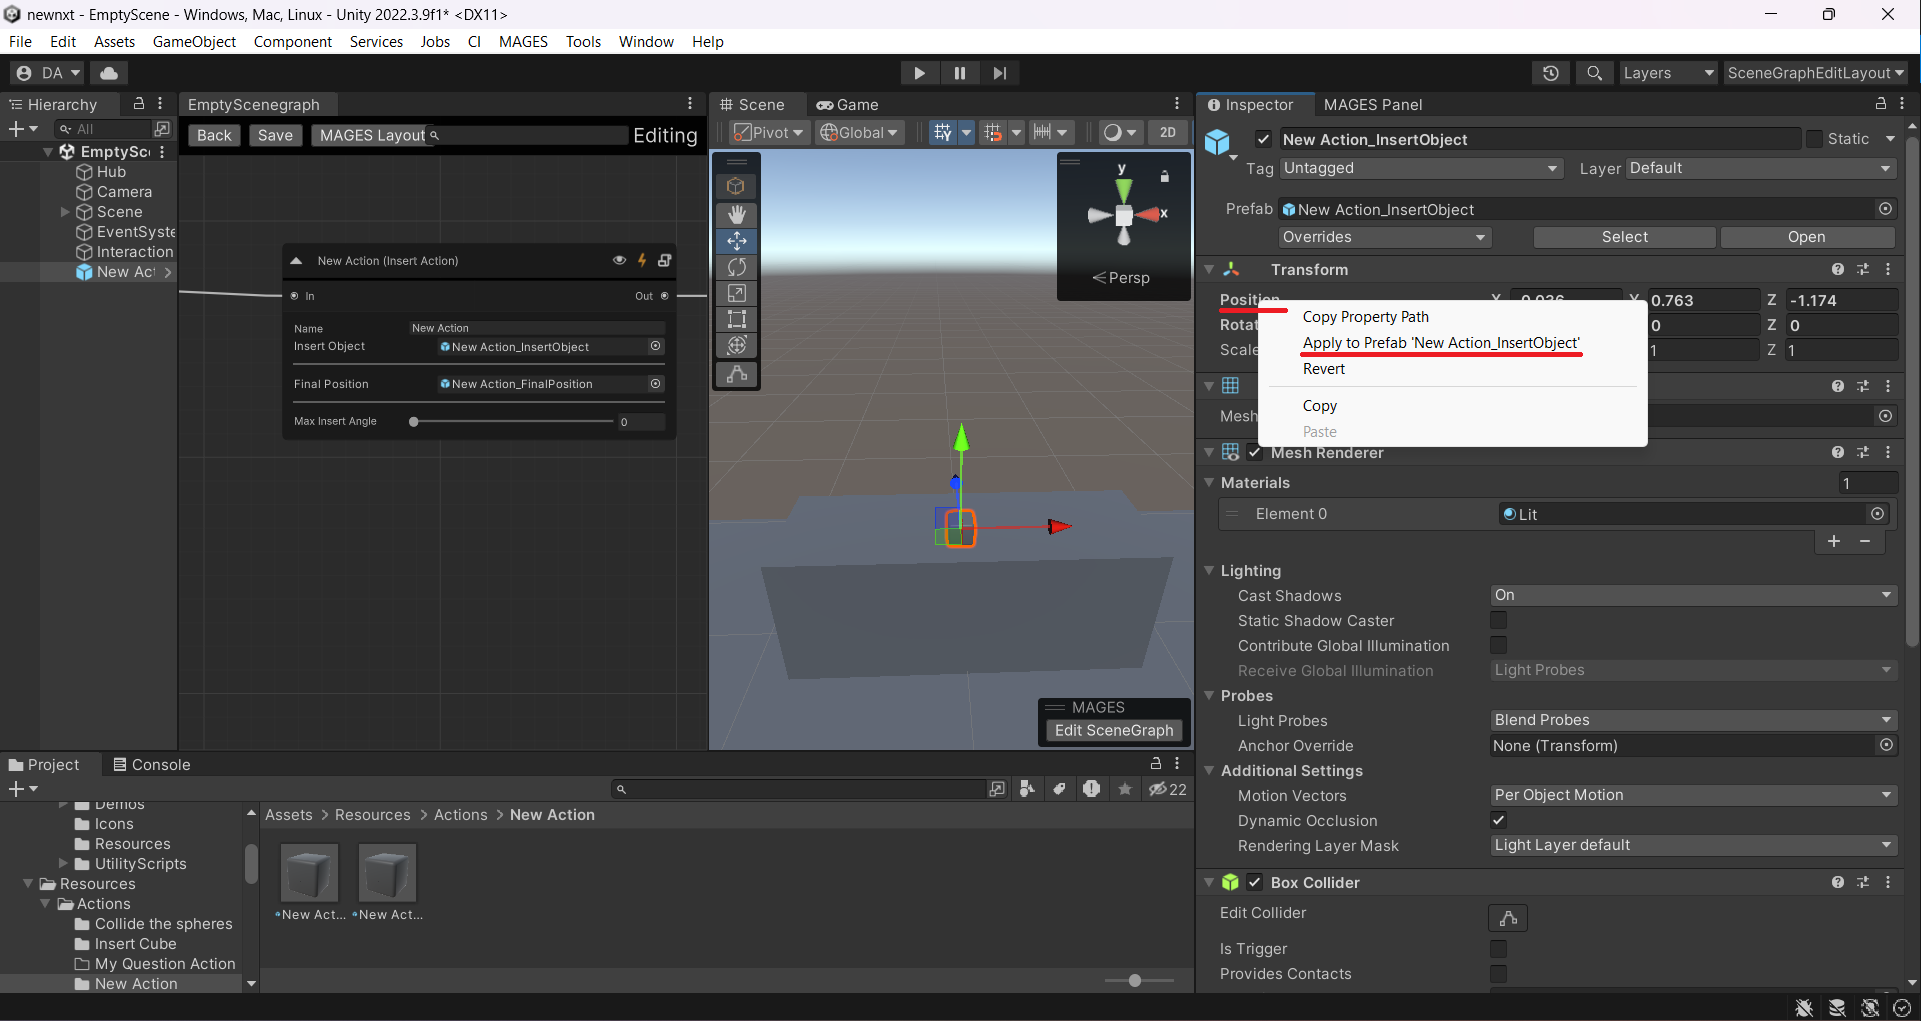
Delete the GameObject from your scene, and you’re done.
Modifying Your First Insert Action
Modifying the Insert Object and Final Object Position
To modify the Insert Object and Final Position, follow the same procedure as mentioned in the Modifying your Action’s prefabs section.
Modifying the Max Insert Angle
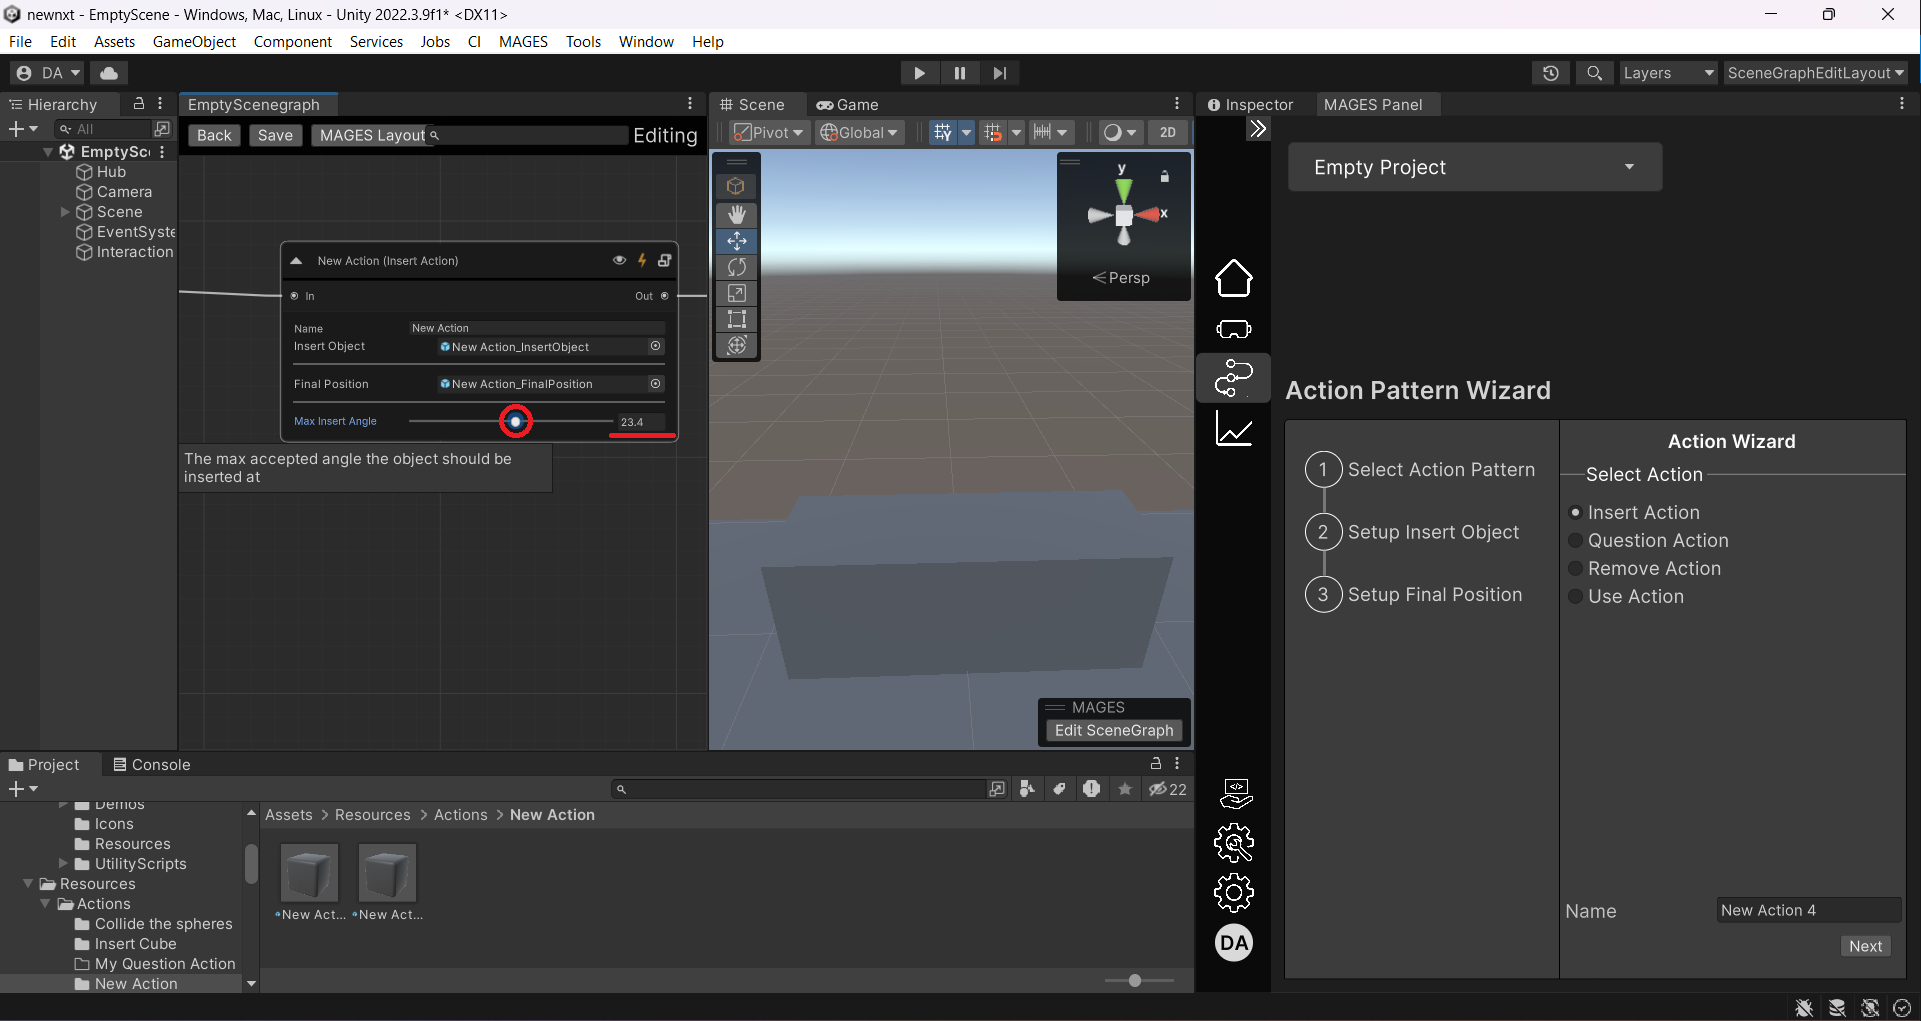
The Max Insert Angle represents the maximum accepted angle for a successful insertion. Adjust the Max Insert Angle by dragging the slider or typing your value in the text field.
Modifying Your First Use Action
Modifying the Use Object and Use Collider
To modify the Use Object and Use Collider, follow the same procedure as mentioned in the Modifying your Action’s prefabs section.
Modifying the Use Time
The Use Time value represents the time needed for the Use Object to interact/collide with the Use Collider. Adjust it by dragging the slider or typing your value in the text field, similar to the Max Insert Angle of the Insert Action.
Modifying Your First Remove Action
Modifying the Remove Object
To modify the Remove Object, follow the same procedure as mentioned in the Modifying your Action’s prefabs section.
Modifying the Release Distance
The Release Distance value denotes the distance the object must move from its original position to be considered removed. Adjust it by dragging the slider or typing your value in the text field, similar to the Max Insert Angle of the Insert Action.
Modifying Your First Question Action
Navigate to the Question Action Node in your scenegraph editor and click the
Edit Questionbutton.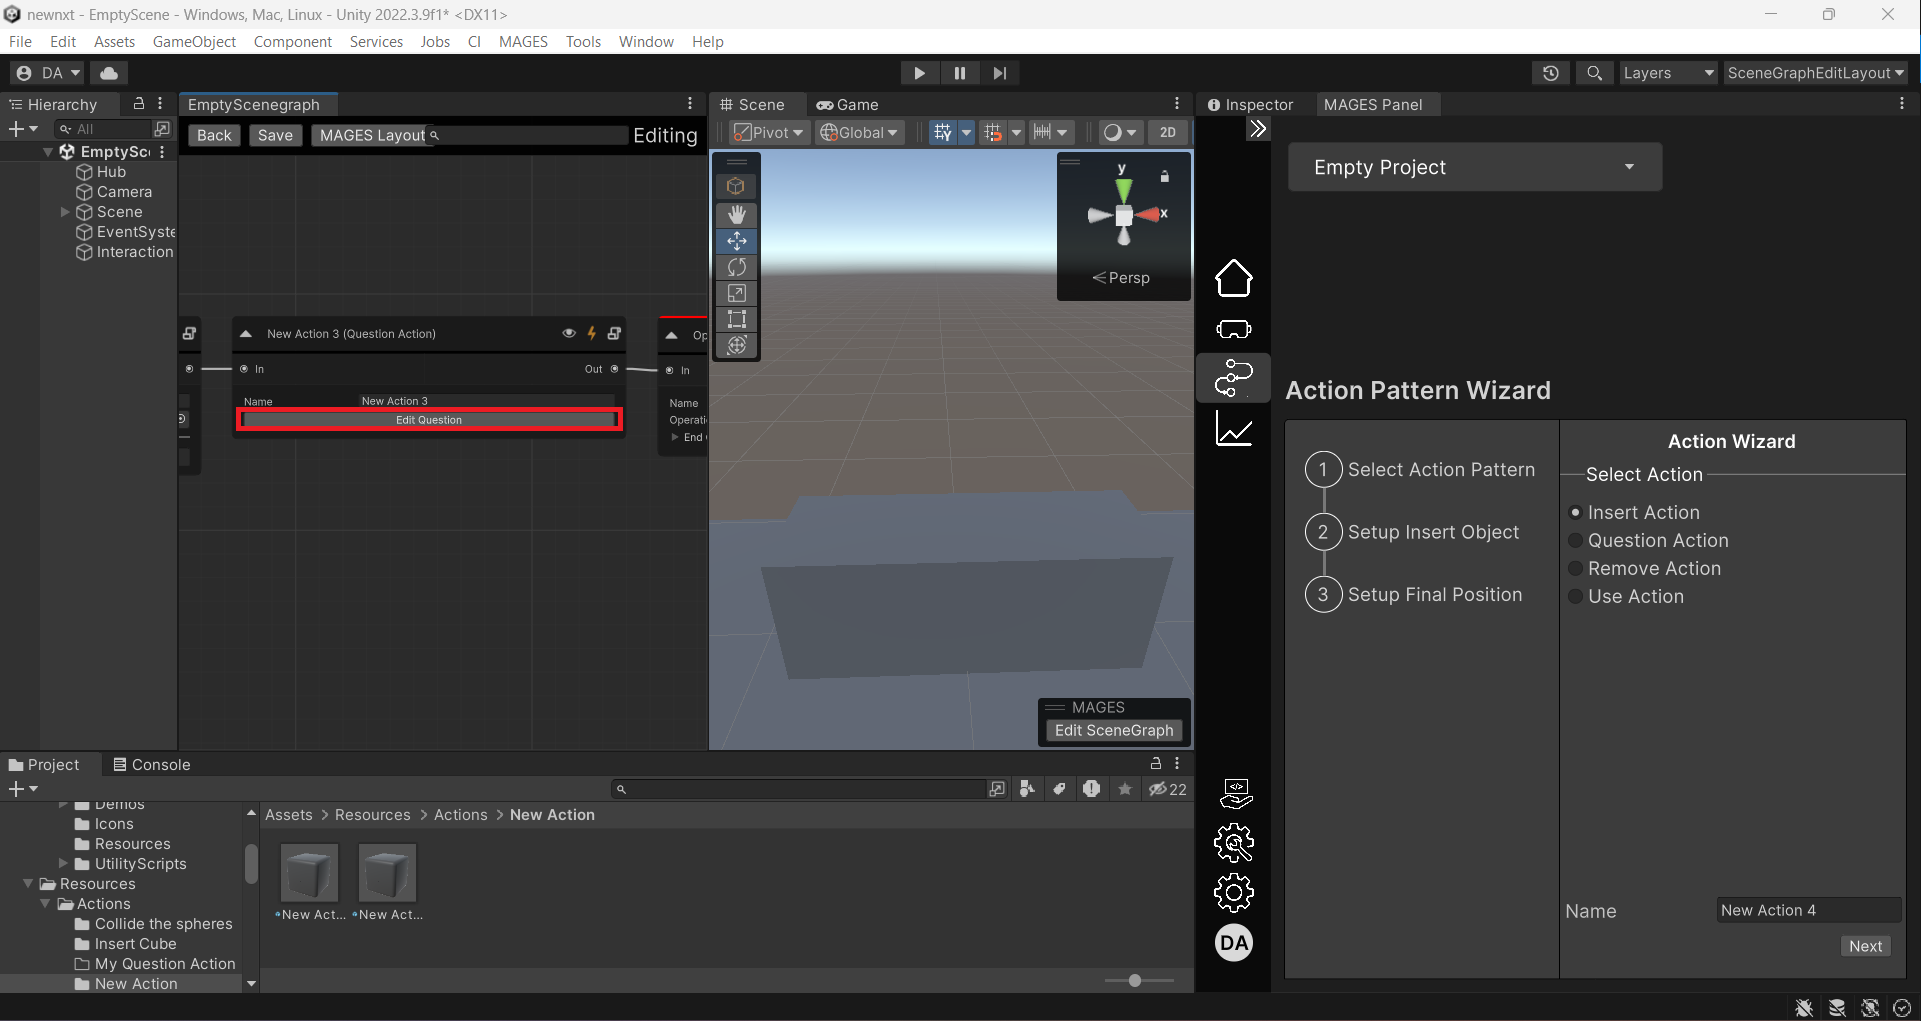
After clicking, the Question GameObject will be spawned in your active scene, and the Question and Answers fields will be revealed in your scenegraph editor.
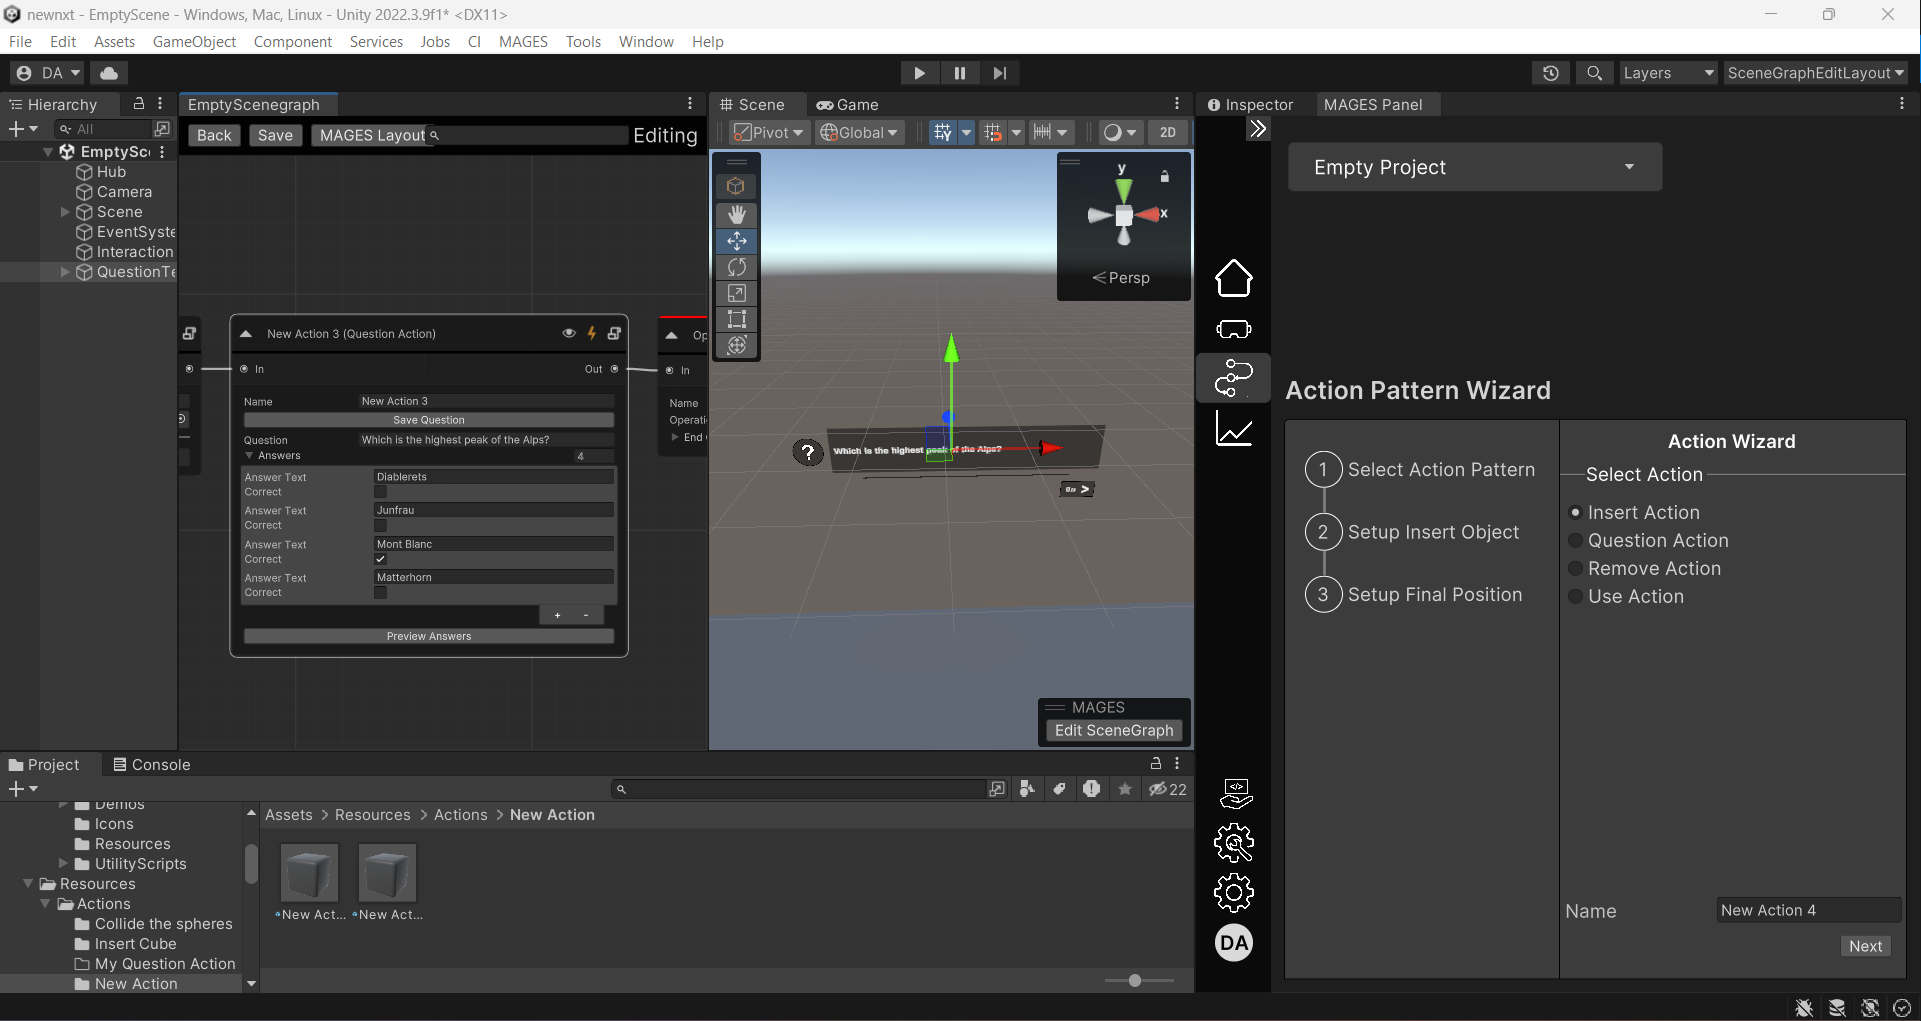
To modify the initial position of the Question GameObject, use the gizmos to move it to your desired location.
To modify your Question, type changes into the
Questiontext field.To modify your answers:
Type changes into the
Answer Textfield.Select or deselect the
Correctcheckbox to define if the answer is correct.Click the
+button to add a new answer.Click on a specific answer and click the
-button to remove it.