Scenegraph Editor
The Scenegraph editor is the main tool to create your XR training scenarios. You can create new nodes or modify existing ones. The nodes are linked together forming the training scenario.
Scenegraph selection
To open the Scenegraph selection panel navigate to the Unity’s top bar and select MAGES > Scene Graph Editor

Here you can see all the Scenegraphs that are available in this Unity project. Double click on a Scenegraph to open it. Remember that a Scenegraph is bounded to a single simulation.
To create a new Scenegraph press the “Create Scene Graph” button.
Main editor

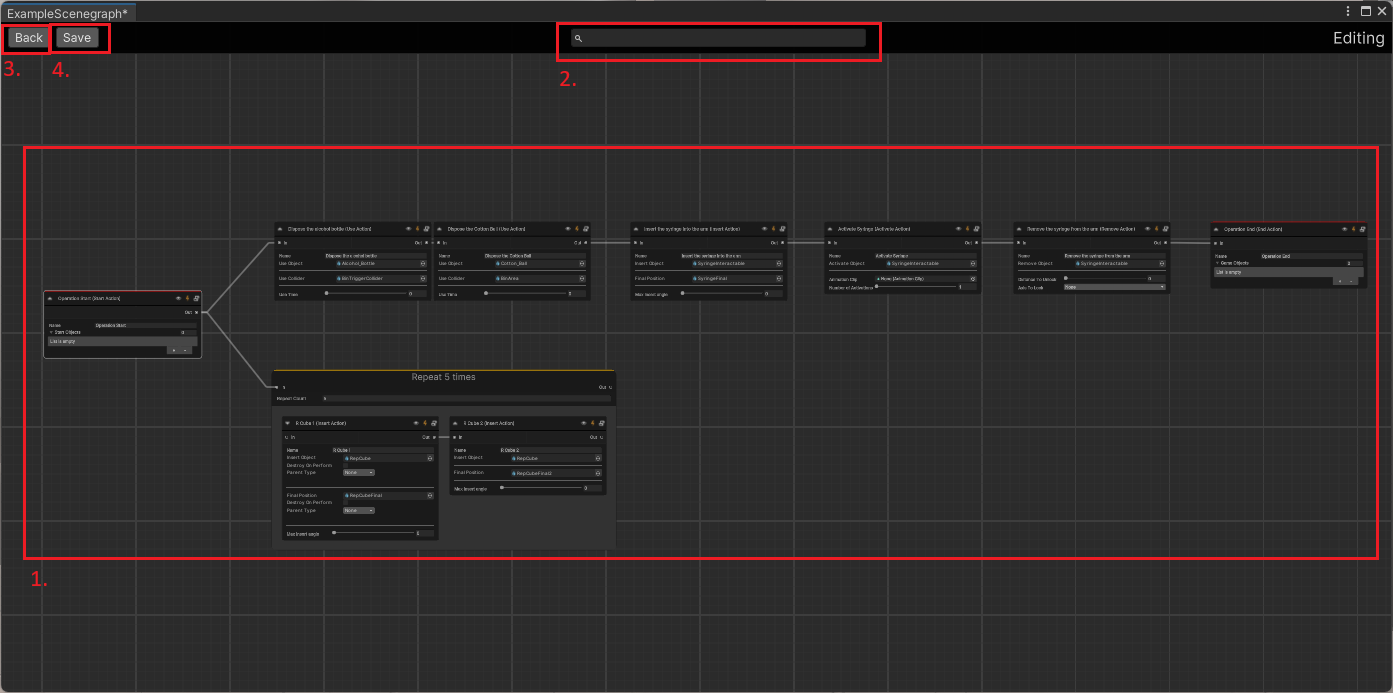
The main editor window contains the following functionalities:
Feature ID |
Explanation |
|---|---|
1 |
Those are the Action nodes that define the current storyboard. Each node is an Action that is connected with the rest of the nodes forming the training scenario. |
2 |
The search area. Start typing the Action name to search Actions by name. |
3 |
Go back to the Scenegraph selection panel. |
4 |
Save the current Scenegraph. The Scenegraph is saved in a |
Scenegraph editor controls:
Button |
Functionality |
|---|---|
Left click |
Select the Action nodes. You can drag the mouse while pressing the Left click to select multiple nodes. |
Right click |
Opens the options menu to create new nodes, copy or delete them. |
Scroll wheel press OR |
Press the scroll wheel (or |
Mouse scroll |
Zoom in-out |
Options menu
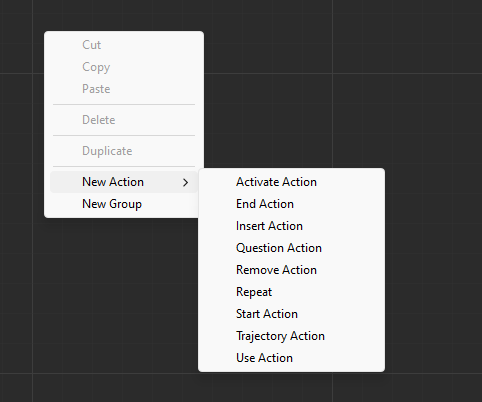
If you click the right click inside the Scenegraph editor, the options dropdown will pop.

This menu allows you to Cut, Copy, Paste, Duplicate and Delete any node from the editor.
Additionally, if you navigate to the New Action section, a sub-menu will appear with all the Action types.
From this menu you can also create a new Action Group. For a detailed tutorial on how to create Action Group look here.