iOS (iphone/ipad)
This step-by-step guide will let you build a Unity3D application that uses MAGES SDK for the iOS operating system. That build will be able to run on Apple mobile devices (iPhone/iPad) as well as desktop PCs (iMac/Macbook) as soon they have an M-series processor (M1/M2).
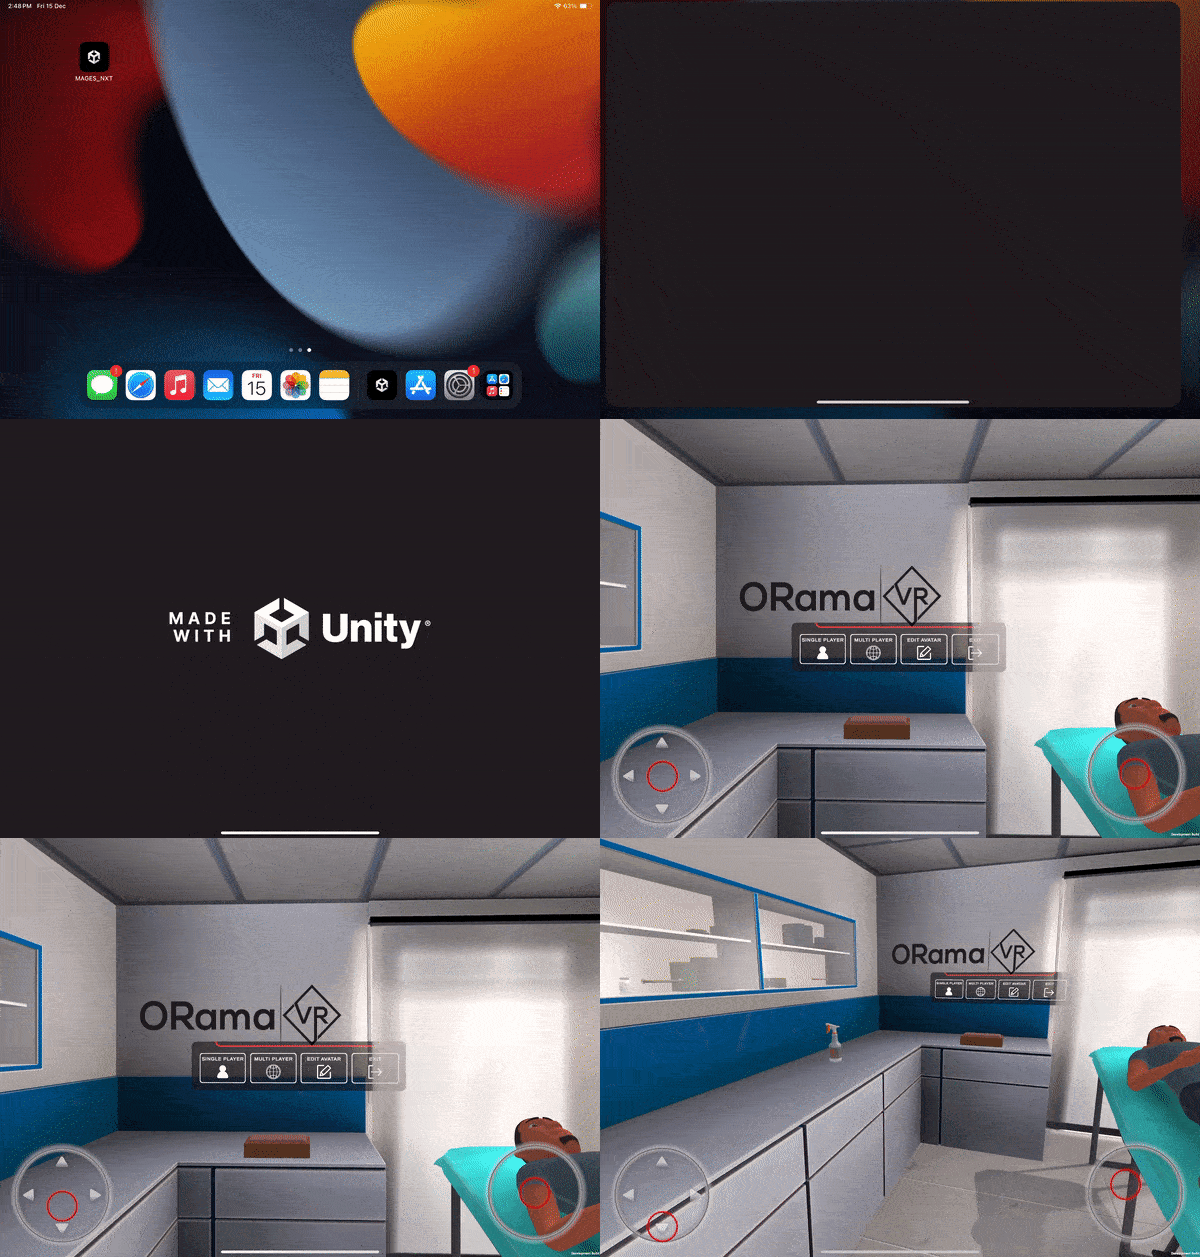
This process has two significant steps:
Unity-side Build
Xcode-side Build
Note
You need an active Apple developer membership program to distribute your application massively, upload it to testflight or test it on multiple devices. Of course, you do not need one if you only want to create test/development builds to run on a single device.
Important
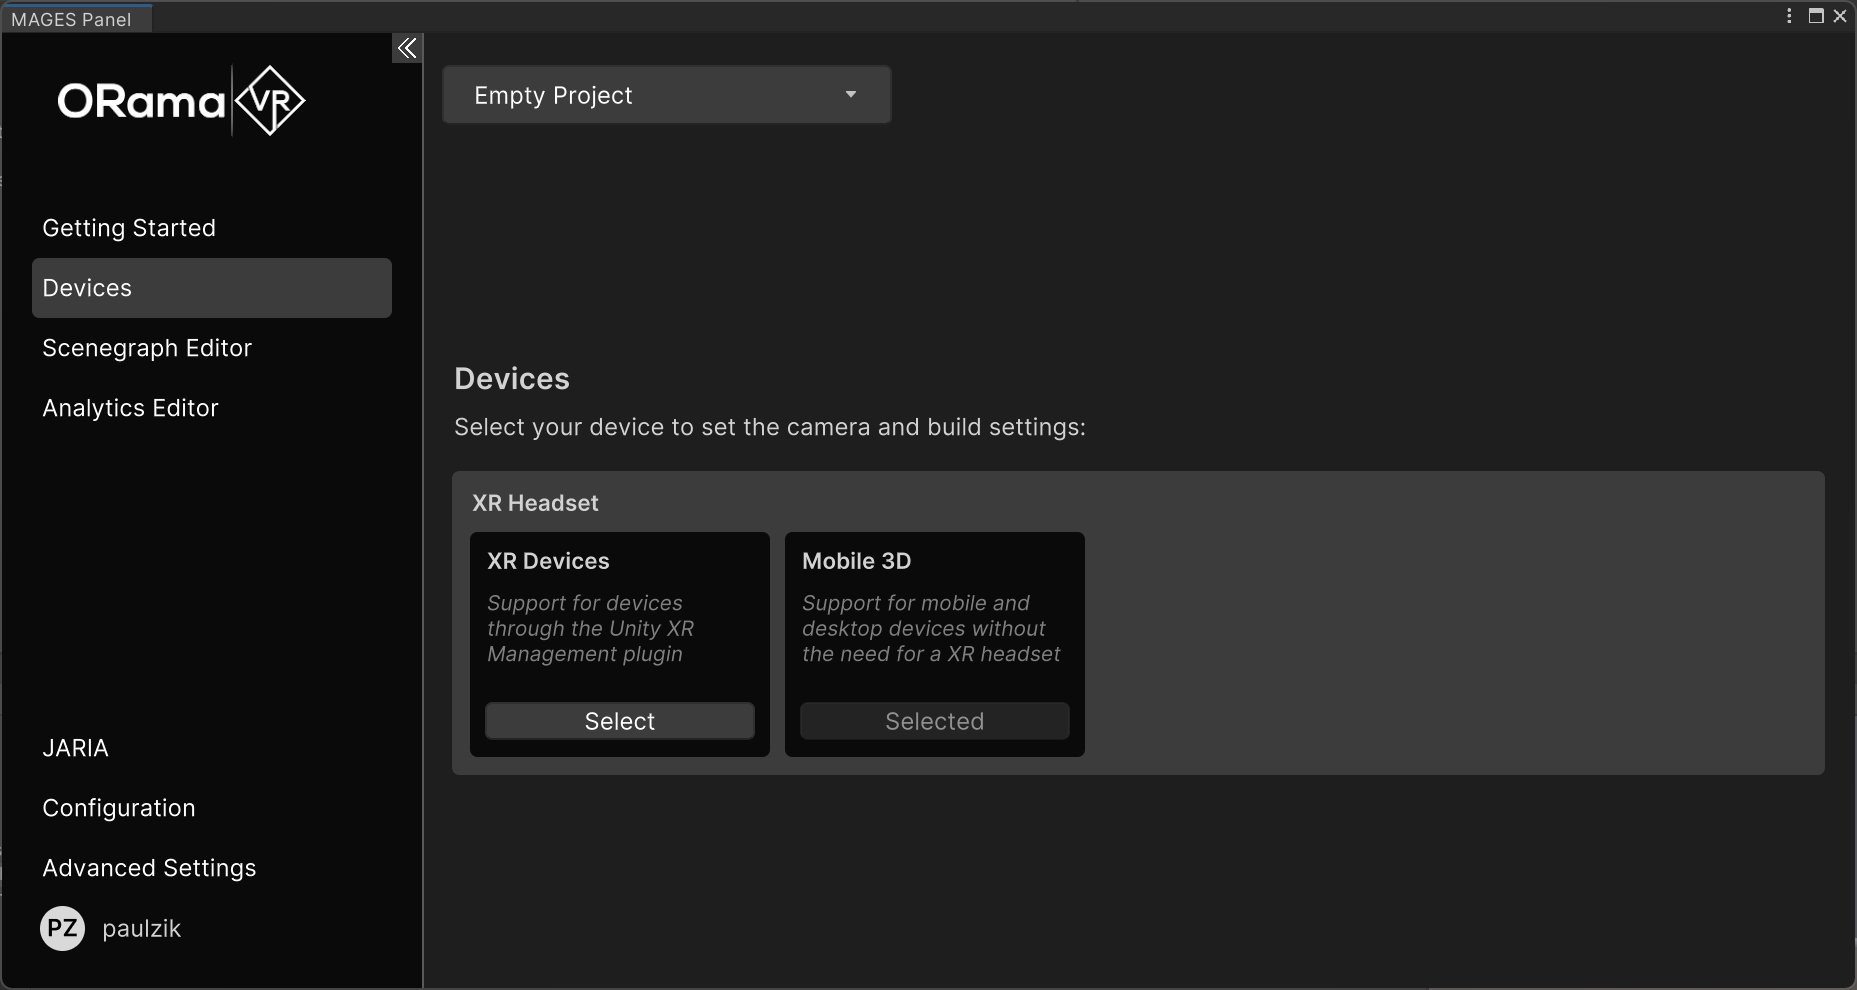
To build your application for iOS, please ensure that you are using the Mobile3D as the Camera XR Mode, from the MAGES hub.
Unity-side Build
Before you build the app, select the Mobile 3D setup from the MAGES Panel.
- To build an iOS application, you must ensure that your Unity project is set for the iOS platform.
To switch the active platform to iOS, head to
File > Build Settingsselect the iOS platform, and click Switch Platform.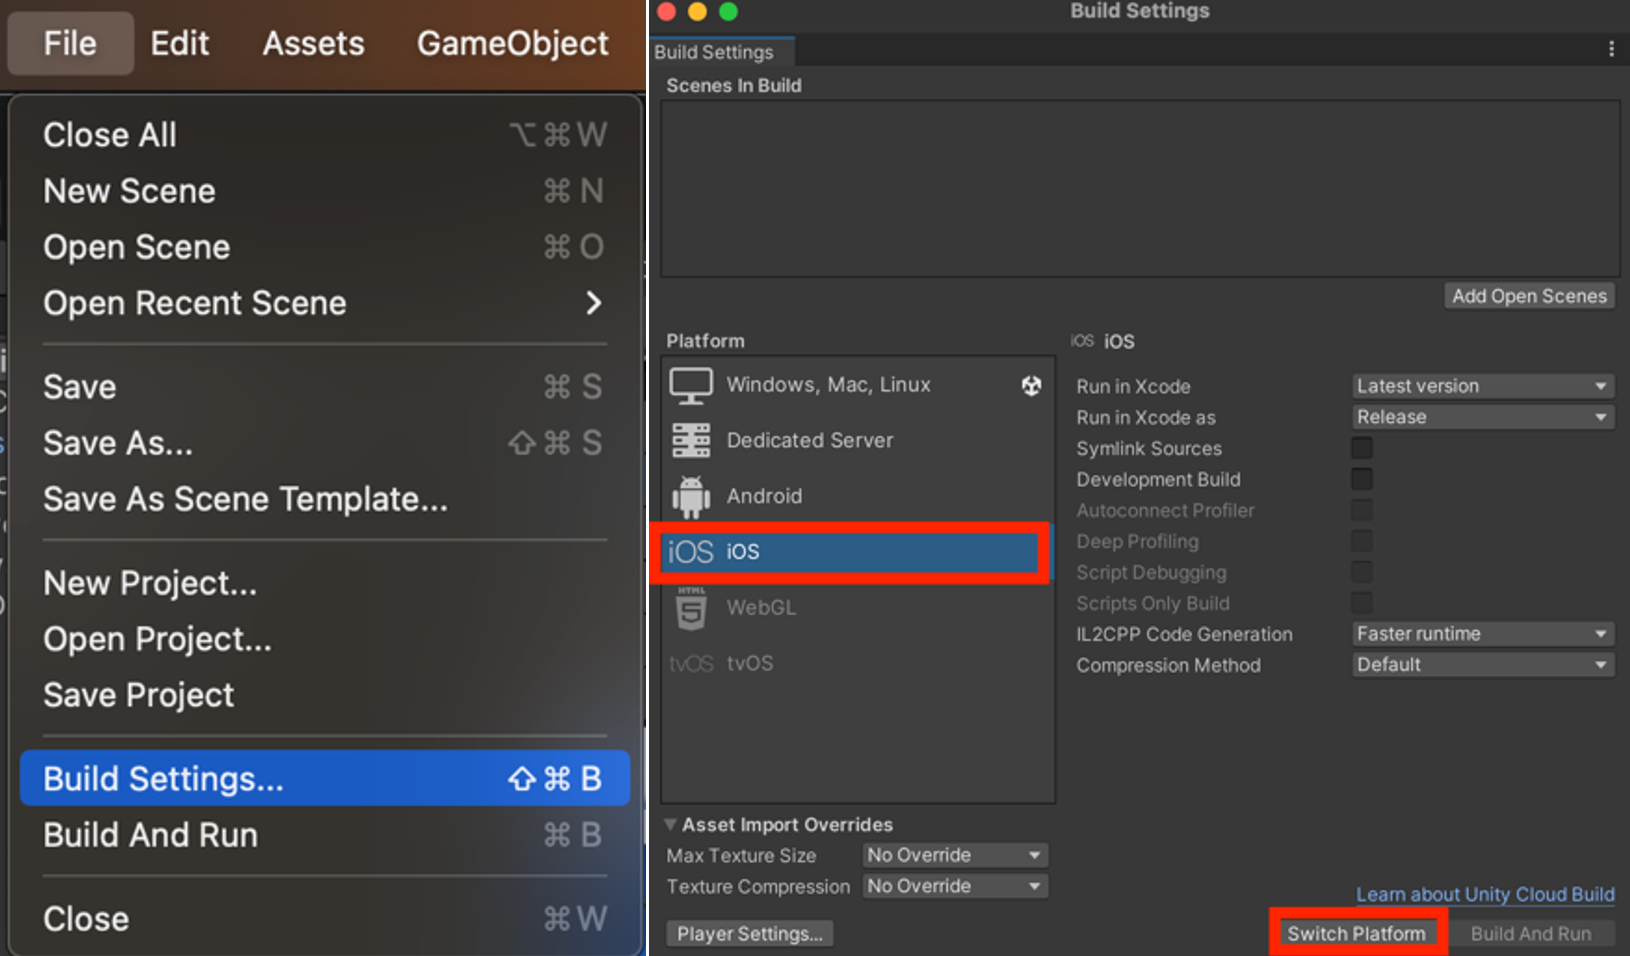
Note
If you did not install the iOS support during Unity installation, there will not be a Switch Platform button available for the iOS platform. Instead, click the “Install with Unity Hub” button and return to this step after the installation.
You can ensure that you are on the correct platform by noting the title of your Unity project window:

Now return to the Build Settings window, click the Add Open Scenes button, to include your currently open scene in the build, and finally click the Build Button.
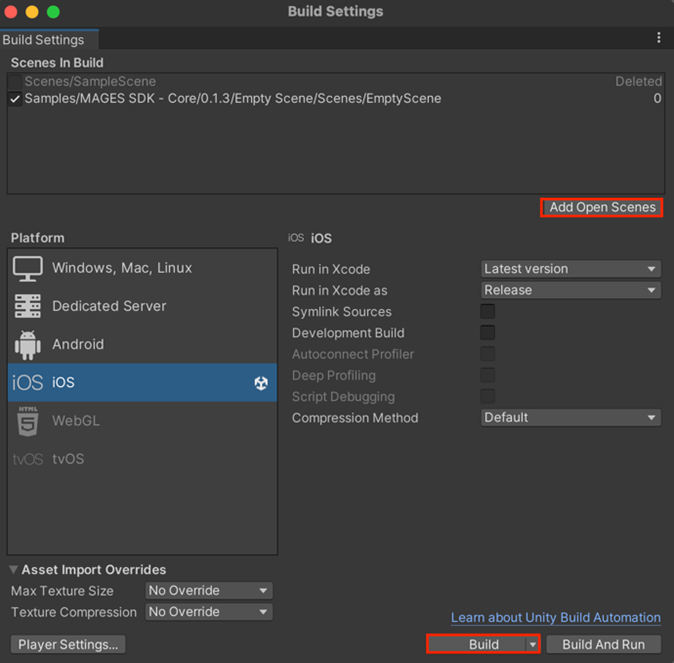
Specify the folder, where your build will be saved and click Save.
Xcode-side Build
You need to have Xcode, which is the program used to build iOS apps.
When you build the Unity iOS game an Xcode project is generated. This project is required to sign, compile and prepare your game for distribution.
To test your application on iOS, you need your personal Apple ID account. In case you would like to distribute your application to Appstore/TestFlight you need to have an Apple Developer account.
You can enroll in the Apple Developer Program here.
Add Developer Account to Xcode
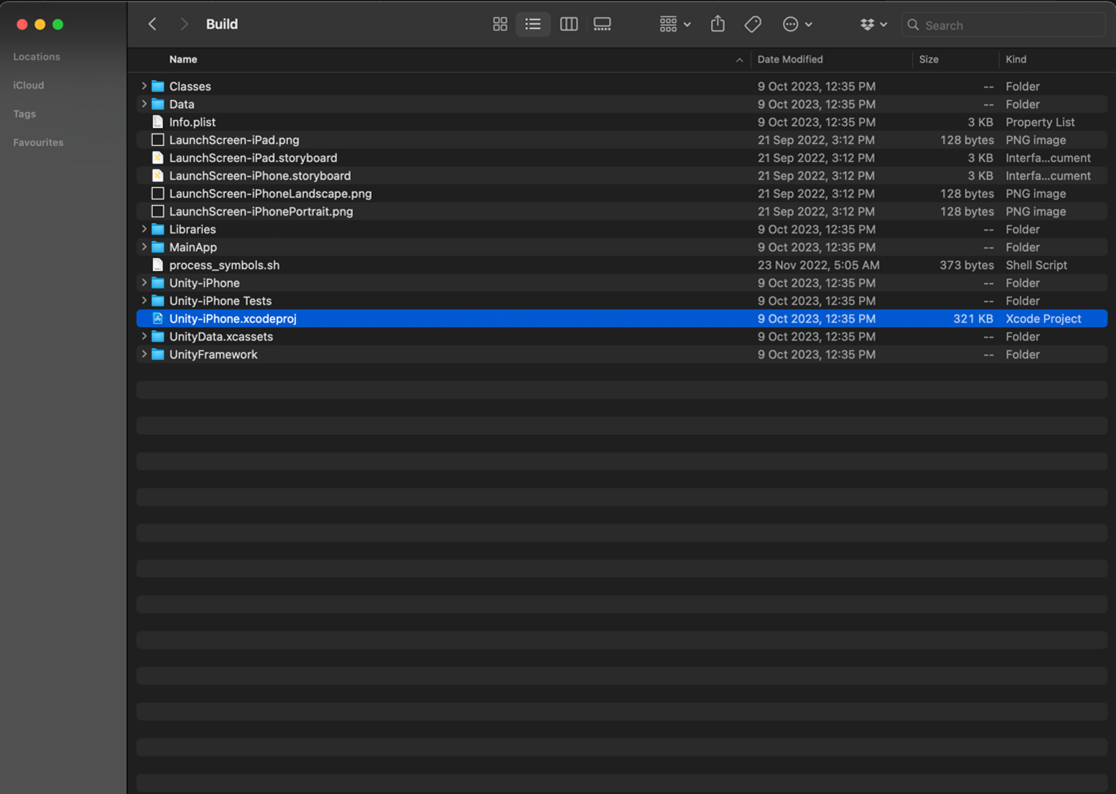
In case this is the first time you are using Xcode, you will need to set up your account using your Apple ID. Open the Unity iOS generated project, by clicking the Unity-iPhone.xcodeproj file on the unity build file.
Go to Xcode in the top menu bar and select Settings. In the Preferences window, click on the Accounts tab. There you can add or manage your Apple Developer account. Click the + button and sign in with your Apple ID.
Signing
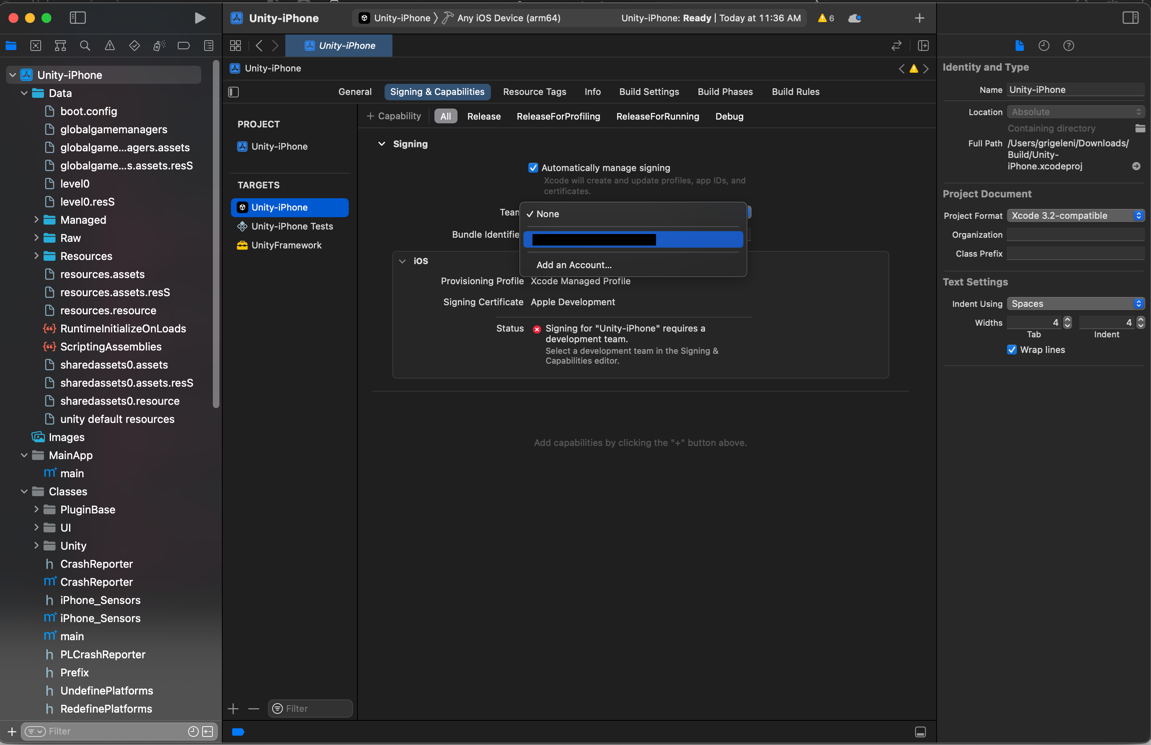
Go to the Signing & Capabilities tab of your target settings in the Xcode project. Click the Automatically manage signing checkbox. Select the team associated with your developer account.
Set Identity of the app
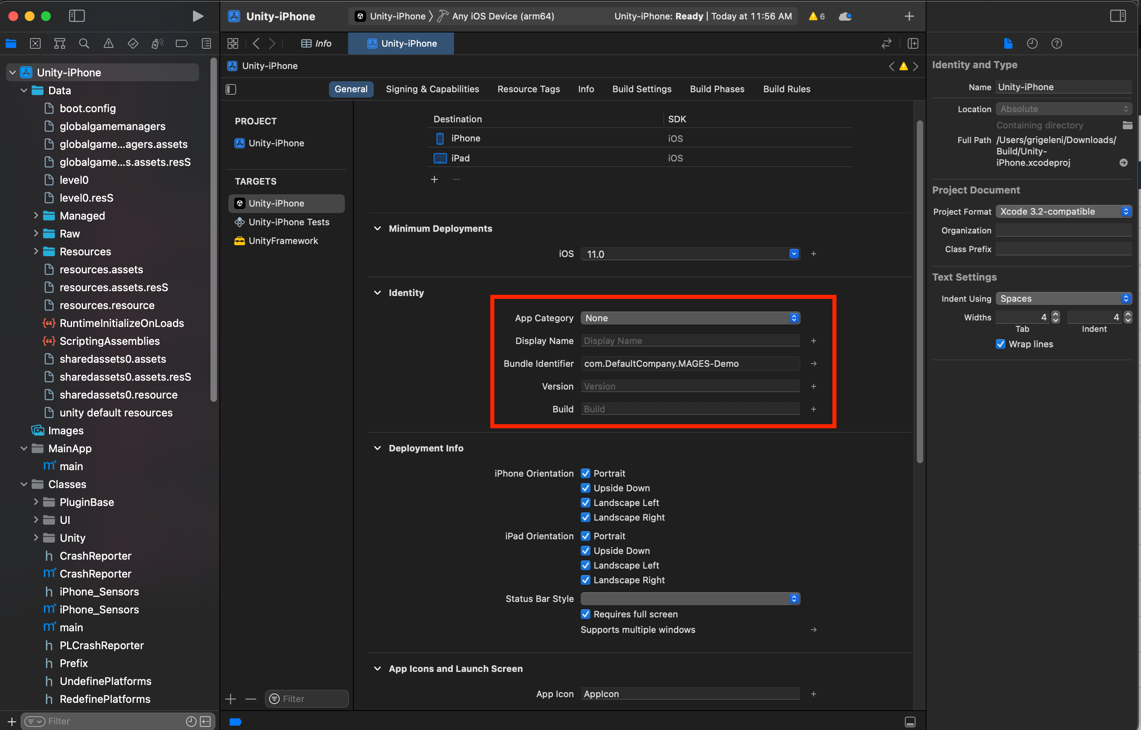
Set the Display Name. Is the name that will be displayed under your app’s icon.
In the Identity section, you/ll find a field labeled Version. The version number is typically a format like “1.0” or “1.0.1”, and it represents the user-visible version of your app.
Just below the Version field, you’ll find a field labeled Build. Edit the field to set the desired build number of your app.
The version number is typically a format like “1.0” or “1.0.1,” and it represents the user-visible version of your app. The build number is an incremental number that can help you keep track of different builds of the same version. For example, you might start with build number 1 for version 1.0, and increment it for each subsequent build of that version.
Remember to update these numbers appropriately each time you release a new version of your app or create a new build. Consistency in version and build numbers is essential for managing and tracking app release.
Build and Run
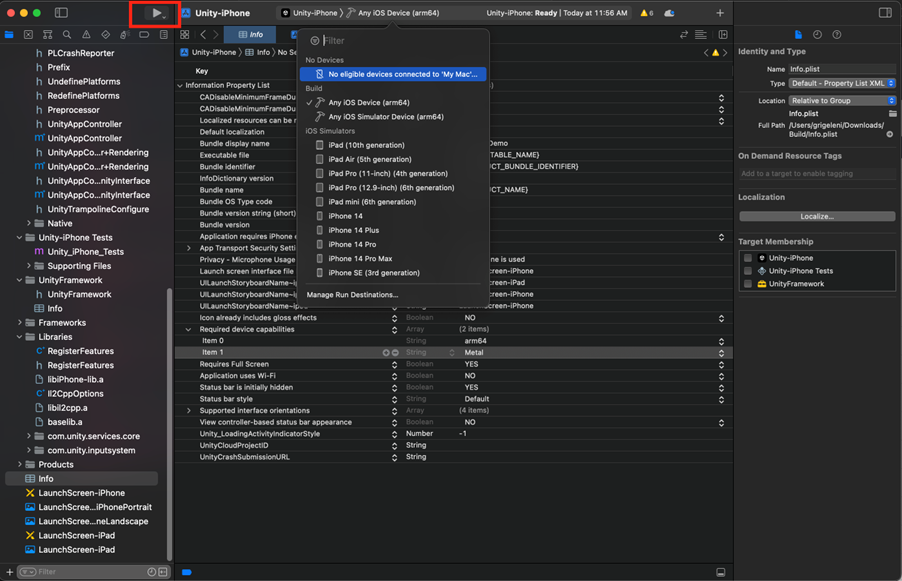
To run your iOS app on a physical device you should connect your iOS device to you Mac. Ensure that your device is set up for development.
In Xcode, select your connected device as the target for running the app. You can do this by choosing your device from the list of available devices in Xcode. Click the Build and Run button in Xcode to compile and run your app on the connected iOS device.
If you don’t have a physical iOS device, you can still develop and test your app using Xcode’s simulators.
