Trajectory Action
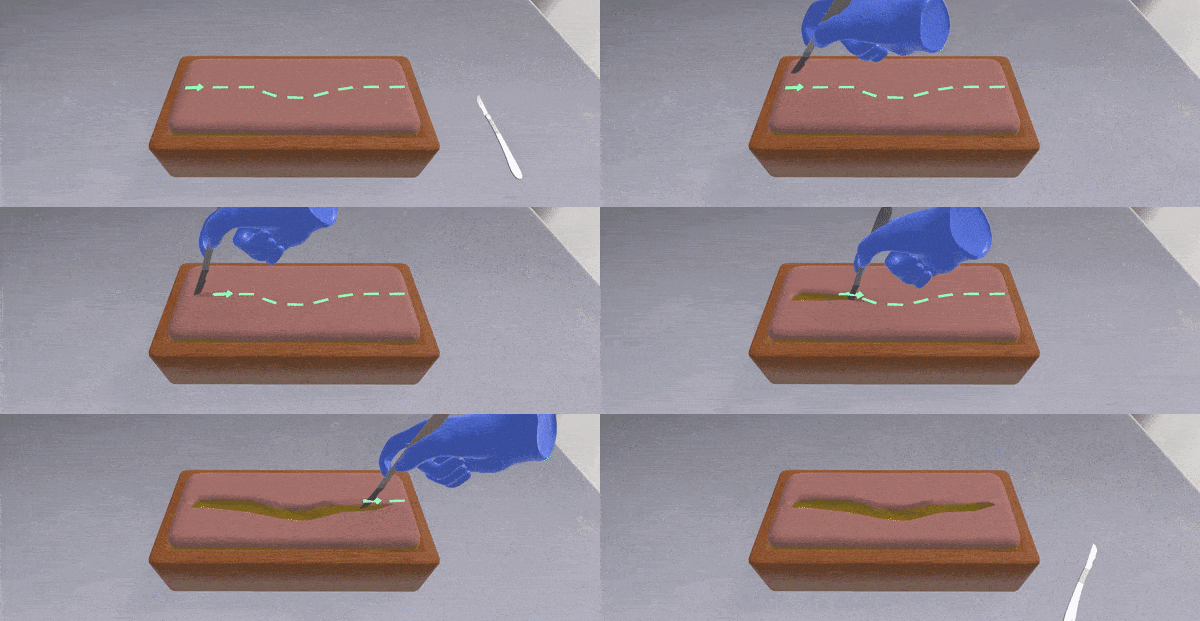
A Trajectory Action is used when you need to take a tool/object and follow a specific trajectory with it. It is a great pattern to simulate cuts.
How to Setup a Trajectory Action
In this tutorial we will make a Trajectory Action to simulate the cutting of a fake skin board with a scalpel.
Right-click on the scenegraph editor.
Select
New Action > Trajectory Action.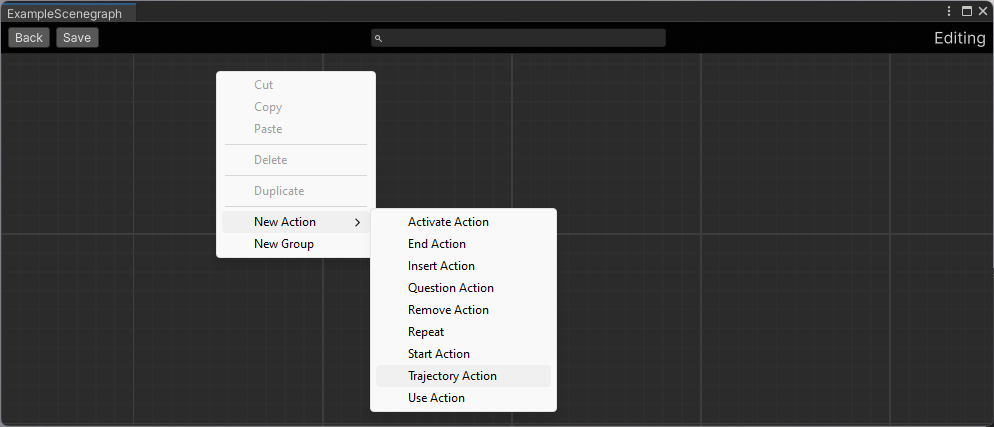
Create the object that will trigger the trajectory. This is the interactable object that we will take with our hands and perform the cutting. This object will spawn when the Action initializes.
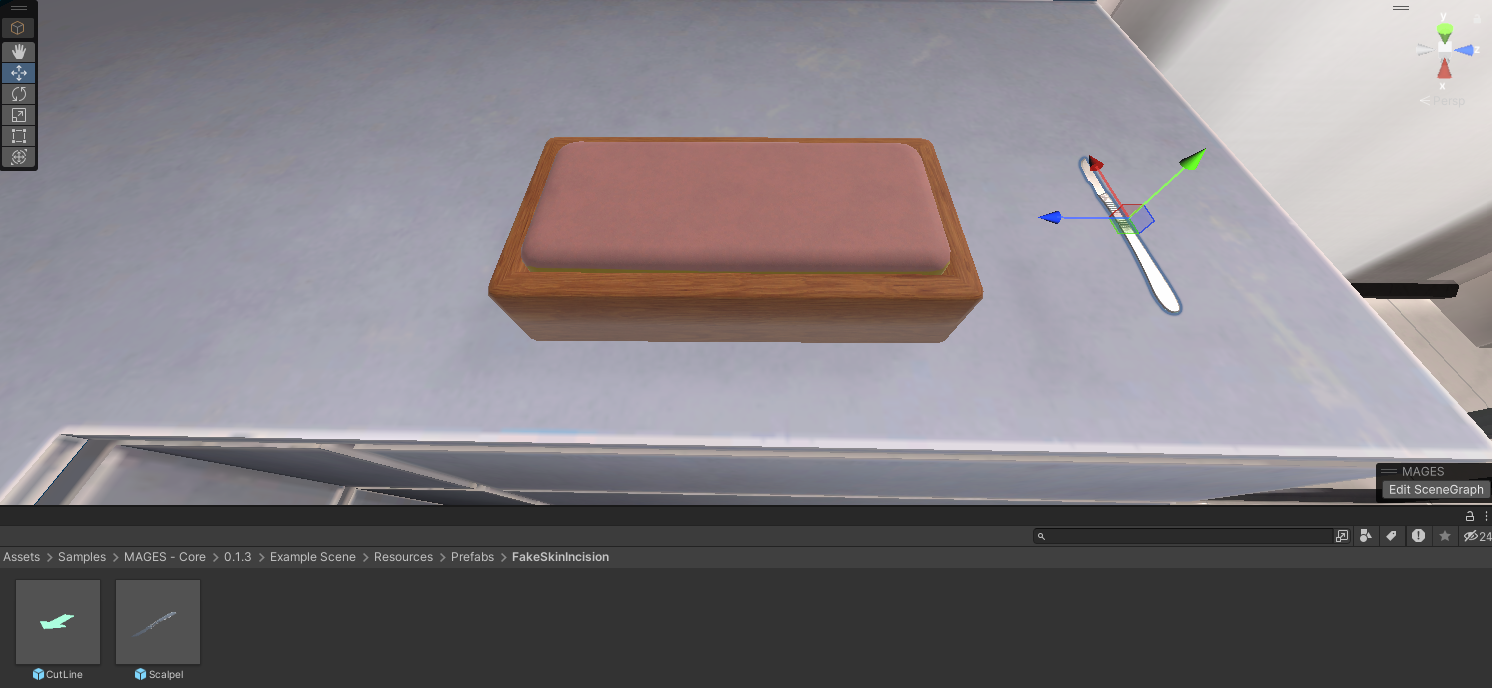
Note
It’s important to add physical colliders to the object. The colliders refer to the Collider Component that you can add to your object by clicking the Add Component button in the inspector of your prefab or GameObject. It’s crucial to use the appropriate colliders and adjust them to match your GameObject’s shape.
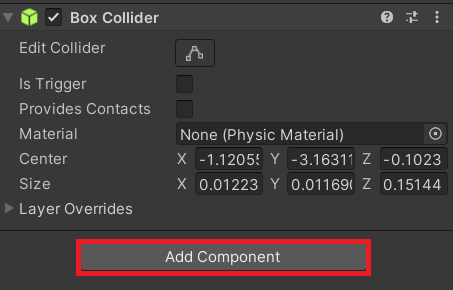
Save the object as a prefab to your assets and drag it to the Object Used field in the Action node.
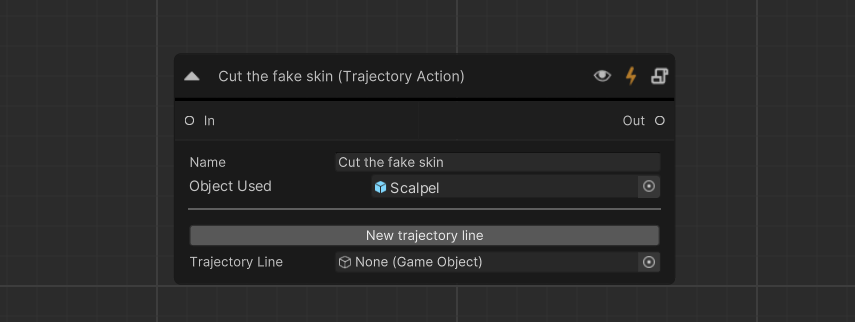
Note
To save the Interactable Object as a prefab, drag the object from the Scene Hierarchy in your Unity Editor and place it inside your Assets. It is strongly advised to place your prefabs under a Resources folder.
Now we need to setup the Trajectory Line using Unity’s Splines. This resembles the line which the user needs to follow with the tool to complete the Action. Press the New trajectory line button.
The Trajectory Line template will spawn in front of the Scene camera. Place the template on top of the area that you want to cut (approximately).
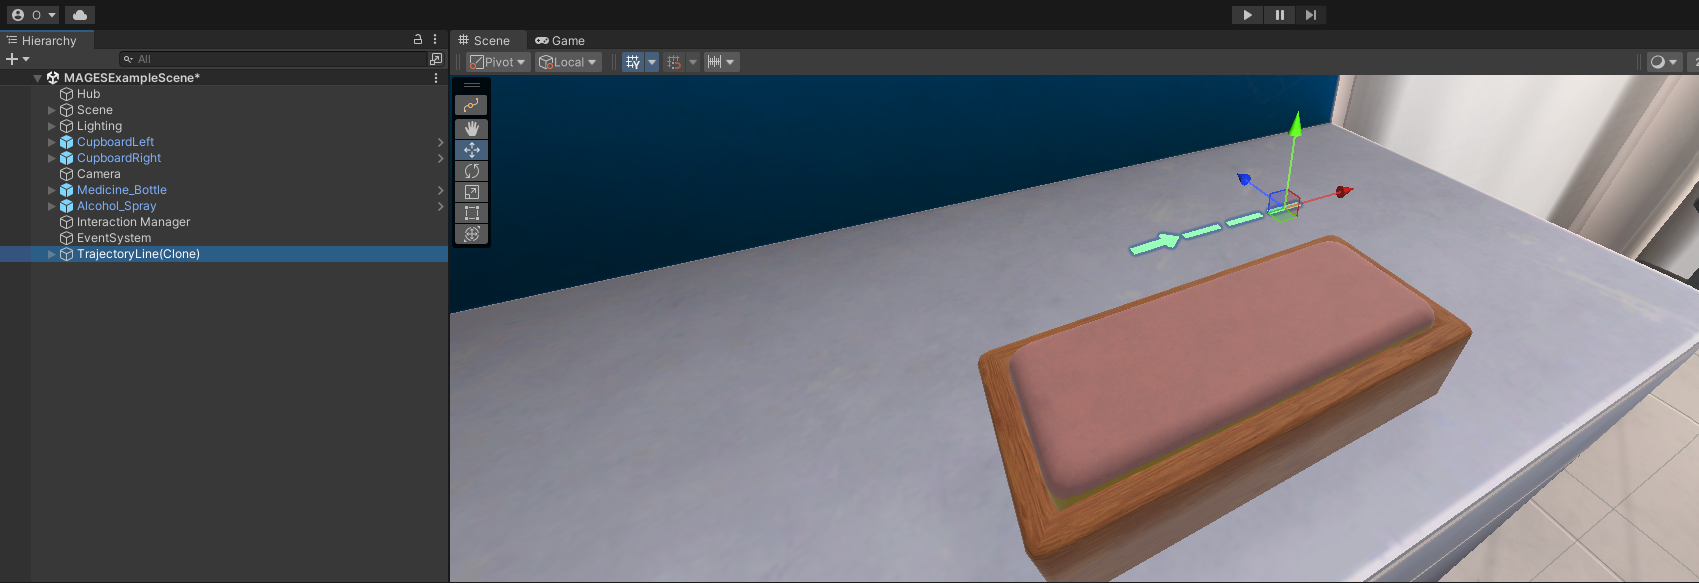
To edit the spline, select the trajectory template and press the spline editor tool on the top left side of the scene panel.
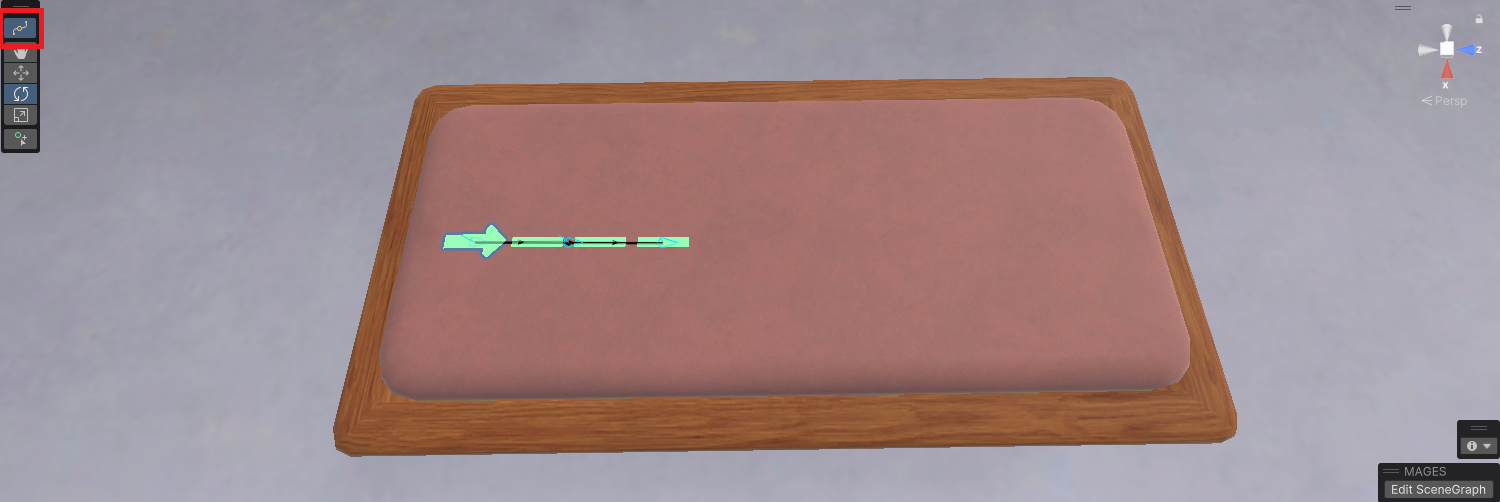
You can edit the spline by selecting the spline knots from the scene and place them in the proper place to define your line.
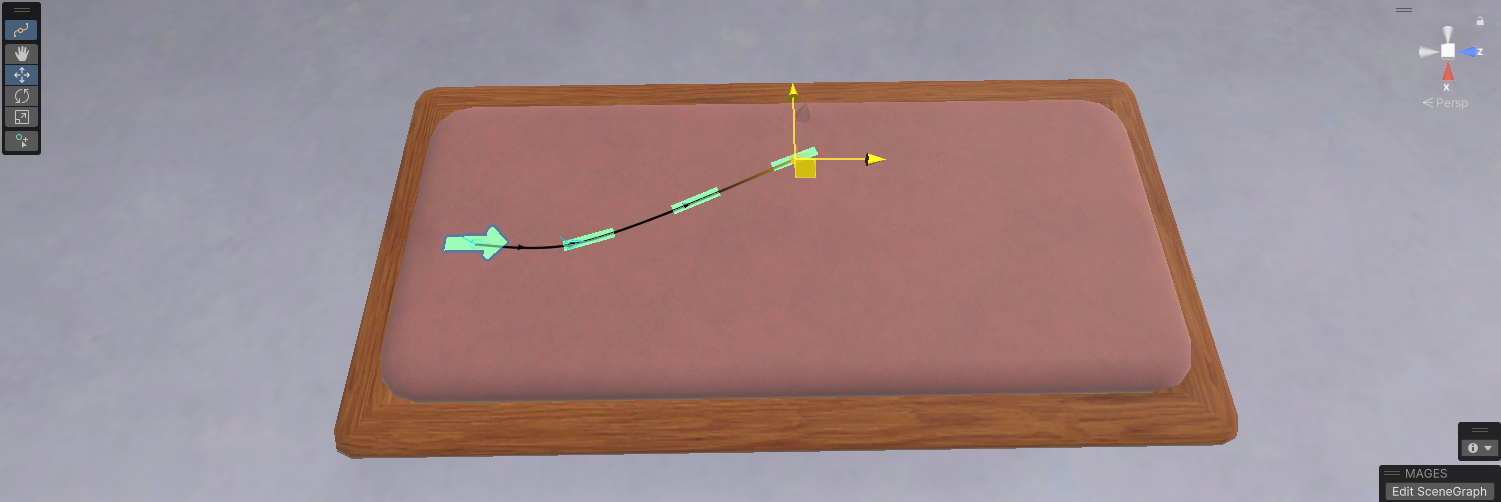
In our example, we will make the Trajectory Line a bit longer.
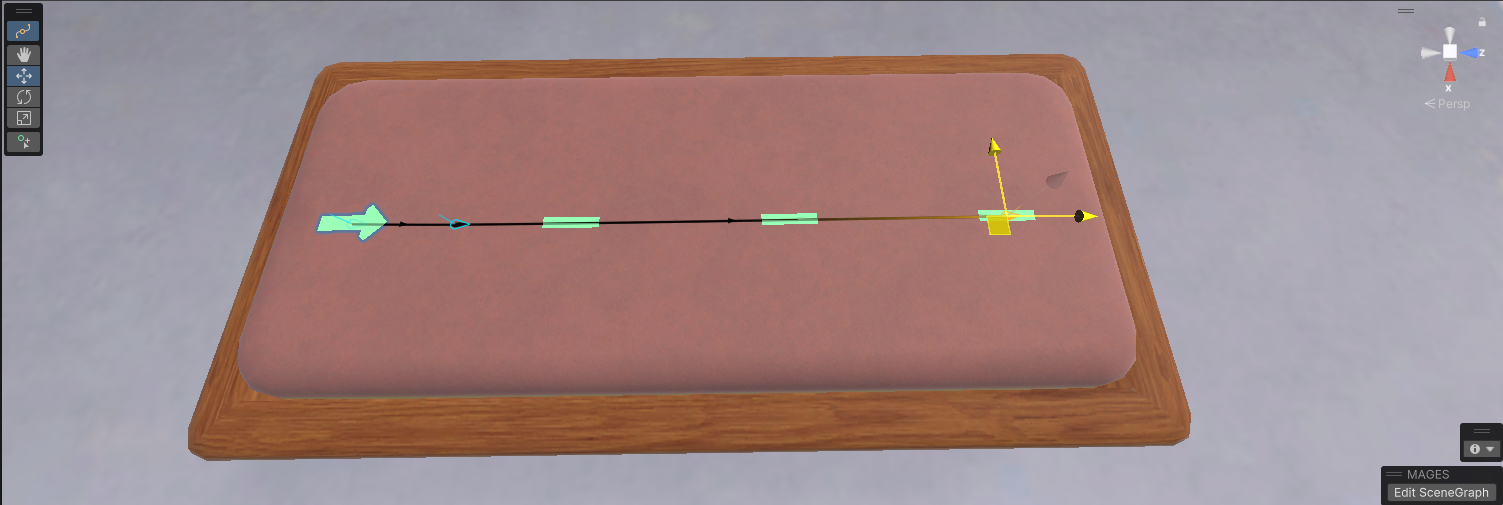
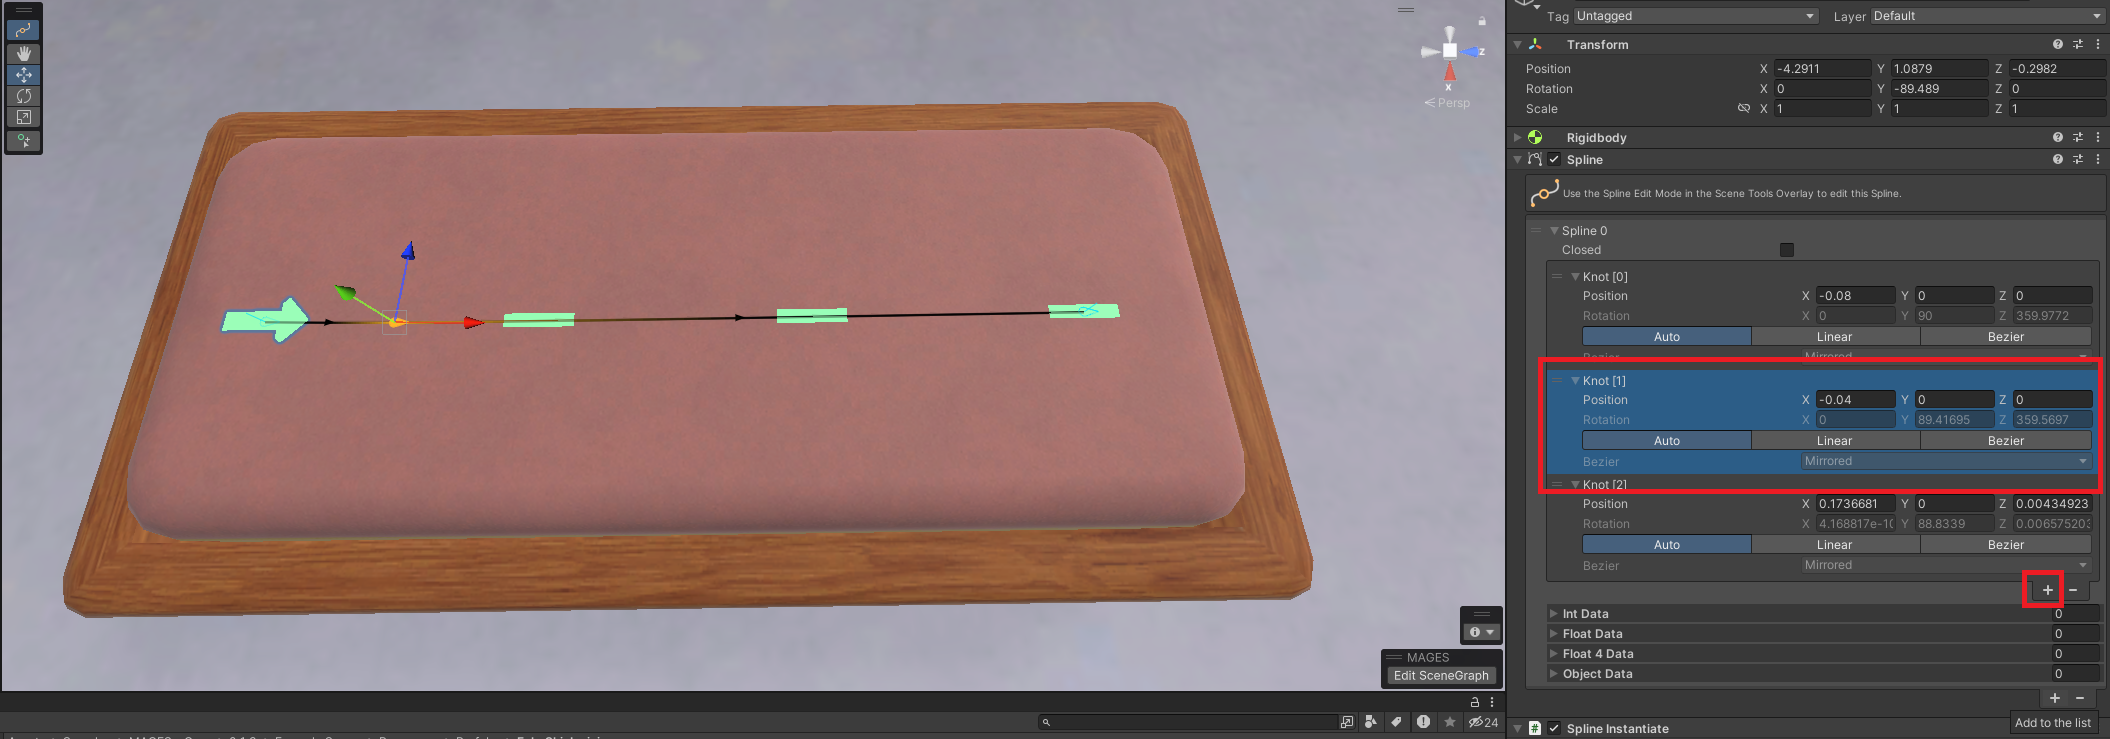
Then, we will add more spline knots. Make sure you have selected the spline template. Then from the inspector select a knot to add extra ones after it. In our case, we select knot[1] and press the + button 5 times to create 5 more knots.
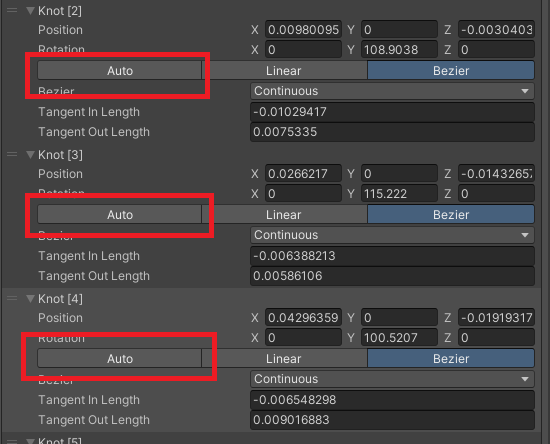
Make sure you configured the new knots to Auto.
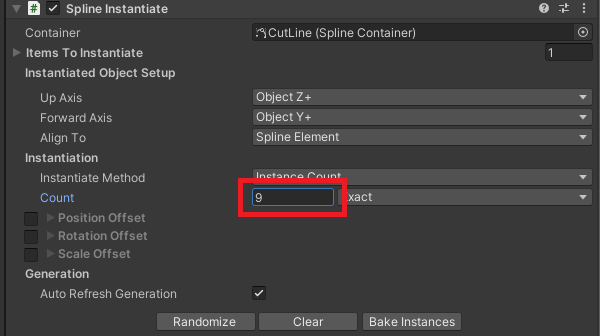
Again from the inspector, navigate to the SplineInstantiate component and adjust the Instantiation count variable. This indicates the number of green lines your trajectory has. In our example we set it to 9.
Finally, using the spline editor tool (from the top left side of Scene view) morph your trajectory according to your case.
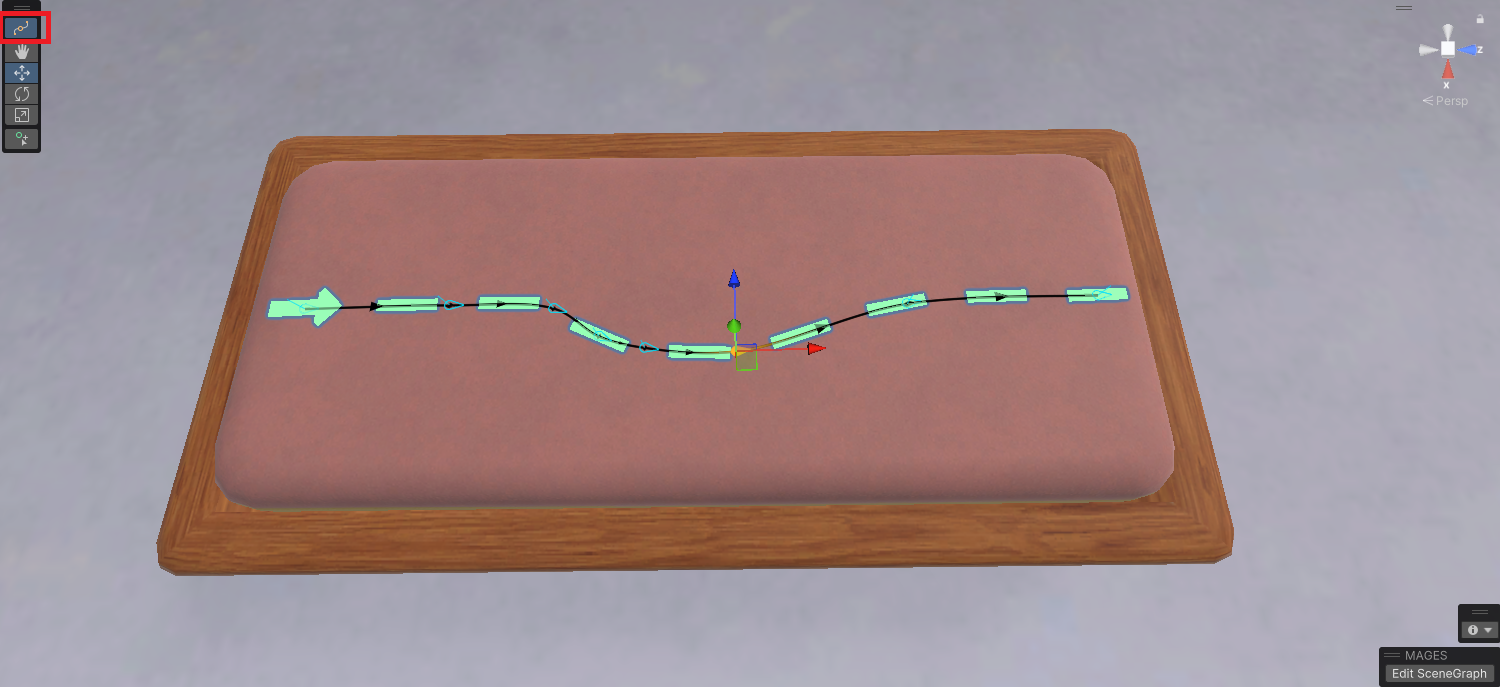
Save the trajectory line as a prefab to your assets and drag it to the Trajectory Line field in the Action node.
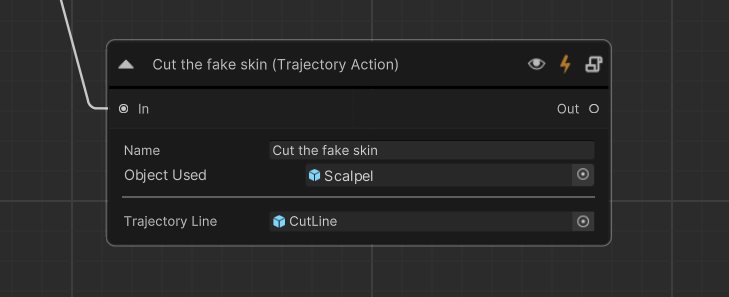
Note
In order to Save the Trajectory Line as a prefab, following the same procedure as the Interactable Object.
This step is optional step but highly recommended. We will set an animation to play along with the incision and map the progress of the trajectory with the cut animation.
Press the arrow on the top left of the Action node to enable the advanced settings. You need to have an animated object at your scene. In our case we will use a fake skin object that we created.
Drag and drop the object to the Animated Object field. A
UniqueReferencecomponent will be attached.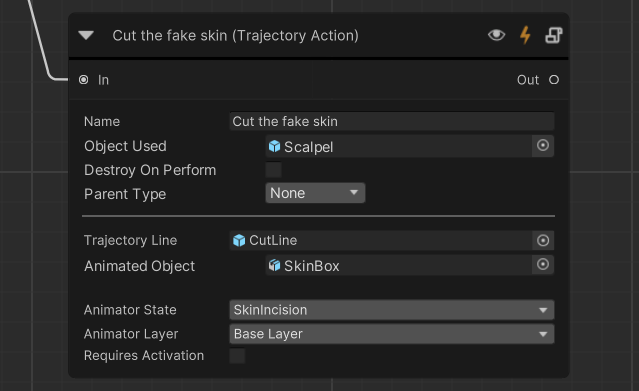
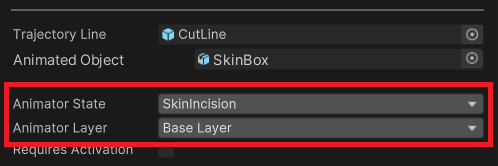
Make sure that you have an animator with at least one animation state on your object. In our case the animator looks like this.
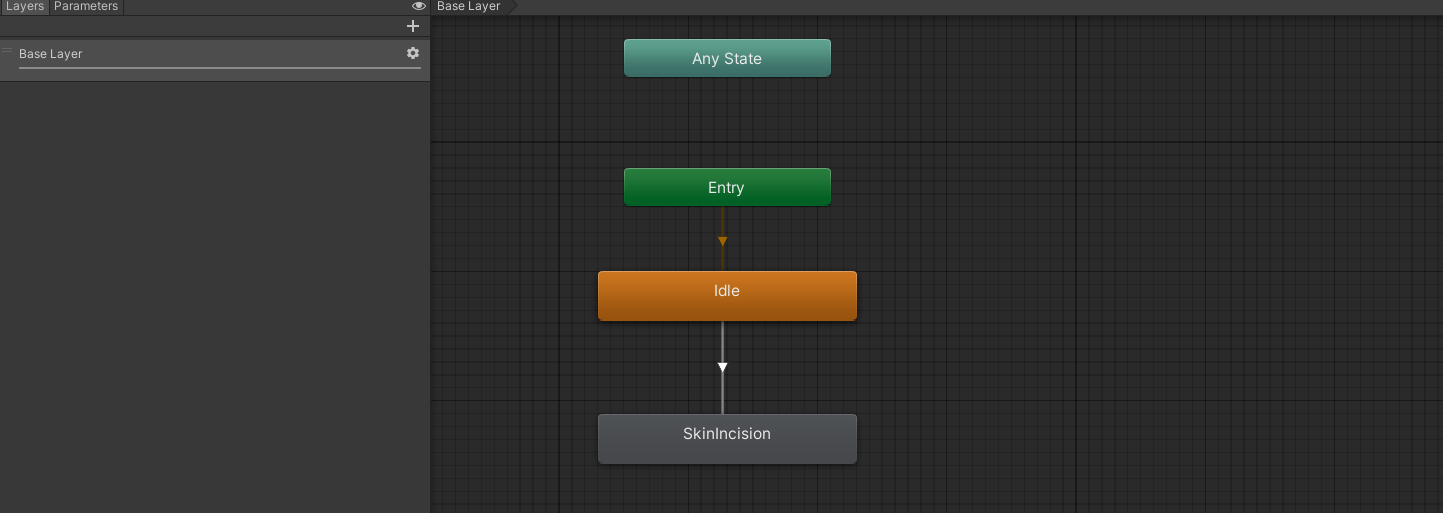
Then select which animator state will be played along with the incision progress. In our example, we select the SkinIncision state from the Base Layer.
Note
The animator will be synced with the Trajectory Line progress.
Name the action, e.g., “Cut the fake skin”.
Remove any prefabs you created from the scene and save the Scenegraph (e.g the Trajectory Line and the scalpel).
How to Perform
The Action performs when the user takes the scalpel and follow the Trajectory Line.
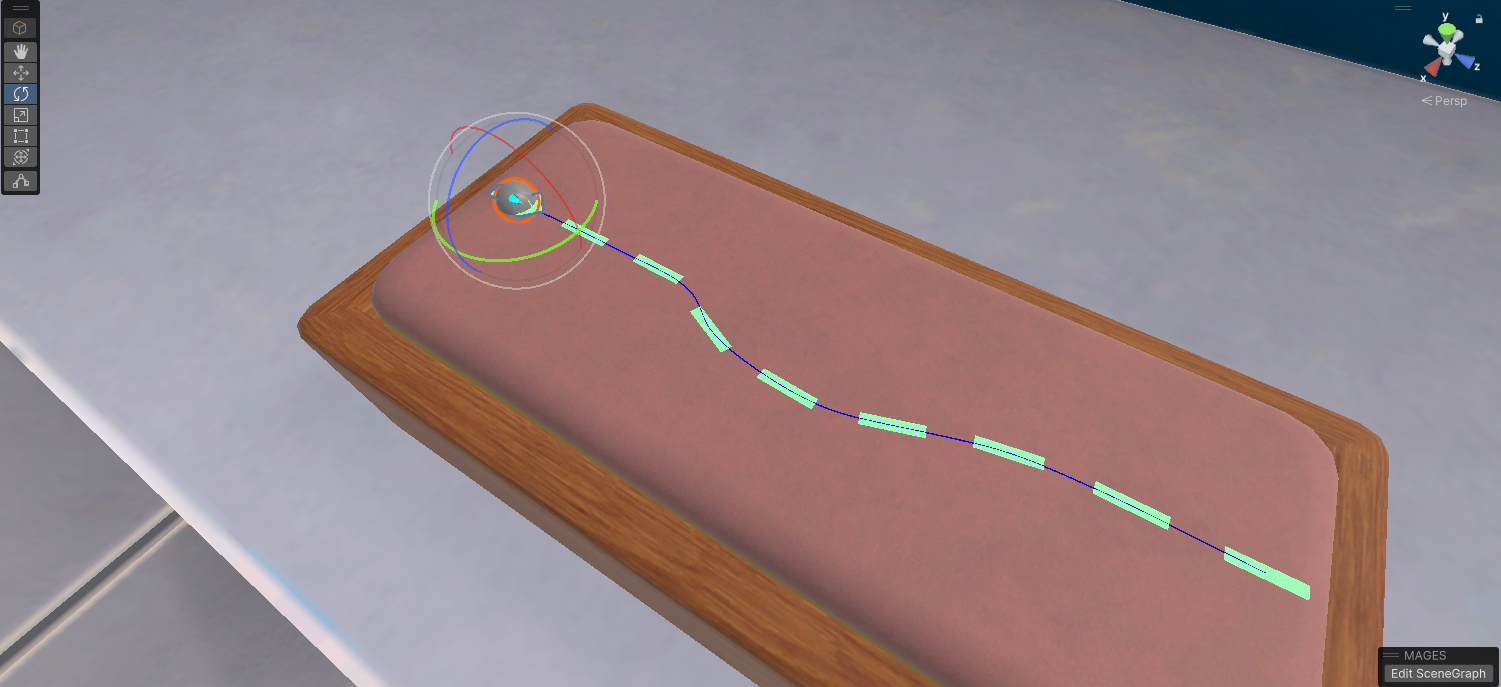
The Trajectory Line works like a zipper. It has a sphere collider on the arrow UI element (see image bellow) that moves the spline when the corresponding tools triggers it. Then it updates the animator to play the selected state. In this way the animation is synced with the trajectory progress.
Hint
For better results add a mesh collider to your animated object. However you need to update it as the animation moves along. Check the SkinBox object in the example scene as we implemented it in this way.