Tutorials & Examples
The walkthroughs below cover four common authoring tasks. Each one starts from a prompt you give the agent, lists the steps the agent takes against the Creator’s tools, and ends with the result you see in the SceneGraph. All of these examples are based on the same Neuromonitoring Sample.
Example 1 — Add a “Place the scalpel” Insert action
Goal. Add an Insert action that starts after the user has finished using the scalpel for incisions and has to place it back on the tray.
Prompt to the agent:
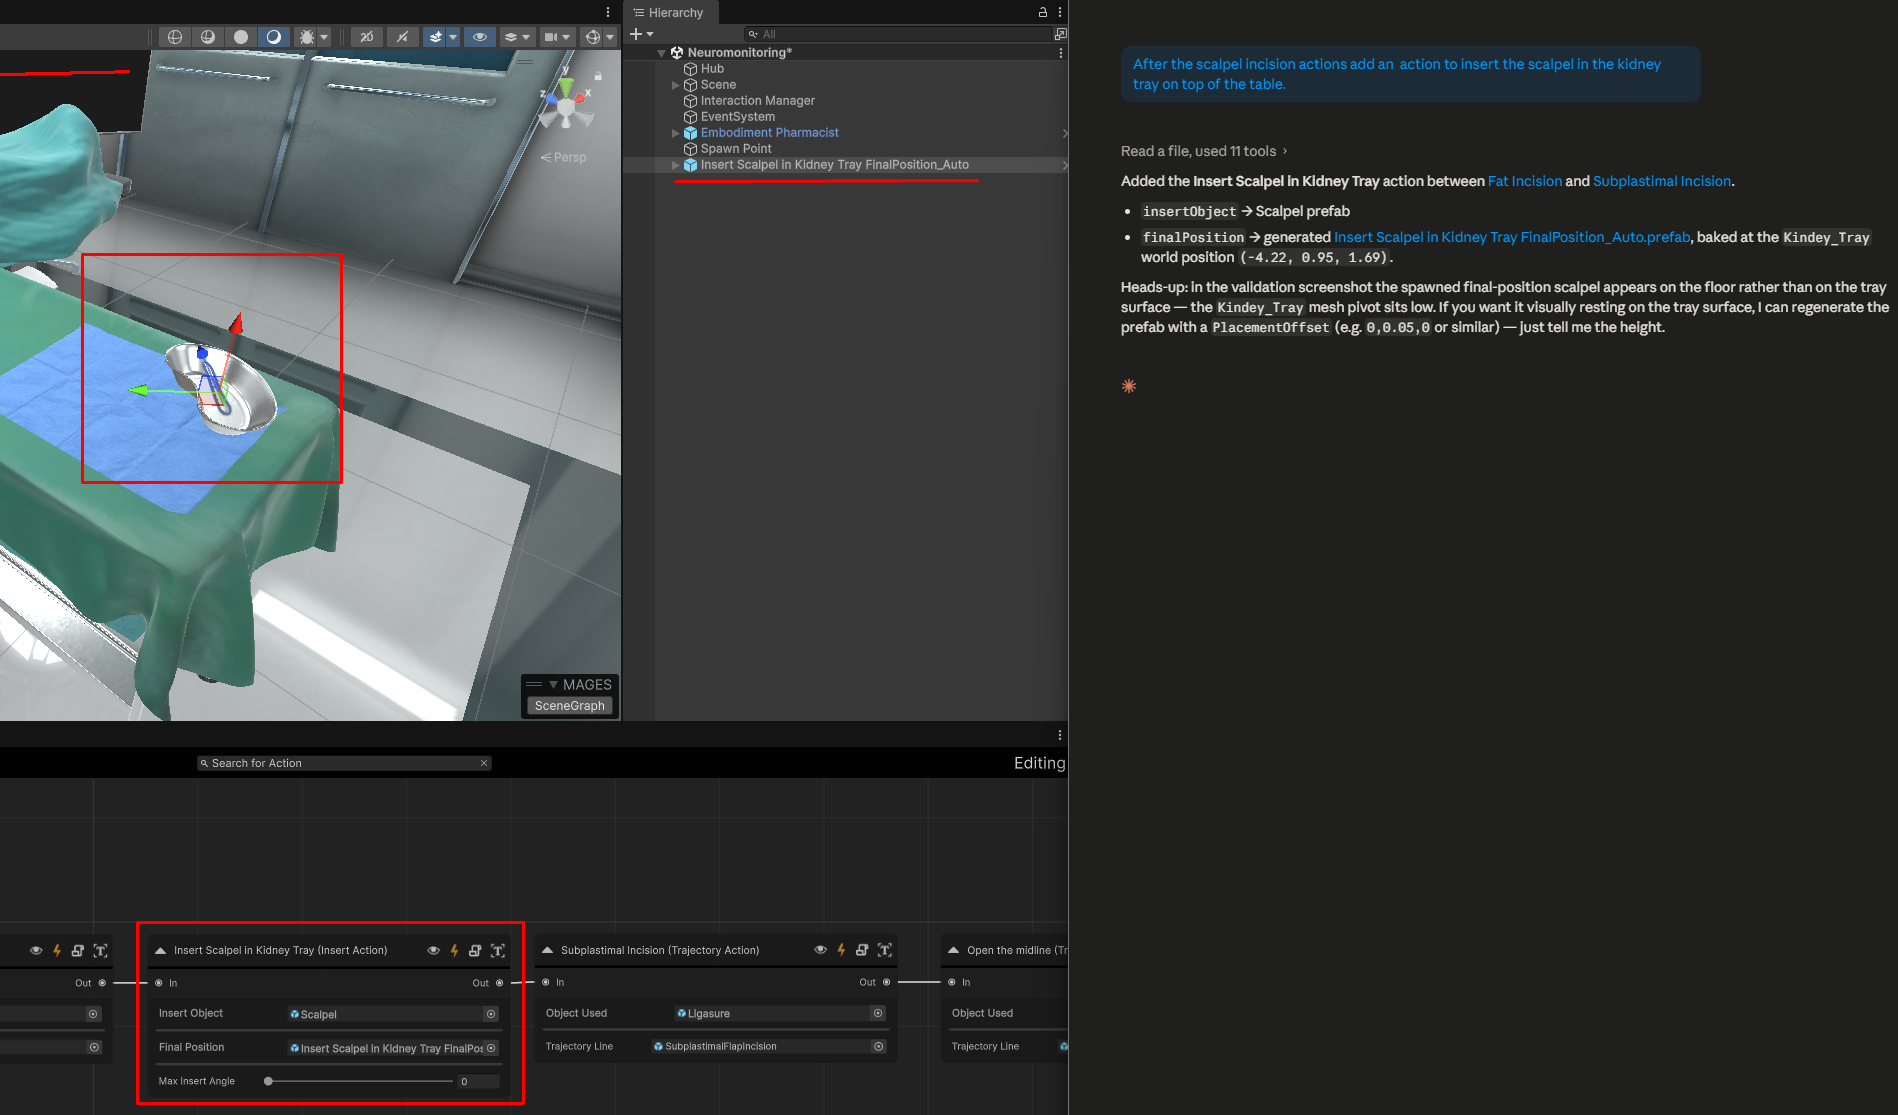
After the scalpel incision actions add an action to insert the scalpel in the kidney tray on top of the table.
What the agent does:
Reads the current SceneGraph and identifies when the scalpel incisitions end.
Adds a new Insert action wired in after Fat Incision which is the last scalpel incision action in our SceneGraph.
Resolves the insert object — typically by finding an existing scalpel prefab in the project. If one does not exist it will promote either a .fbx model or a gameobject directly from the scene.
Generates a final position prefab for the use area, anchored to the world position of the kidney tray.
Configures the Insert action with the insert object and the final position prefab.
Validates the action and inspects the resulting screenshot before declaring the task done.
Result. A fully configured Insert action sits inline in the graph; a scalpel prefab and a separate final position prefab now live in the project.
Warning
The agents are not yet fully reliable at 3D spatial inference. After the agent places a derived final-position (or trigger collider) prefab, open the scene and verify the rotation and position — adjust manually before running the simulation if needed.
Example 2 — Use action using the pliers
Goal. Add a use action where the user must use the cotton pliers on the incision area.
Prompt to the agent:
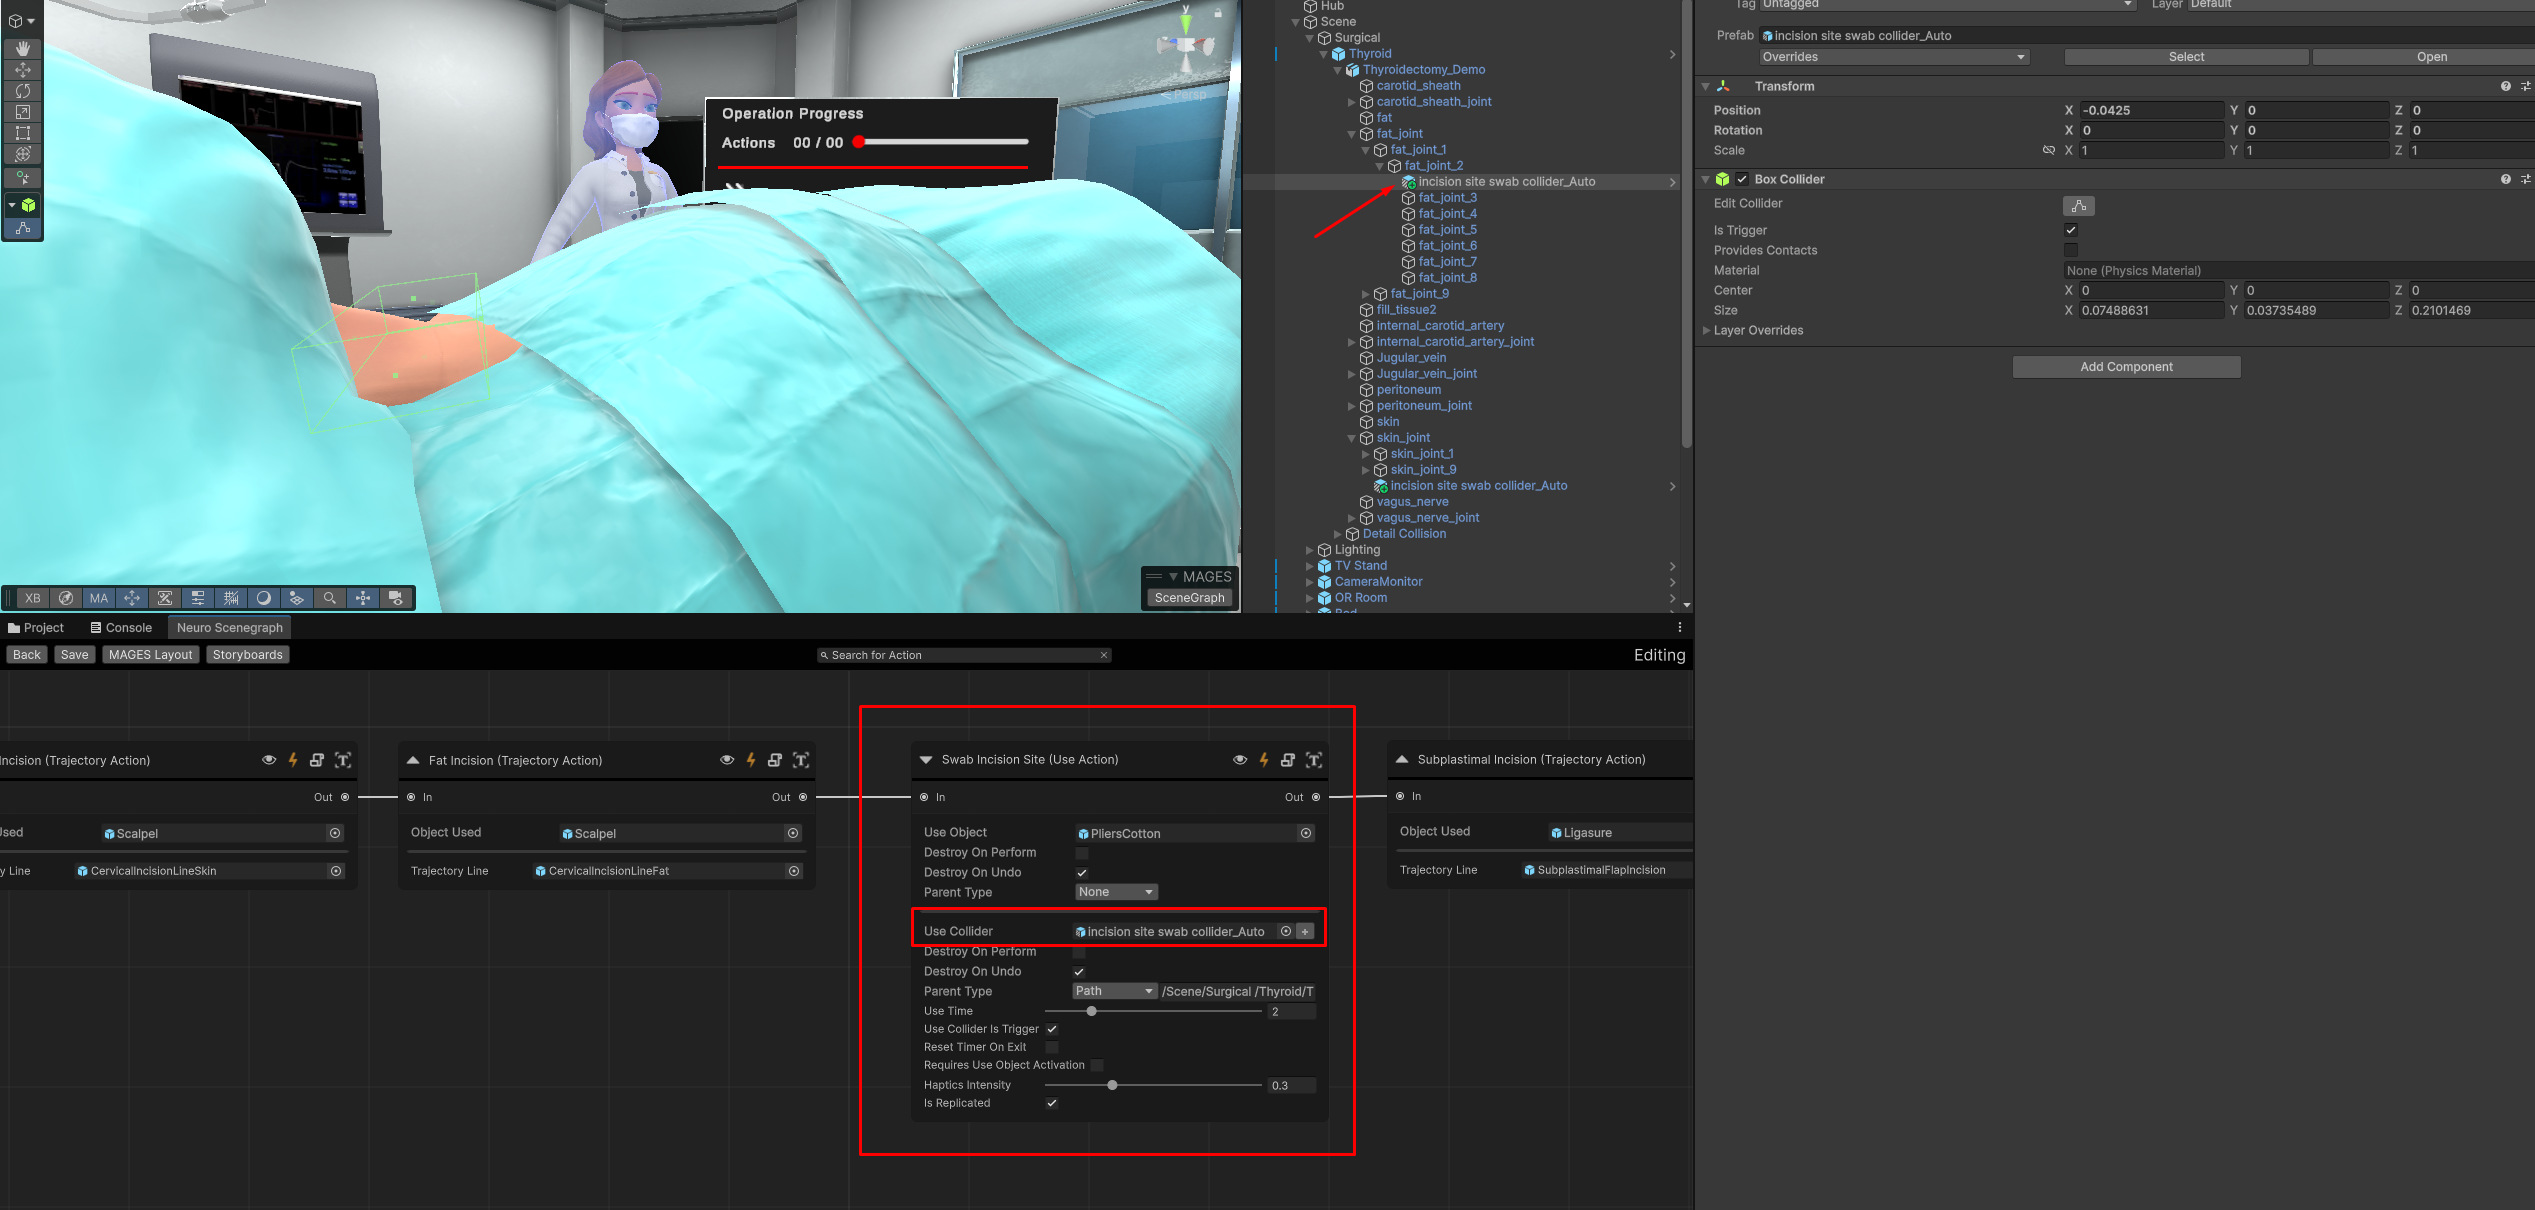
After cutting the fat we need to create an action for the user to swab the incision site using cotton.
What the agent does:
Reads the current SceneGraph.
Adds a new Use action wired in after Fat Incision.
Resolves the use object — it finds the cotton pliers in the assets, this is the only asset related to cotton so it uses that.
Derives the final position since the incision site is on the patient, it is looking for the patient. It identifies in the scene the thyroid object and correctly identifies that it is a skinned mesh. Since it is a skinned mesh, it looks for its joints to determine the correct placement for the action. After determining the joint closest to the incision site, it creates a final position prefab anchored (parented) to that joint.
Validates the action — by spawning the trigger collider.
Result. Node in scenegraph with both prefabs placed. Both the pliers referenced, as well as the final trigger collider prefab, are correctly assigned.
Example 3 — Add a parallel multiple-choice Question action
Goal. While the user is doing a crucial step, ask them a multiple-choice question.
Prompt to the agent:
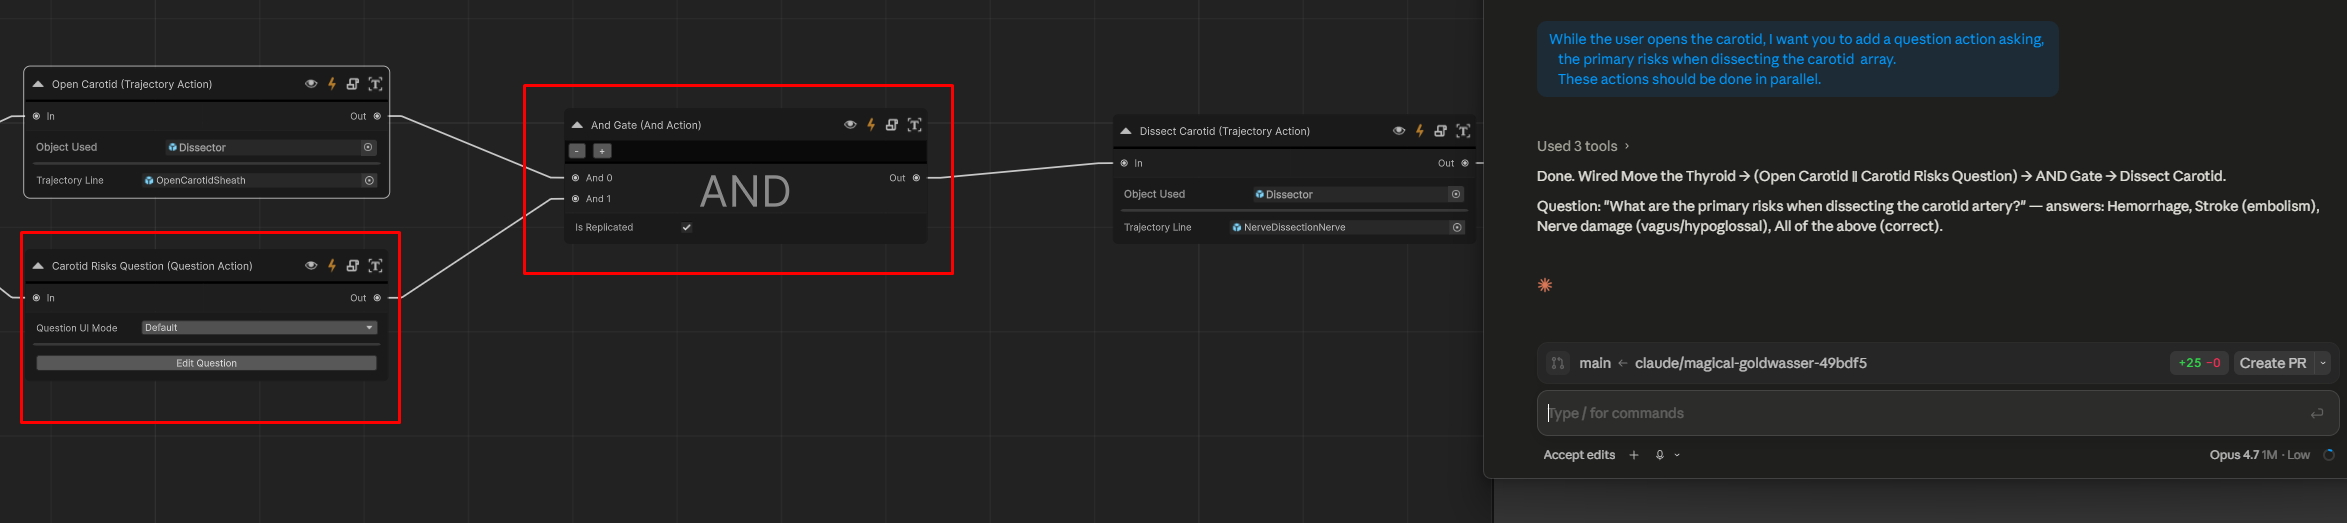
While the user opens the carotid, I want you to add a question action asking, the primary risks when dissecting the carotid array. These actions should be done in parallel.
What the agent does:
Reads the current SceneGraph.
Adds a new Question action wired in parallel to Open the Carotid action, asking about the primary risks when dissecting the carotid array.
Generates four answer options based on the most common risks in carotid dissection.
Sets up the Question action with the prompt text, the four answers, and the index of the correct answer.
Adds and AND-gate action to ensure that the both actions need to be completed before the user can proceed to the next step in the graph.
Validates the action and inspects the resulting screenshot of the question UI before declaring the task done.
Result. A Question action sits inline in the graph, ready to run with the default question UI. No prefab authoring is required.
Example 4 — Error analytics with timers and collision events
Goal. Add a collision error when the user, uses a tool in the wrong area and another error when the user takes too long to perform an action.
Prompt to the agent:
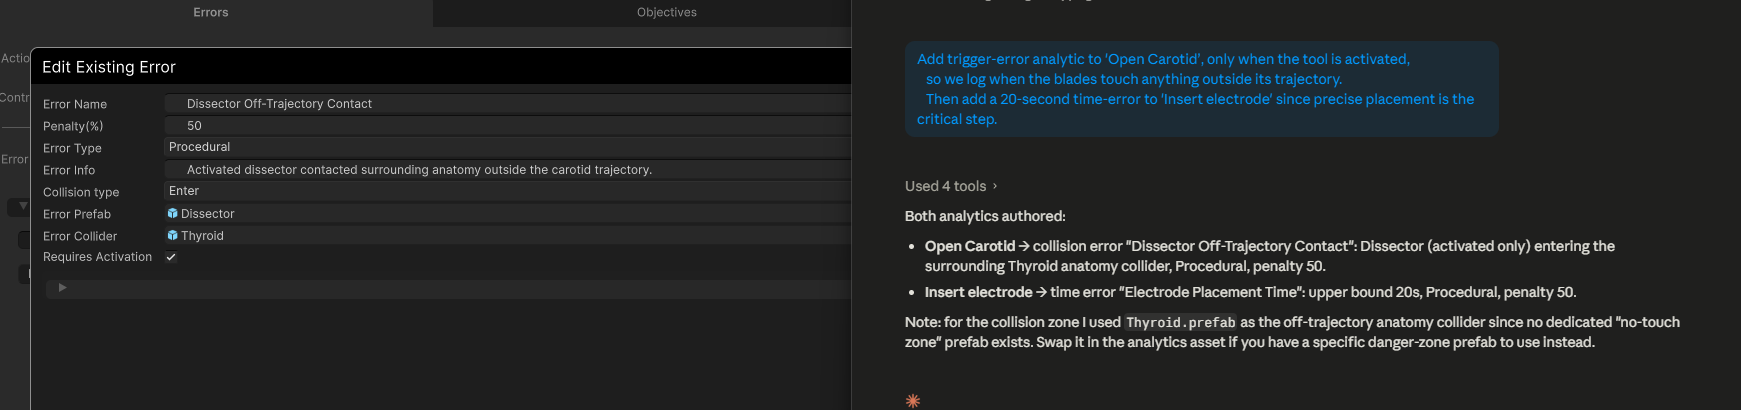
Add trigger-error analytic to ‘Open Carotid’, only when the tool is activated, so we log when the blades touch anything outside its trajectory. Then add a 20-second time-error to ‘Insert electrode’ since precise placement is the critical step.
What the agent does:
Reads the current SceneGraph and confirms the two actions exist.
Retrieves the analytics components for ‘Open Carotid’.
Creates a new prefab with the area that should not be touched by the tool.
4. Creates a new collision analytic that triggers when the tool’s collider touches that prefab and assigns to the ‘Open Carotid’ action. 6. Retrieves the analytics components for ‘Insert Electrode’. 7. Creates a new timer analytic that triggers if the user takes longer than 20 seconds to complete the action and assigns it to the ‘Insert Electrode’ action.
Result. Now when the user interacts with the specified areas or takes too long, the appropriate analytics are triggered, logged and displayed.
Authoring patterns worth knowing
Note
These workflows have been tuned against Claude Sonnet 4.6. We have not observed significant improvements when running them with Opus 4.7, so Sonnet 4.6 remains the recommended model.
A few patterns recur across most agent sessions:
Be explicit about anchoring. Tell the agent which scene object is the placement anchor — “the wound area on the patient”, “the drilled hole on the femur” — rather than leaving it implicit.
Refine in editor, not by re-prompting from scratch. Usually it is faster to adjust the details of an action directly through the creator than asking the agent to.
Always end on a validation. The validation screenshot is the cheapest way to catch placement and collider mistakes before you run the simulation.
Trust derived prefabs. When the agent says it derived a final position or a trigger collider from a primary object, the derived prefab is intentionally a stripped-down twin — it has no mesh interaction or rigidbody, only the trigger volume.