Needle Actor
Needle actor is an extension of the Rigidbody, but with additional properties for a needle. It can be used along with the Puncturable component to simulate needle punctures in soft deformable objects. In order to create a needle actor, you need to:
Create a NeedleActor and Assign a Physics World.
Create an empty GameObject and add a NeedleActor component to it by clicking Add Component > MAGES > Mesh Deformations > Medical > Needle Actor in the inspector
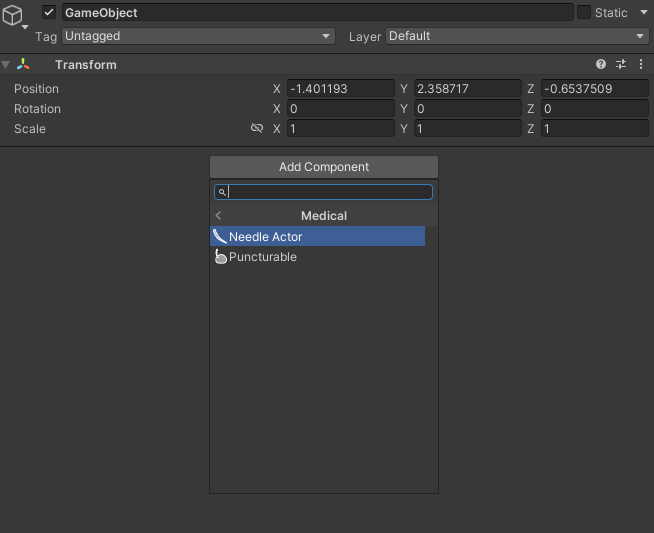
Assign a Physics World to the NeedleActor component
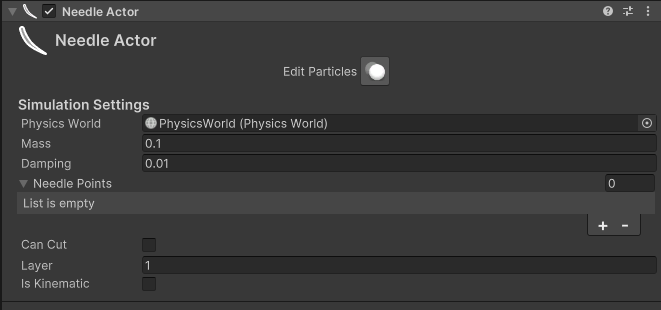
Press Edit Particles in the inspector to edit particles in the Scene view.
Instructions
Left click: make particles kinematic.
Shift + left click: make particles non-kinematic.
Alt + drag: marquee-select particles and make them kinematic.
Shift + Alt + drag: marquee-select particles and make them non-kinematic.
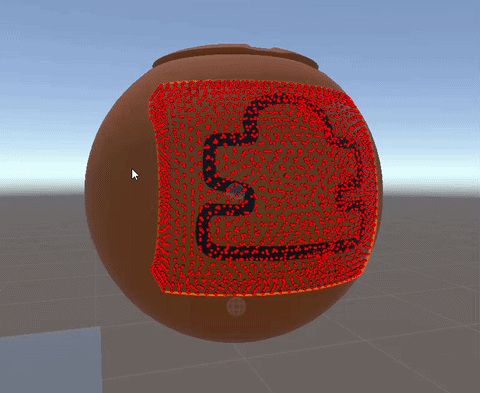
Particle Ledger
Red: kinematic.
Green: non-kinematic.
Blue: selected.
Configuration Settings
Particle scale: How big particles are, helping with the visualization.
Particle count: How many particles show. Restricting the number of particles shown can help with performance when editing large meshes.
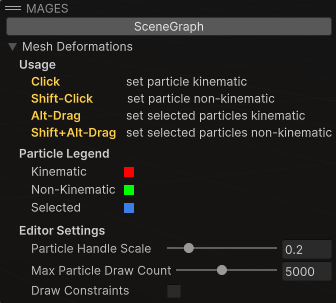
Marquee Selection can help you select multiple particles at once. You can hold the Alt key and drag to marquee-select particles and make them kinematic, or hold Shift + Alt and drag to marquee-select particles and make them non-kinematic.
Configure the needle points.
Instead of using a Simulation Mesh like most of the other actor types, the Needle Actor uses a list of points to define the needle shape. Add points to the needle by clicking the ‘+’ button in the inspector and assign the transform of each point:
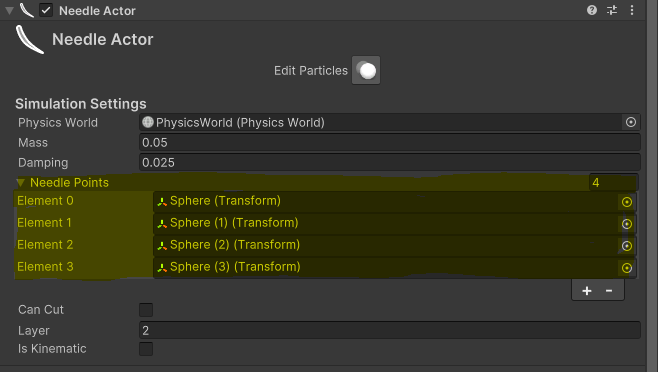
Based on these points a Simulation Mesh will be generated automatically.
Note
The first needle point will be used as the needle tip.
Render the needle.
To render the needle, you can add a MeshFilter and a MeshRenderer component to the GameObject and assign a mesh to the MeshFilter and a Material to the MeshRenderer.
Note
The mesh assigned to the MeshFilter should be aligned with the needle points in order for the collisions to be accurate.