Installation guide
Before you Start
Unity Version:
The latest stable release of Creator is designed for 6000.3.10.
Warning
You can use any LTS version above 6000.3.10.
Unity Hub simplifies version management. If you don’t have it yet, download it from Unity’s official page. After installation, navigate to
Installs > Install Editor.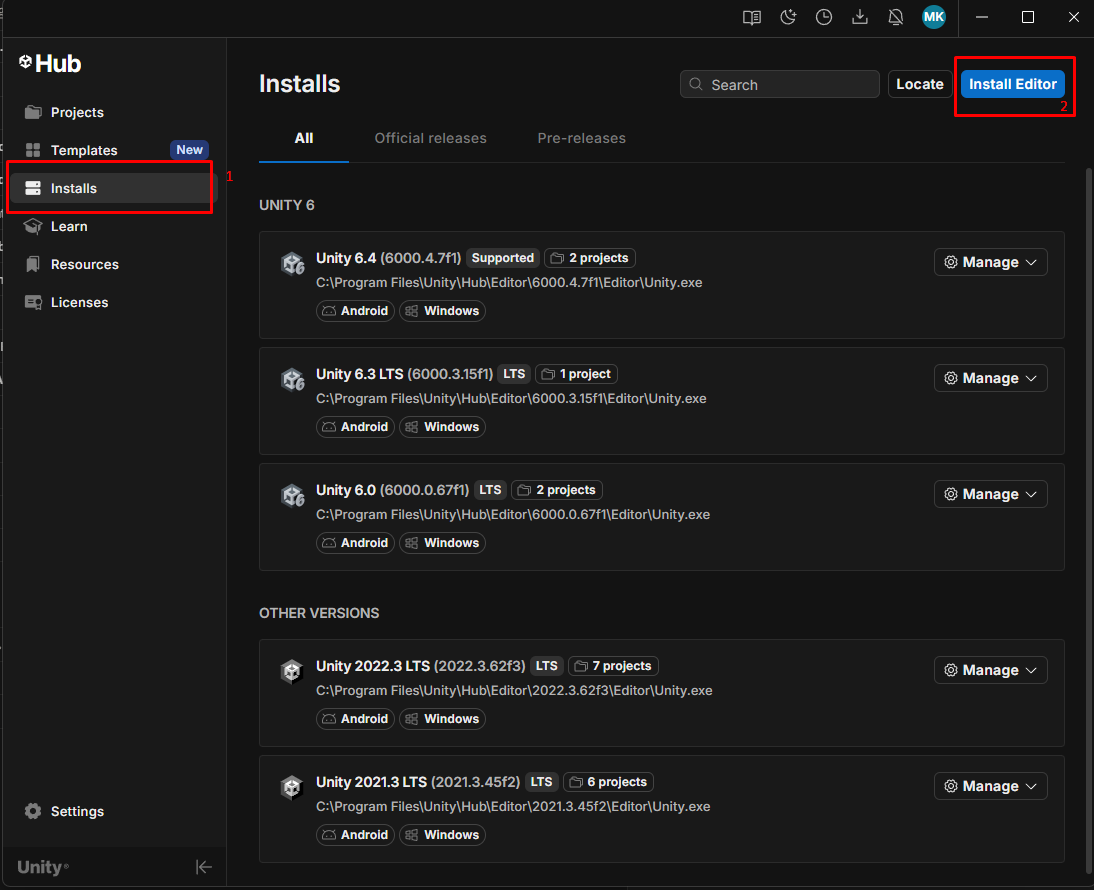
Warning
Install the specified Unity version to avoid incompatibility issues with internal and third-party packages.
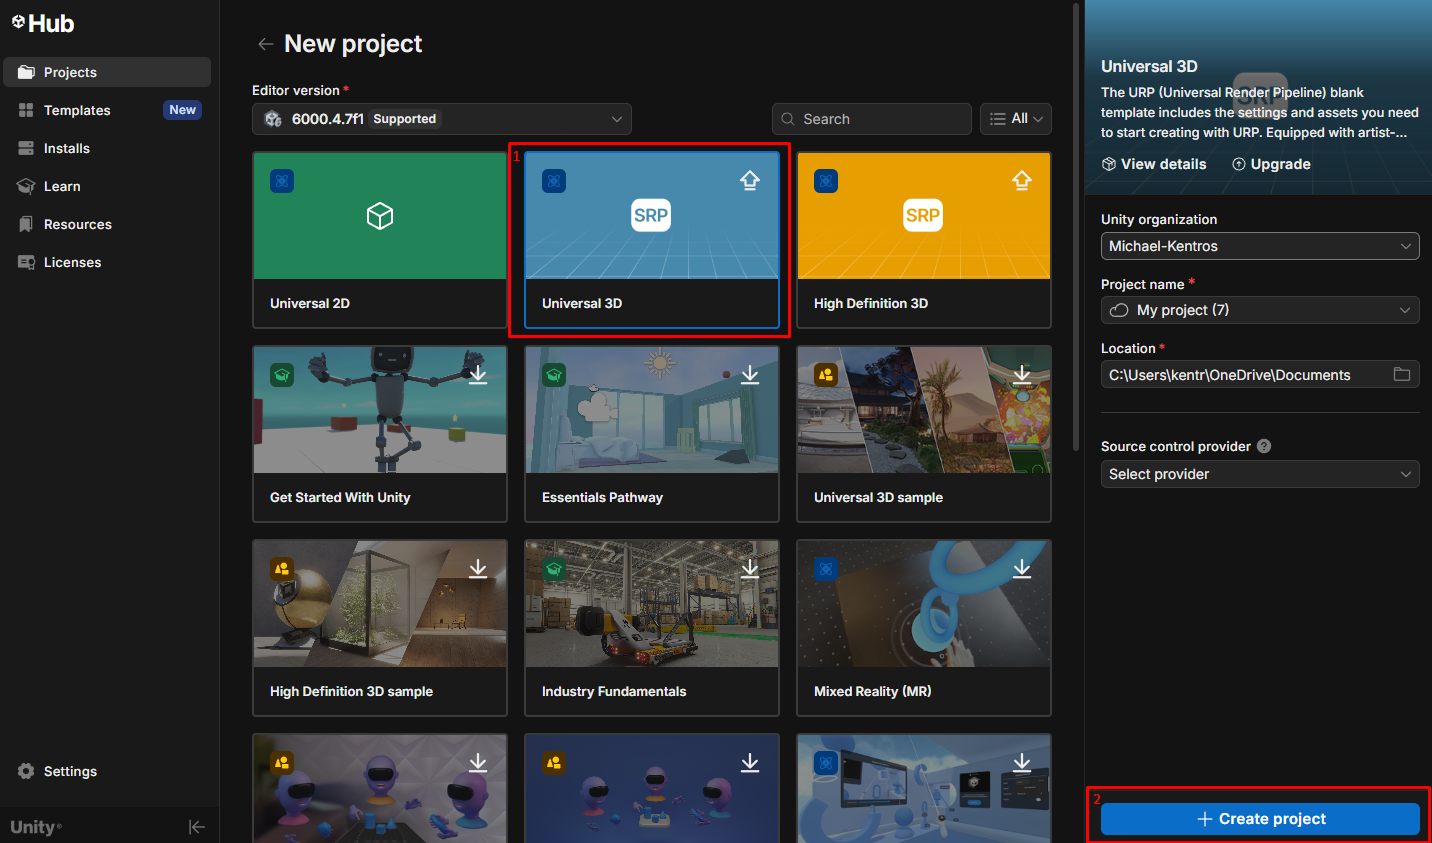
Create a New Unity Project:
Initiate a new Unity project. Opt for the 3D preset when creating the project, as illustrated below:
Download Creator
Navigate to
Edit > Project Settings > Package Manager.In the Scoped Registry section, add a new scoped registry and fill in the details as illustrated below.

For your convenience, you can find these links below:
Name
ORamaVR
URL
Scope(s)
com.oramavr.mages.core
- To enable the experimental package, click the plus icon and add the following scope:
com.oramavr.mages.experimental
Click Save and close the Project Settings window.
Navigate to
Window > Package Manager. You should be able to locate Creator package under ORamaVR registry.
Note
Make sure to set Packages to My Registries from the dropdown menu on the top of the window, to be able to see the Creator package.
Select the Creator package and click the Install button.
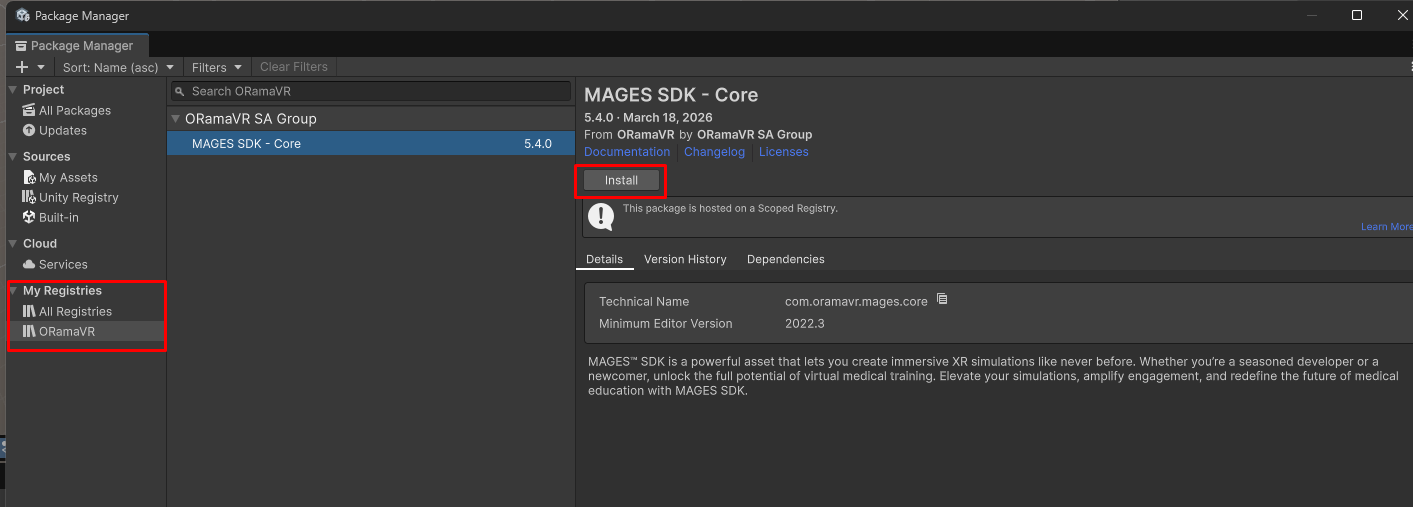
That’s it, you are done with the installation. You can close the Package Manager window.
Initial Setup
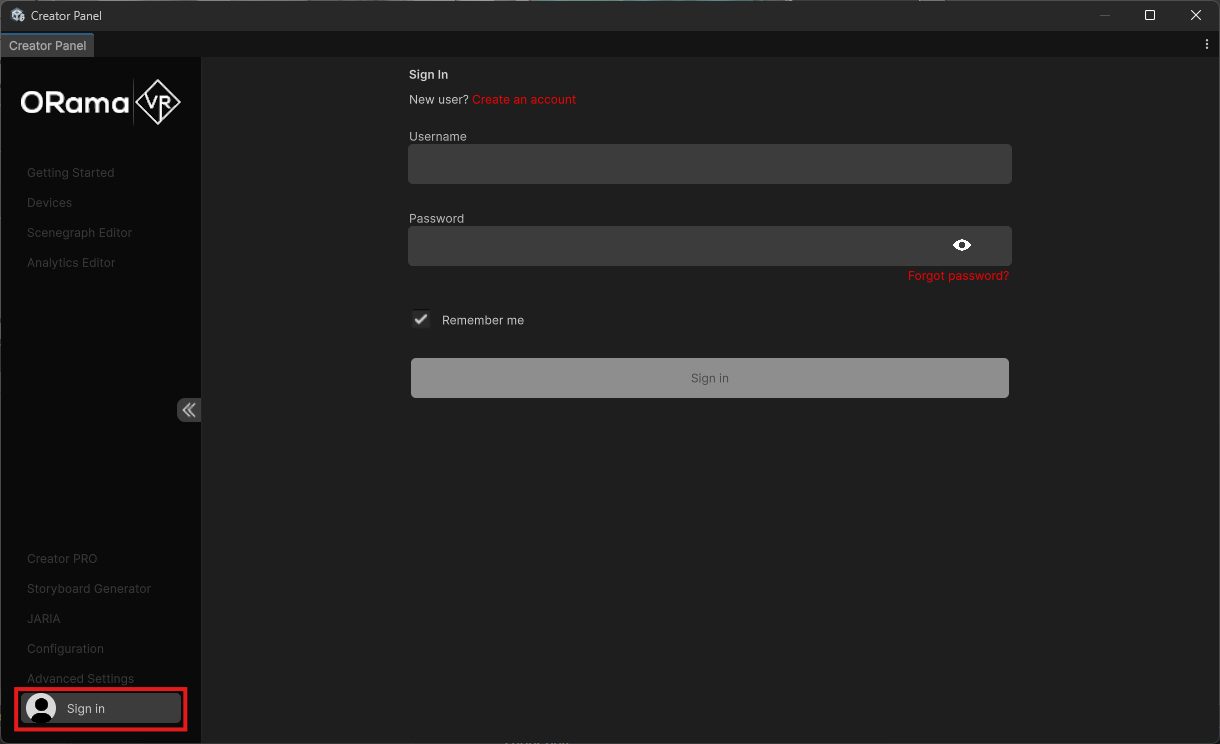
After installing the Creator package, open the Creator Panel by navigating to
ORamaVR Creator > Panelat the top bar.To use Creator, you need an ORamaVR account. Go to the Sign in tab to log in or create an account.
Click on the Getting Started tab inside the Creator Panel and resolve all issues listed on the 2. Configuration section.
Issues with the
 icon are mandatory for correct Creator functionality.
Issues with the
 icon are recommended.
Issues with the
 icon are needed for specific functionalities.
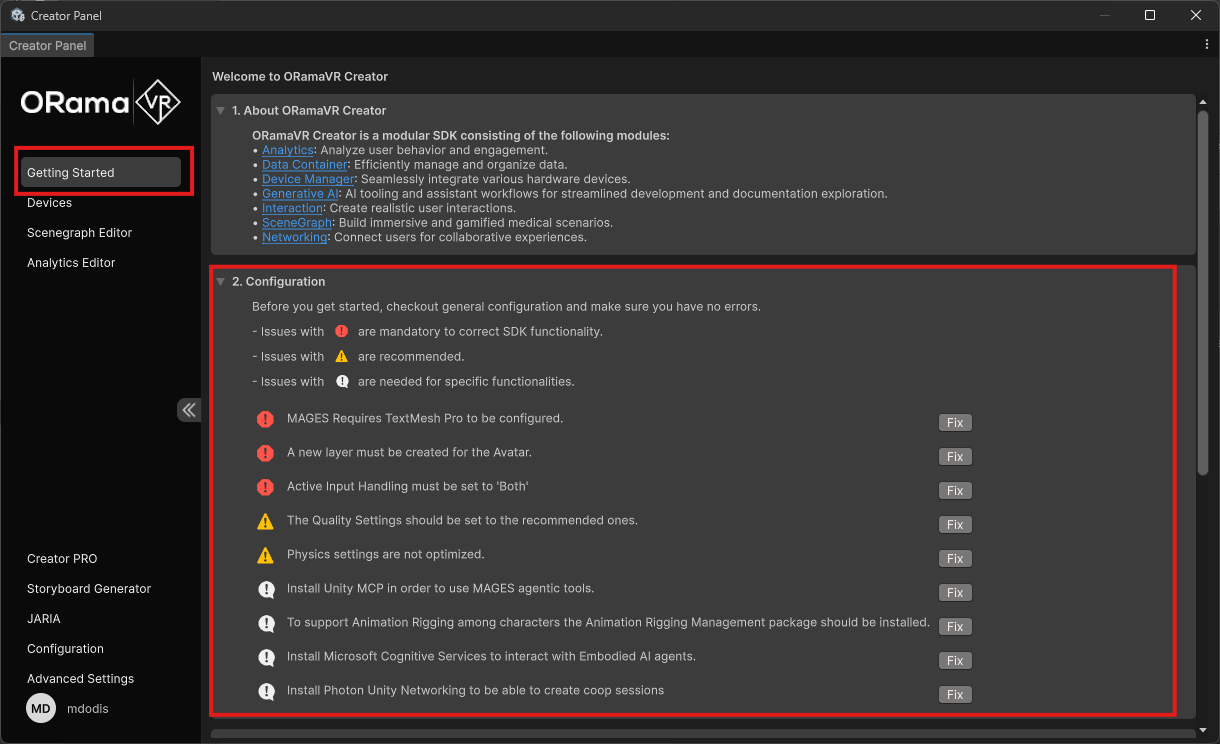
Note
If you do not require multiplayer in your project, you can ignore the option to install Photon from the Creator Panel.
Adding VR Support
Navigate to
Edit > Project Settings > XR Plug-in Management.There you should see a list of XR settings per platform:
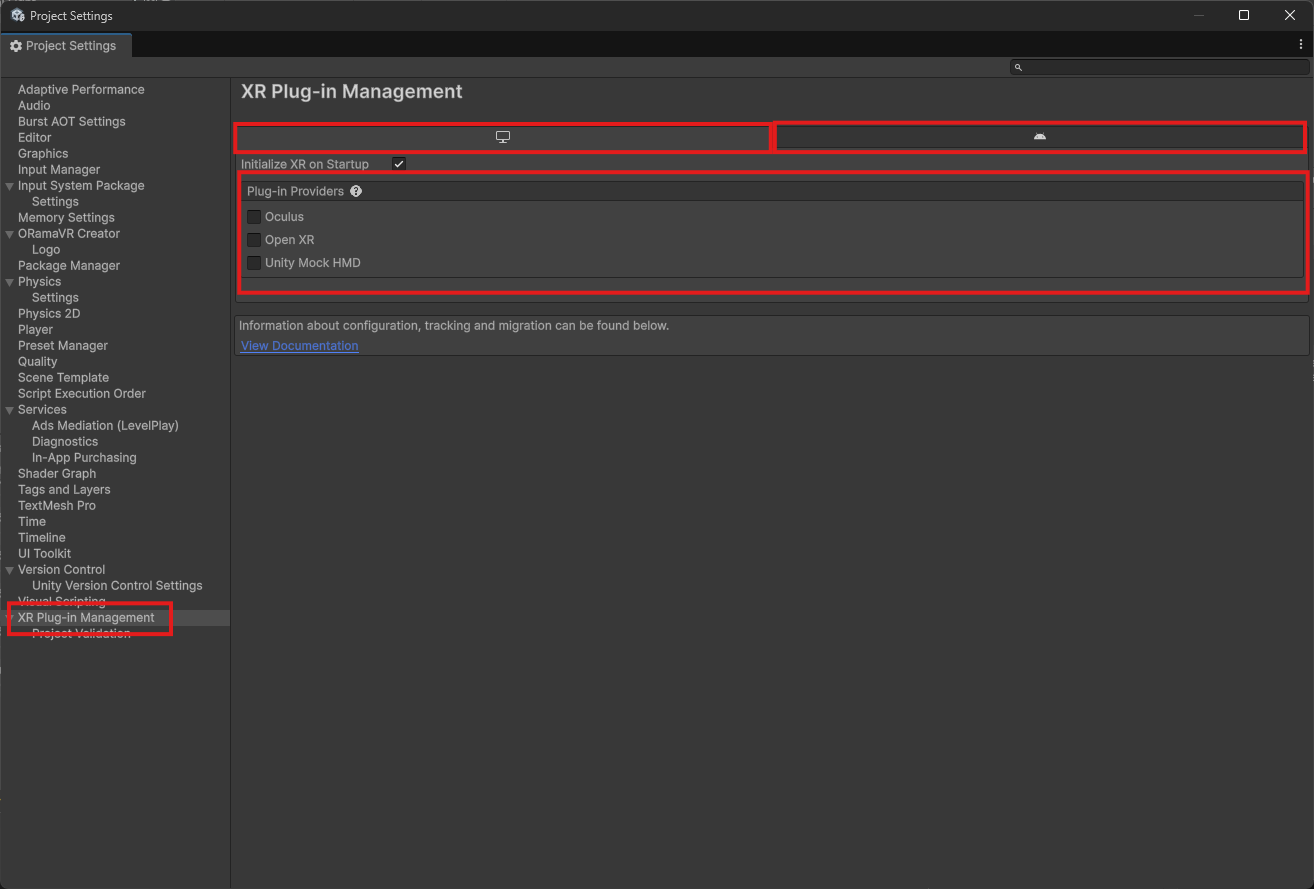
Select the platform of your choice and choose the plugin provider. We recommend OpenXR for Desktop & Android platforms:
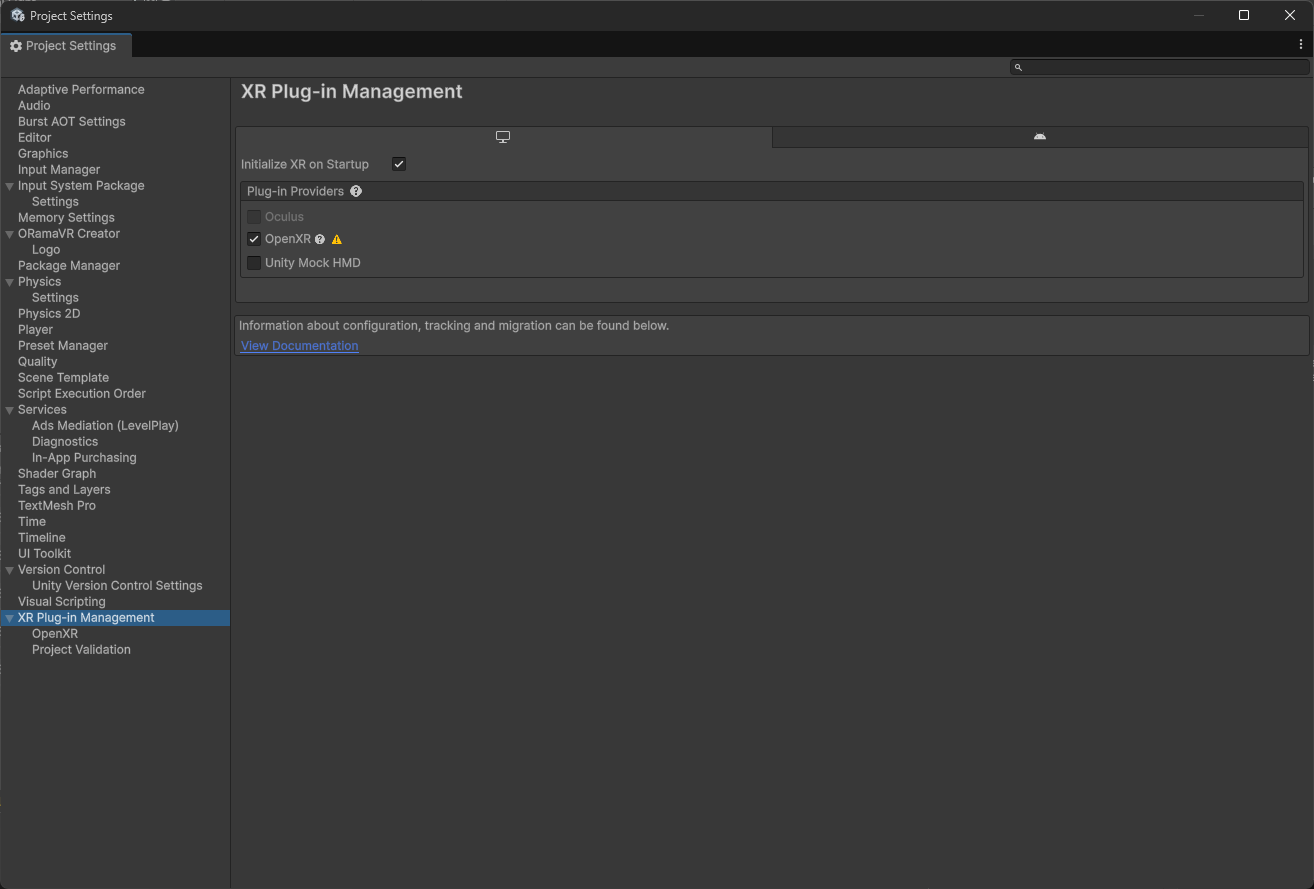
After OpenXR has been installed, you should be navigated to the “Project Validation” tab automatically. Clicking ‘Edit’ on any of the issues will take you to the OpenXR configuration tab:
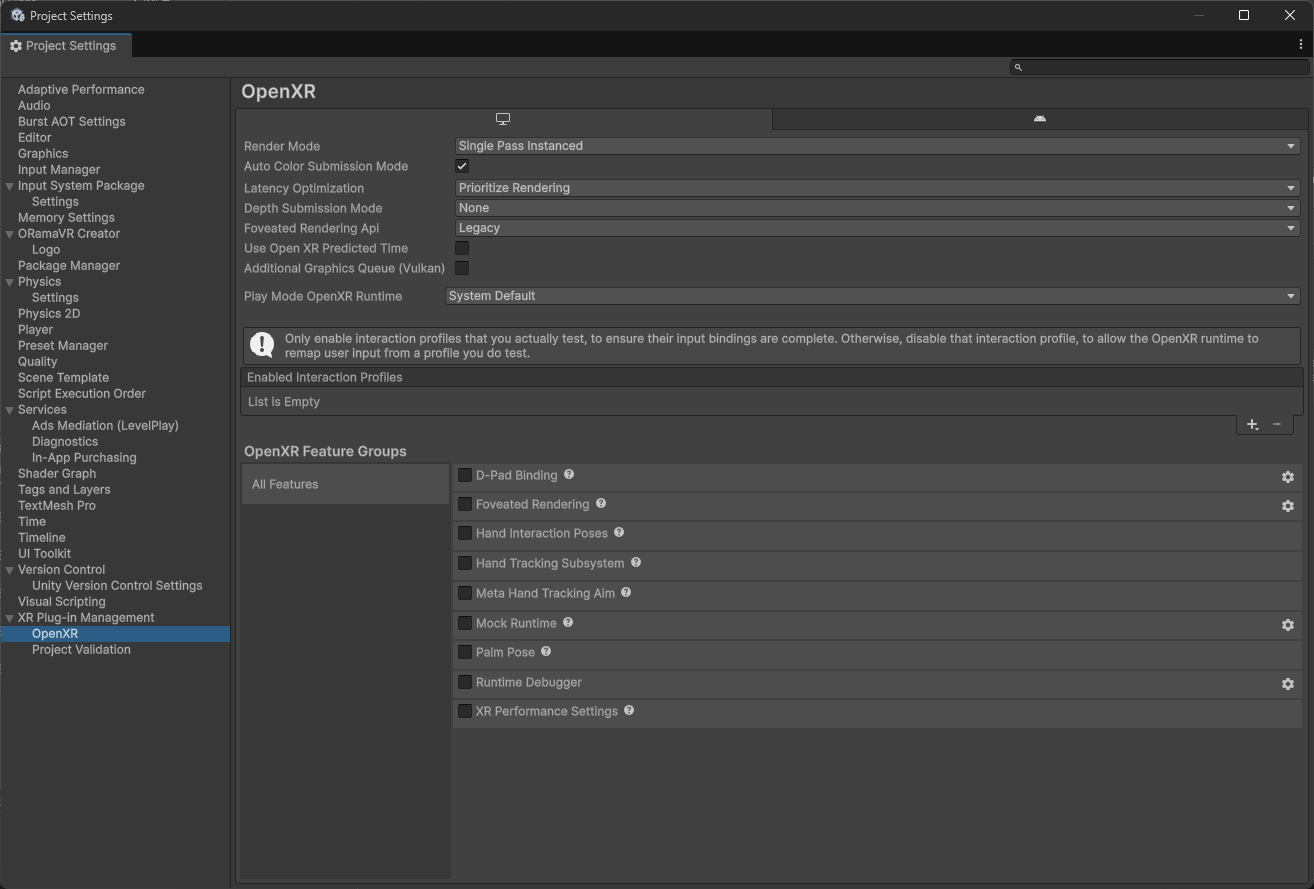
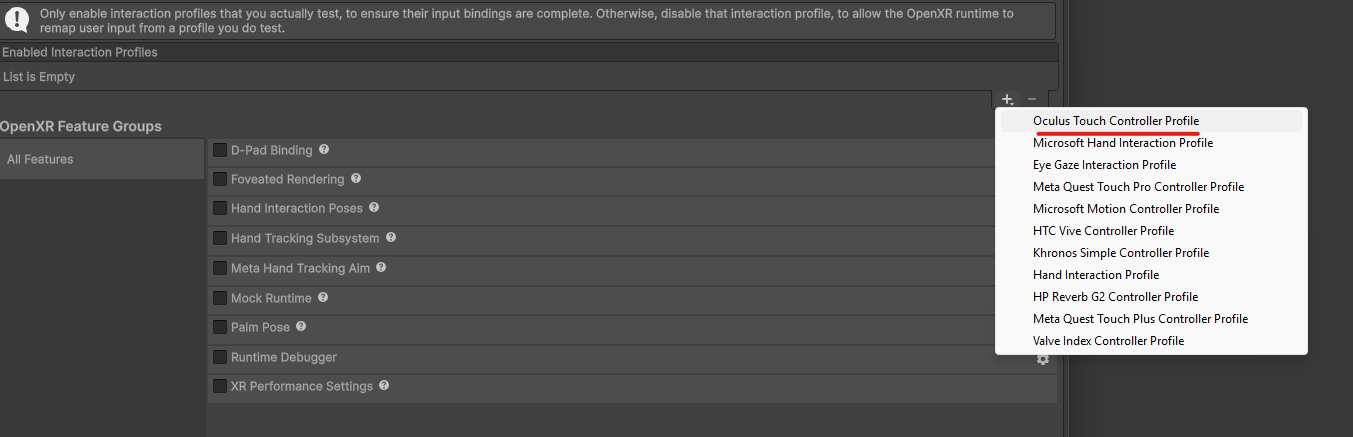
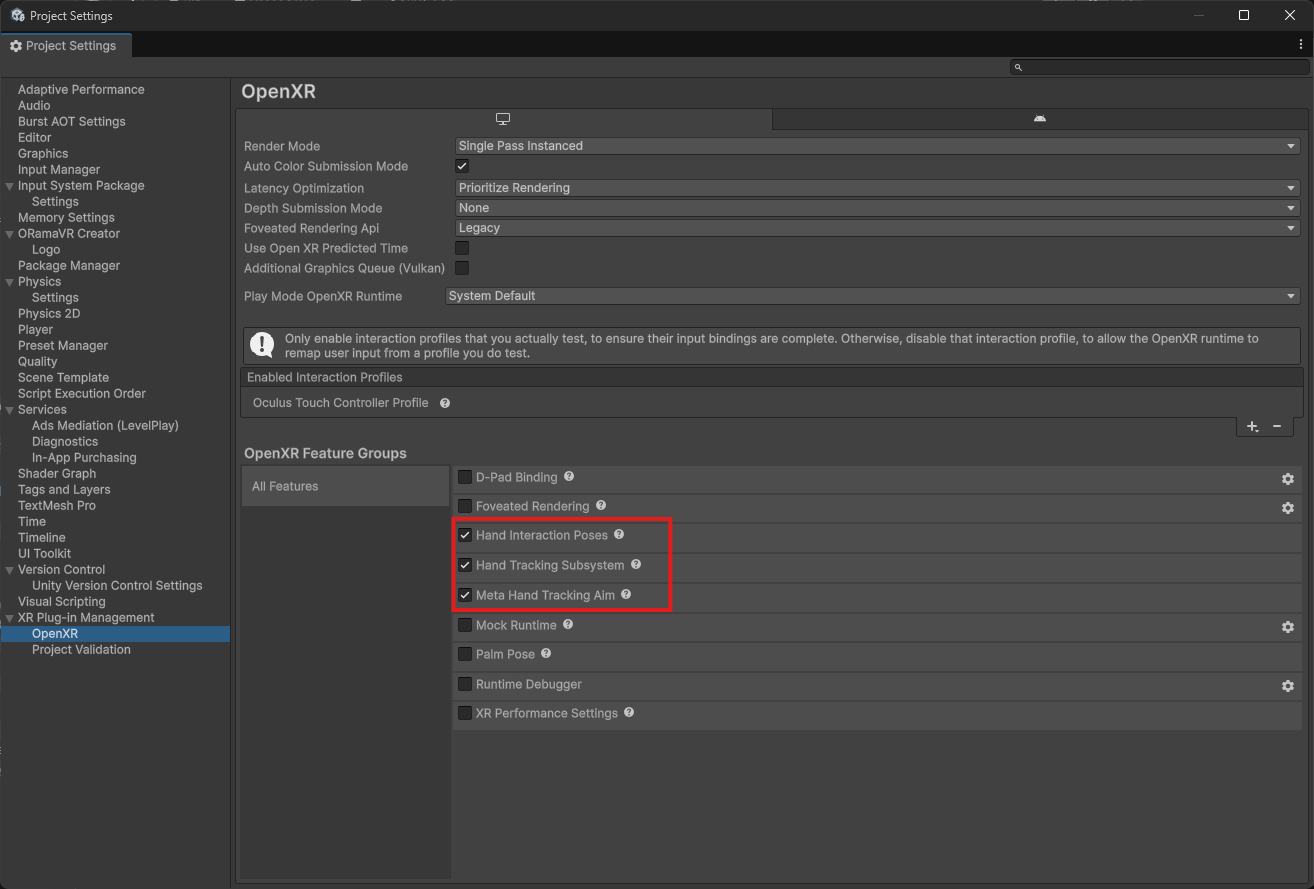
In this section, click the ‘+’ button under “Enabled Interaction Profiles”, and choose “Oculus Touch Controller Profile”;
Additionally, check the following boxes:
Warning
Be aware that even though desktop VR is not supported on macOS, standalone VR is and you can fully create a simulation and transfer it to a mobile HMD. Learn more here.